GameCube Controller Paracord Guide
| Difficulty | Time | Cost |
|---|---|---|
| 7/10 | 15-45 Minutes | $5.00 - $10.00 USD |
Beta Guide
Work in progress. Information in this guide may be incorrect, missing, or unfinished. This note will be removed when complete.
Prerequisites
Hardware/Parts
- Cable (5-core w/ shielding)
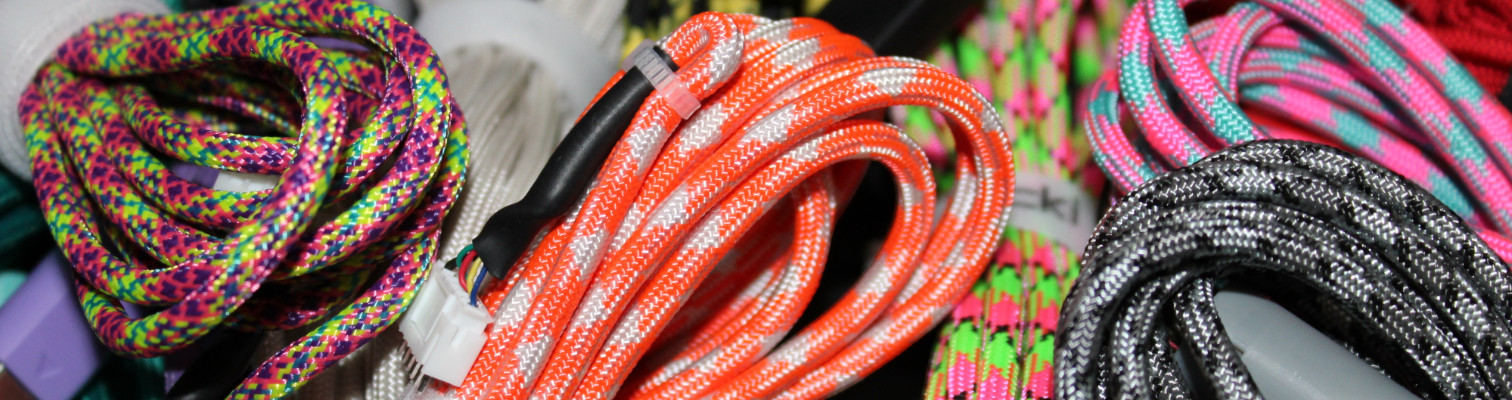
- Paracord
- Most 550 paracord will work. "550" is not a size but rather a breaking strength, so diameter may vary. Recommended to stay away from ones with reflective tracers. Solid colors are usually looser. Sites like Paracord Planet or Paracord Galaxy are popular choices.
- 1x Ferrule
- Retro Forge, Tensility (aka liquid cable), or other cable around 3mm in diameter: 3/16" OD, 0.144" ID
- Other thicker cables: 15/64" OD, 0.172" ID
- Heatshrink 4.8-6.0mm Inner-Diameter 4:1 or 3:1 (adhesive lined preferred)
- Heatshrink 0.4-0.6mm Inner-Diameter 3:1 or 2:1
- JST PH 2.0 (1x male, 1x female, 6 pins)
- Console-End Plug, Casing, and Pins
- 1x Zip tie 3mm width or less (any length)
Tools
- Heat Gun / Hot Air Rework Station
- Crimping Tools (two options)
- The first option would be to buy a single open barrel crimper. There are 2 barrels/wings on each pin and a total of 12 pins you will need to crimp, meaning you will crimp a total of 24 times per cable.
- Crimper for both JST PH 2.0 and GCC Plug Pins
- The second option is to buy two separate specialized crimpers that crimp both barrels/wings on each pin at once, meaning you will crimp a total of 12 times per cable.
- The first option would be to buy a single open barrel crimper. There are 2 barrels/wings on each pin and a total of 12 pins you will need to crimp, meaning you will crimp a total of 24 times per cable.
- Wire Strippers (self adjusting for outer sheathing)
- Wire Strippers (24-30AWG for inner wires)
- 2x Micro Pliers (Needle nose preferred)
- Needle Nose Tweezers, Paperclip, or other strong small tipped object
Term Glossary
- Sheathing - The protective (often rubber/pvc/tpu) outer layer of a cable
- Sheilding - Protective (braided metal or foil) layer that helps minimize electromagnetic/signal interference. This is a highly debated topic in the GCC community to whether it makes a noticable difference or not, but we (Retro Forge) will always recommend a cable that has it!
- Conductor - The bare center-most material (in this case copper wire) that current flows through
- Conductor Insulation/Inner Sheathing - Thin protective (often rubber/pvc/silicone) colored layer around the conductor
Preparation
Cable
Select a desired length and cut your cable. Most modders and players choose a length between 2-3 meters (6.5-10ft).
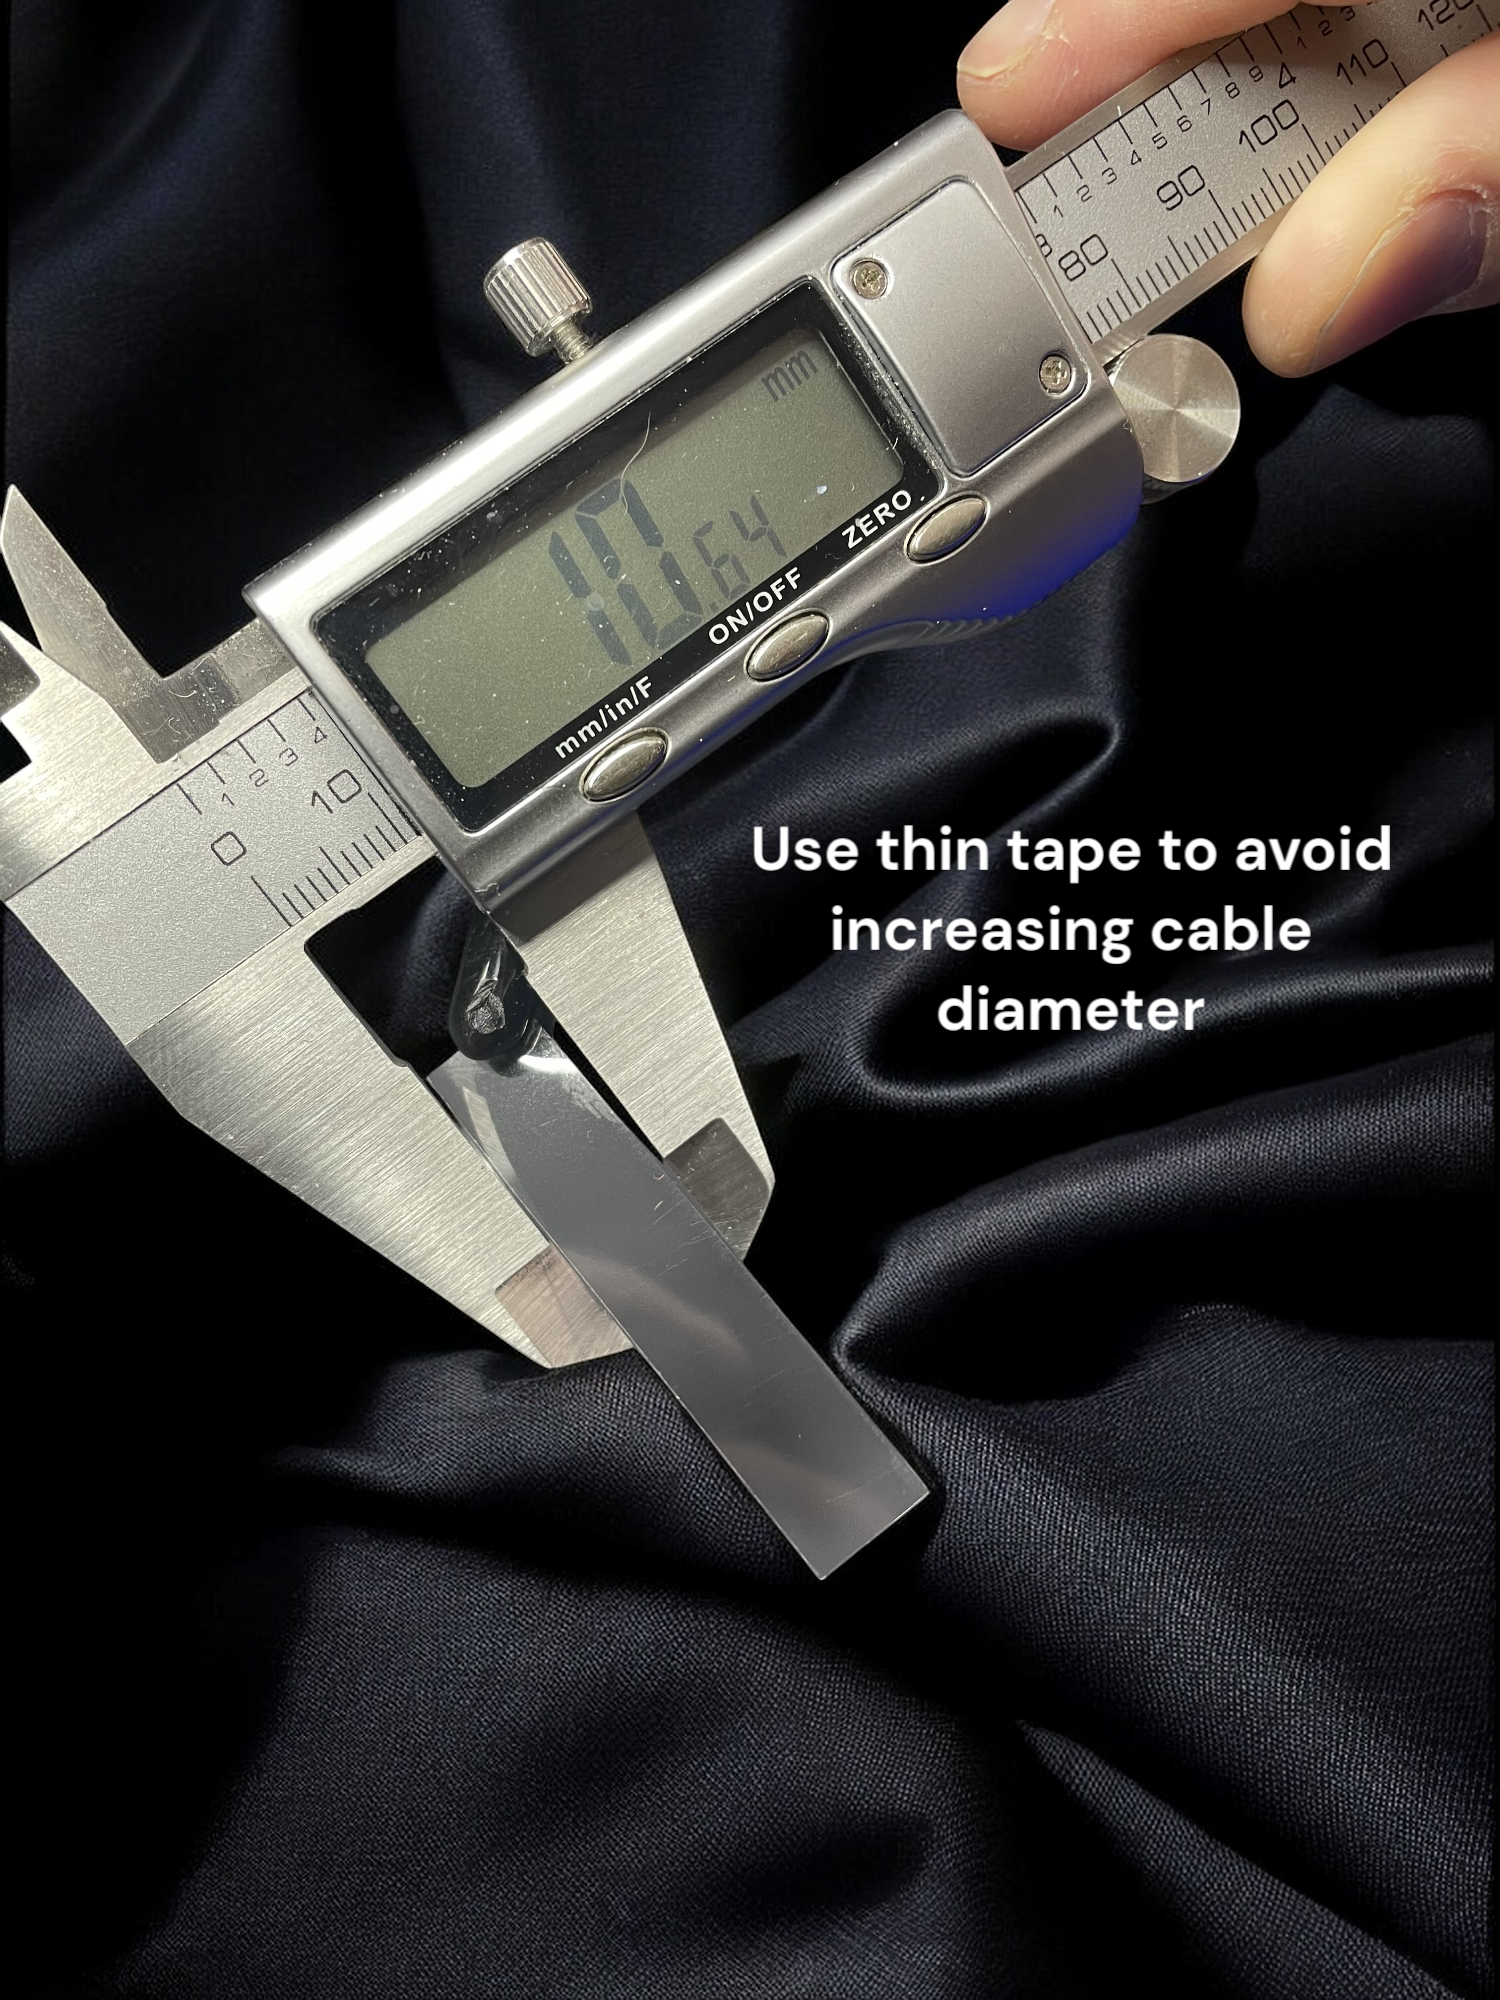
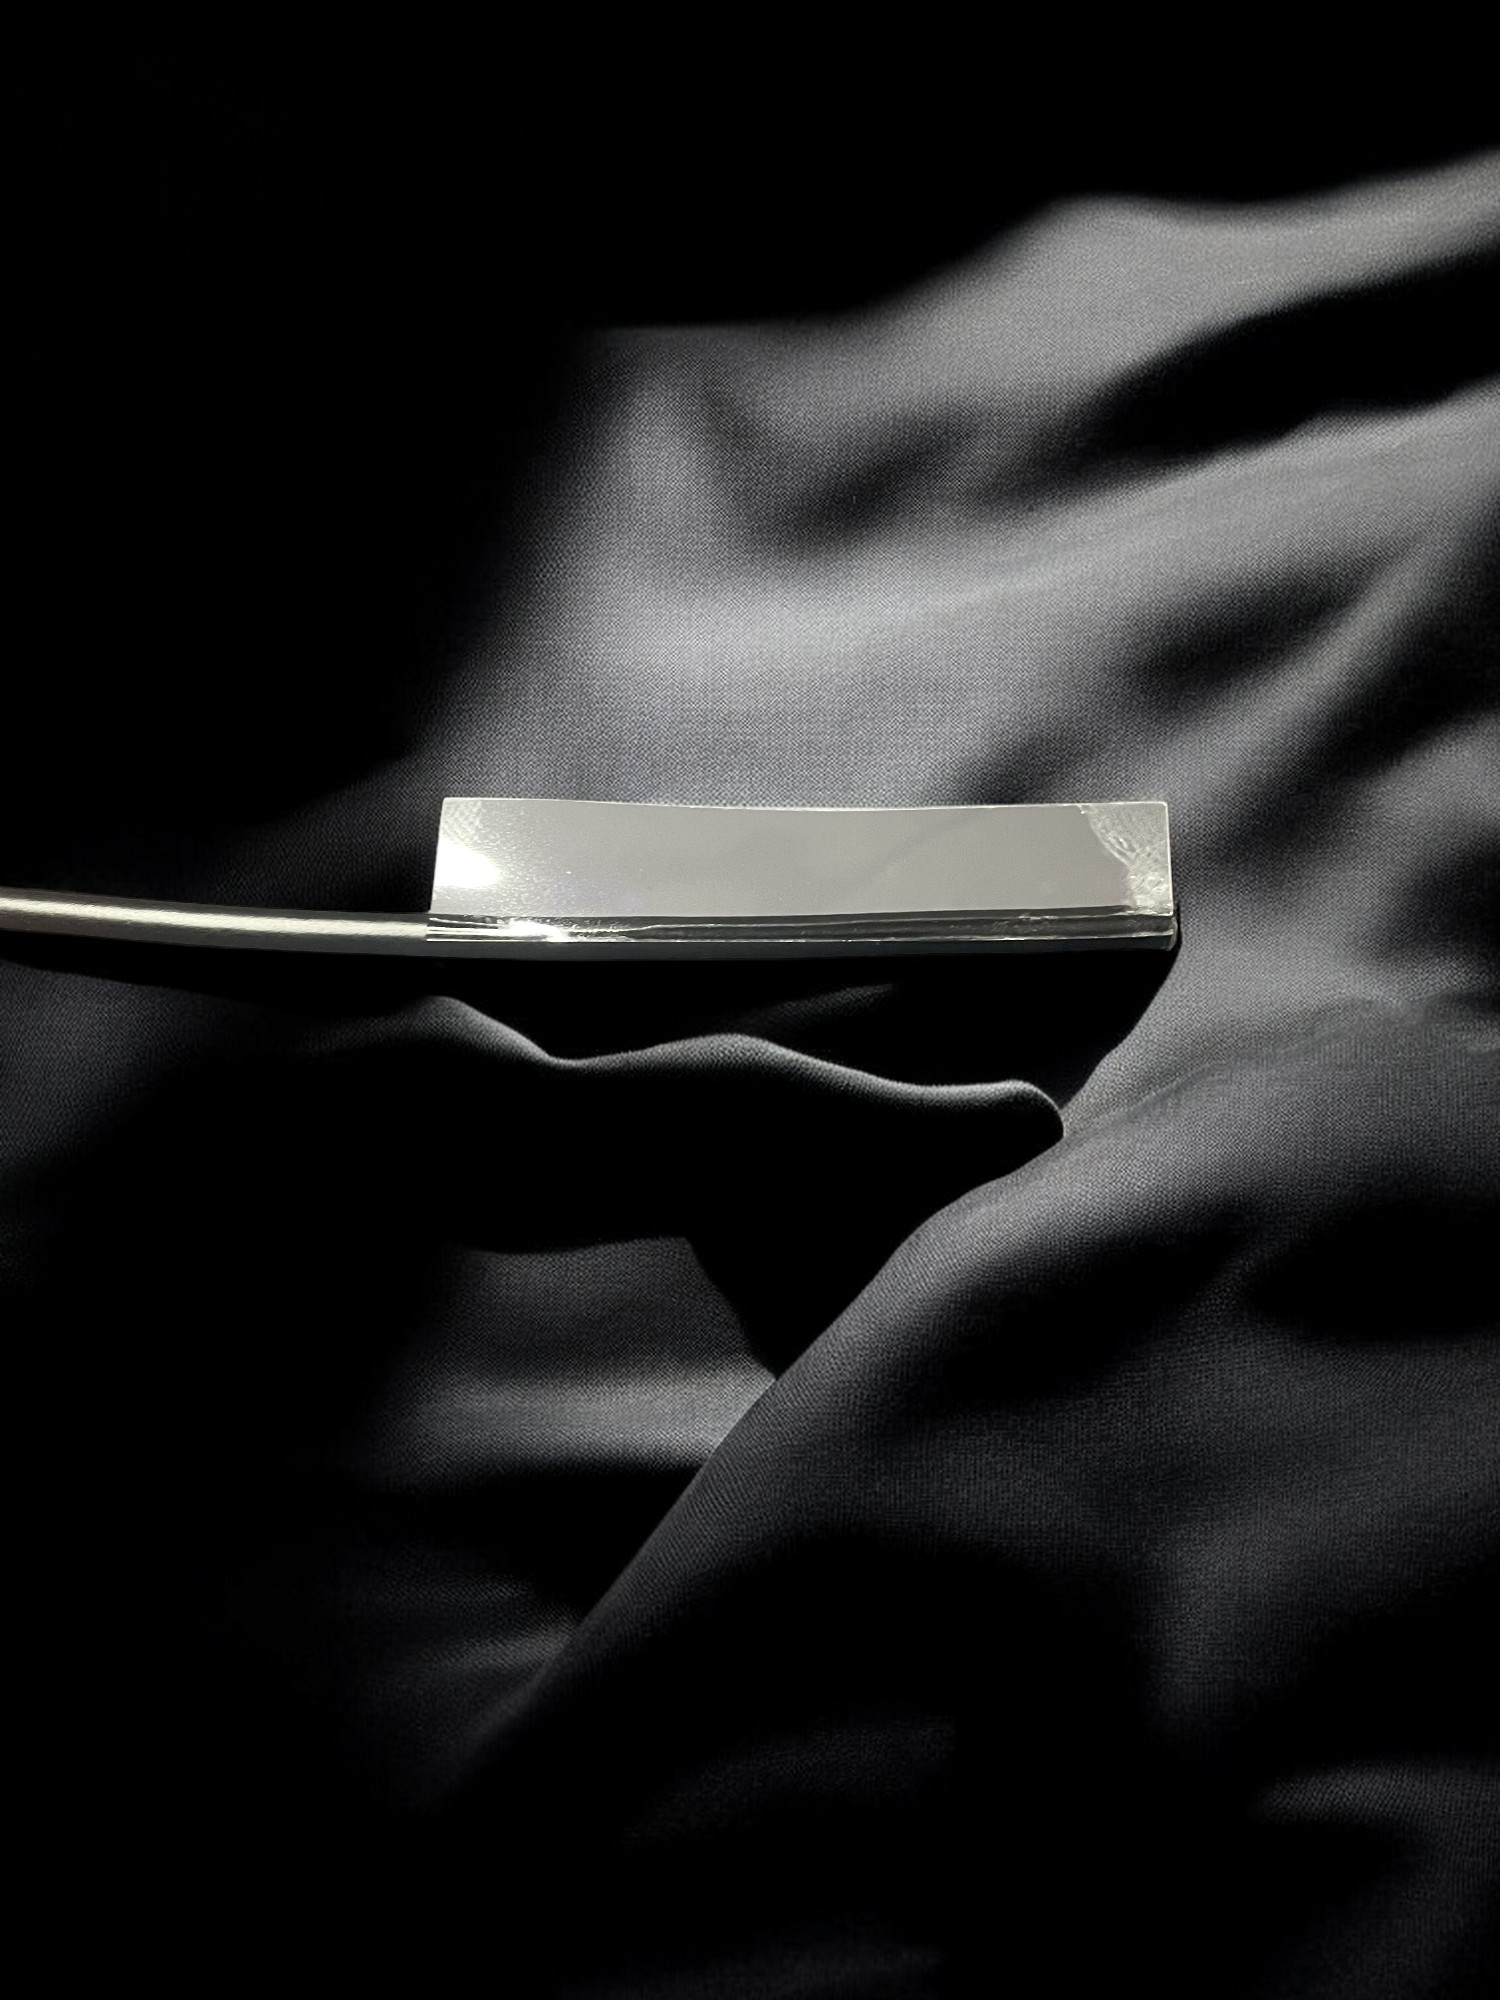
For cables where sheathing is on the softer side (RetroForge cable, Tensility Liquid cable, ect), I find it easiest to wrap a thin piece of tape around one end of the cable. This greatly decreases friction when sleeving and will especially help on tighter paracords.
When cutting your tape, make sure it's enough to only wrap around the circumference of the cable once (we want to avoid increasing the cable thickness by having multiple layers of tape).
When applying tape, make sure it's smooth and does not have creases as this will also effectively increase cable diameter.
| Measure & Cut | Wrap | Finished |
|---|---|---|
 |  |  |
Paracord
Cut a strand of paracord that is approximately 25% longer than the cable you're sleeving. This is necessary in the event that the cable is a tight fit for the paracord as it will contract as its sleeved.
Remove all inner-strands from the paracord. Upon pulling the strands out you will get 6-12 inches out then be forced to run your hand along the entire length of the remaining paracord to de-compress and allow more length to be pulled.
Sleeving
Onto sleeving the cable...
WARNING
If you have cats or pets with sharp claws, avoid having paracord near them. They are adorable, but it isn't fun getting halfway through sleeving and your paracord suddenly becomes frayed from their claws.
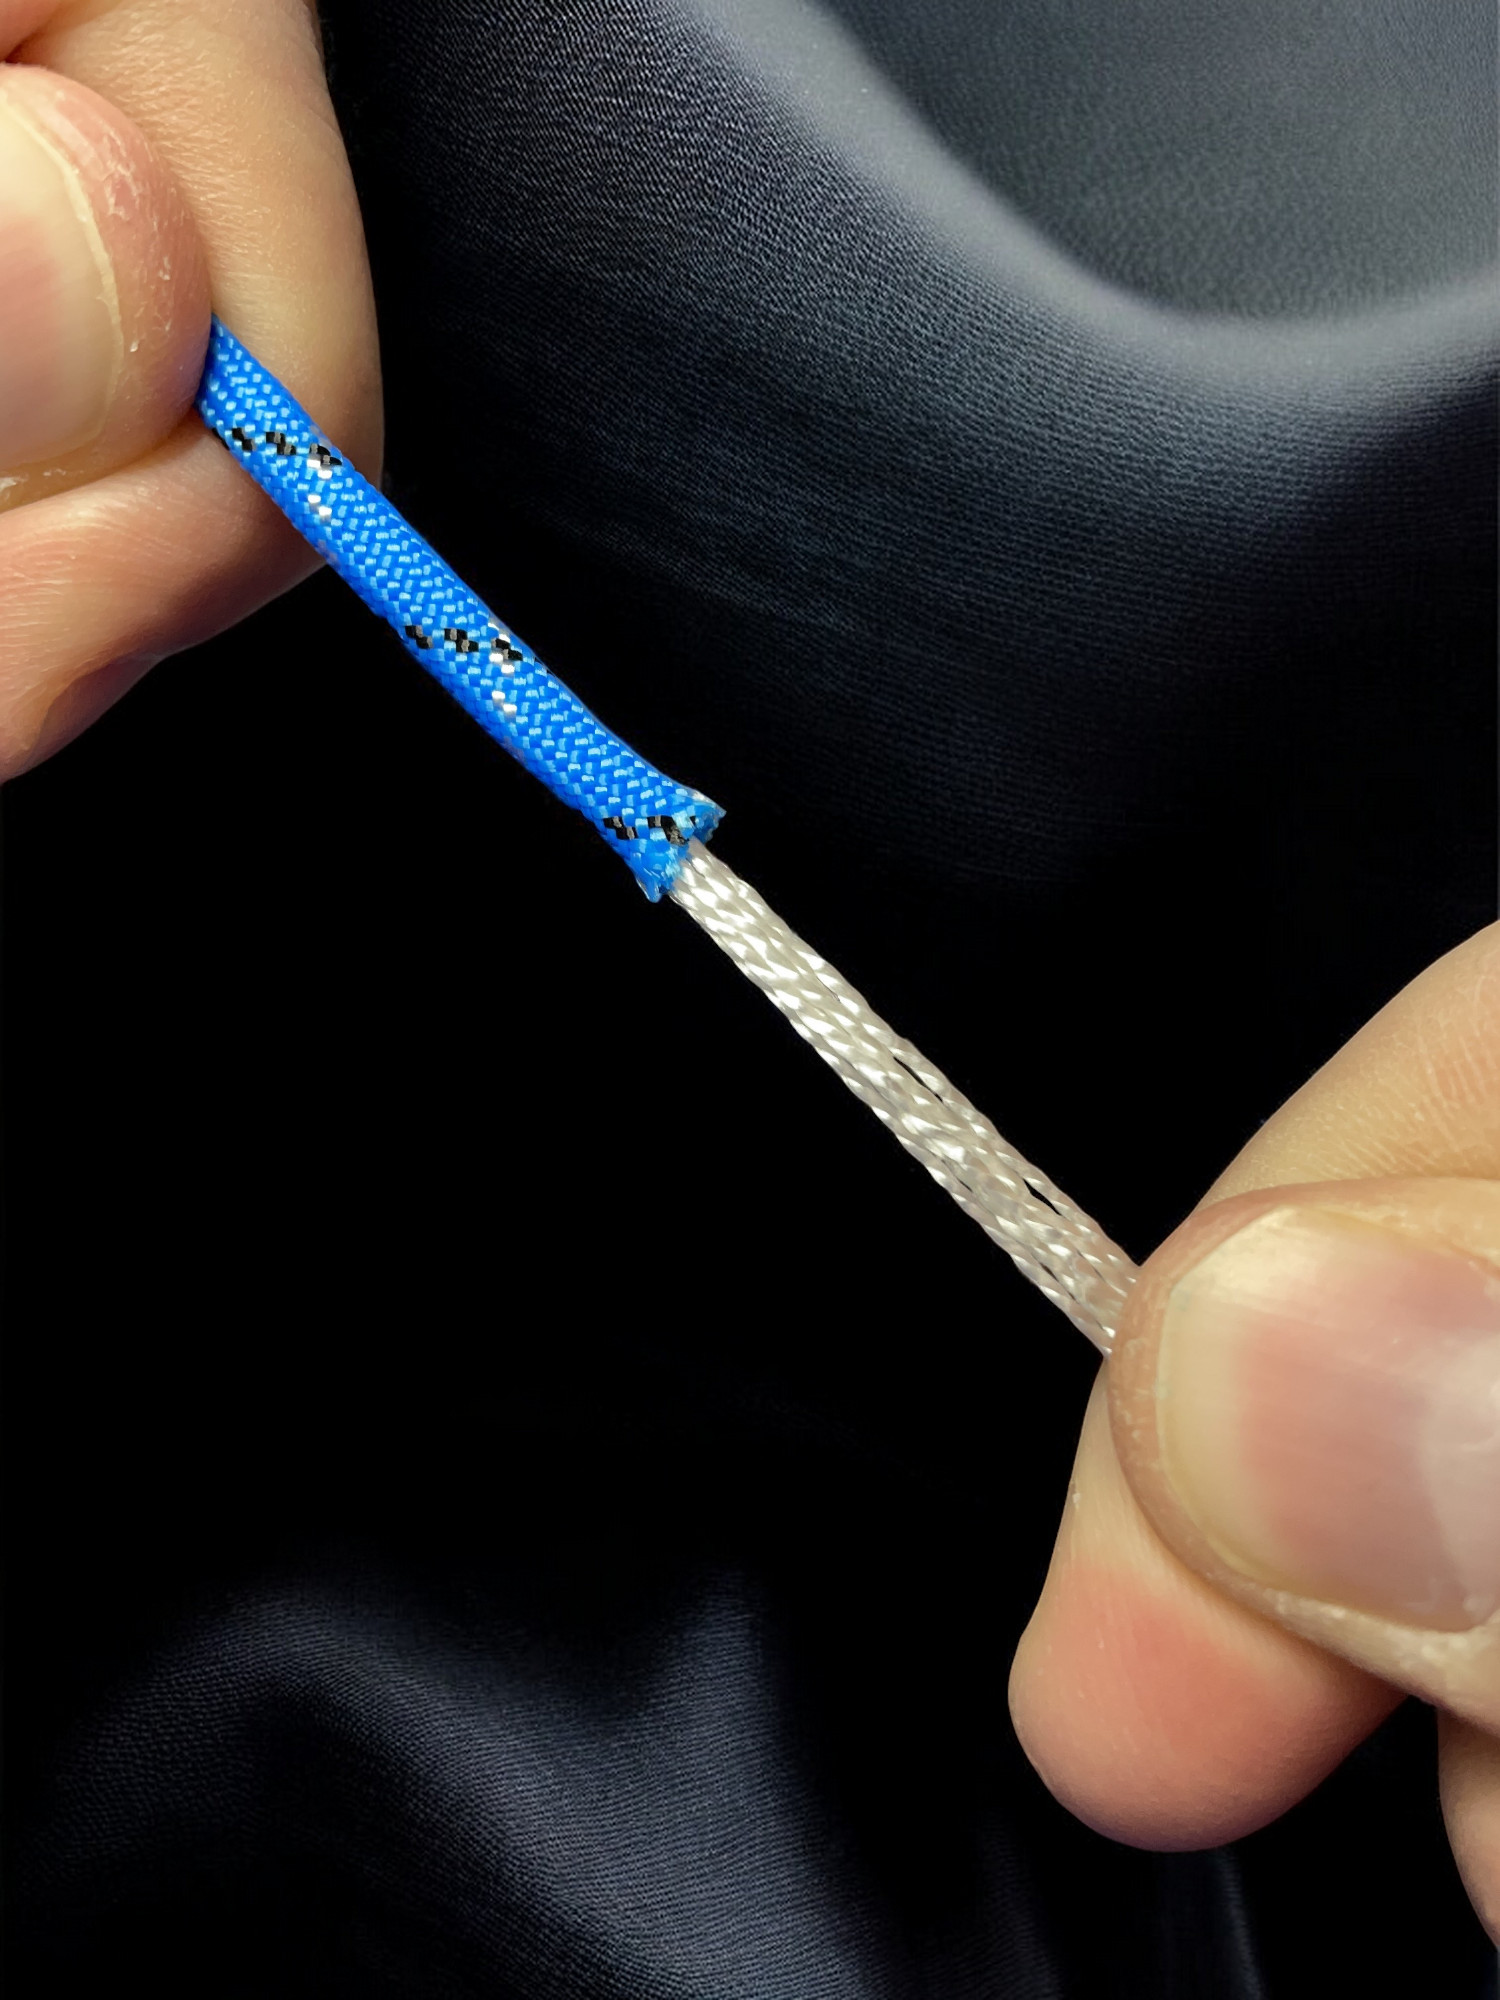
Start by inserting the end of your cable (use tape end if you applied tape) into the paracord.
Use the "inchworm" method to guide the cable through a few inches at a time as displayed in the following video:
After you have done the inchworm rotation several times, paracord will start to scrunch up on the part you have already sleeved. To alleviate this, perform the last step of the rotation (pull sleeving back) on the entire paracord instead of the normal few inches.Repeat until fully sleeved.
Console Connector
| Directions | Image |
|---|---|
| Choose a side of the cable (if you used tape in the previous step, choose the side that does not have the tape) and cut excess paracord away. | 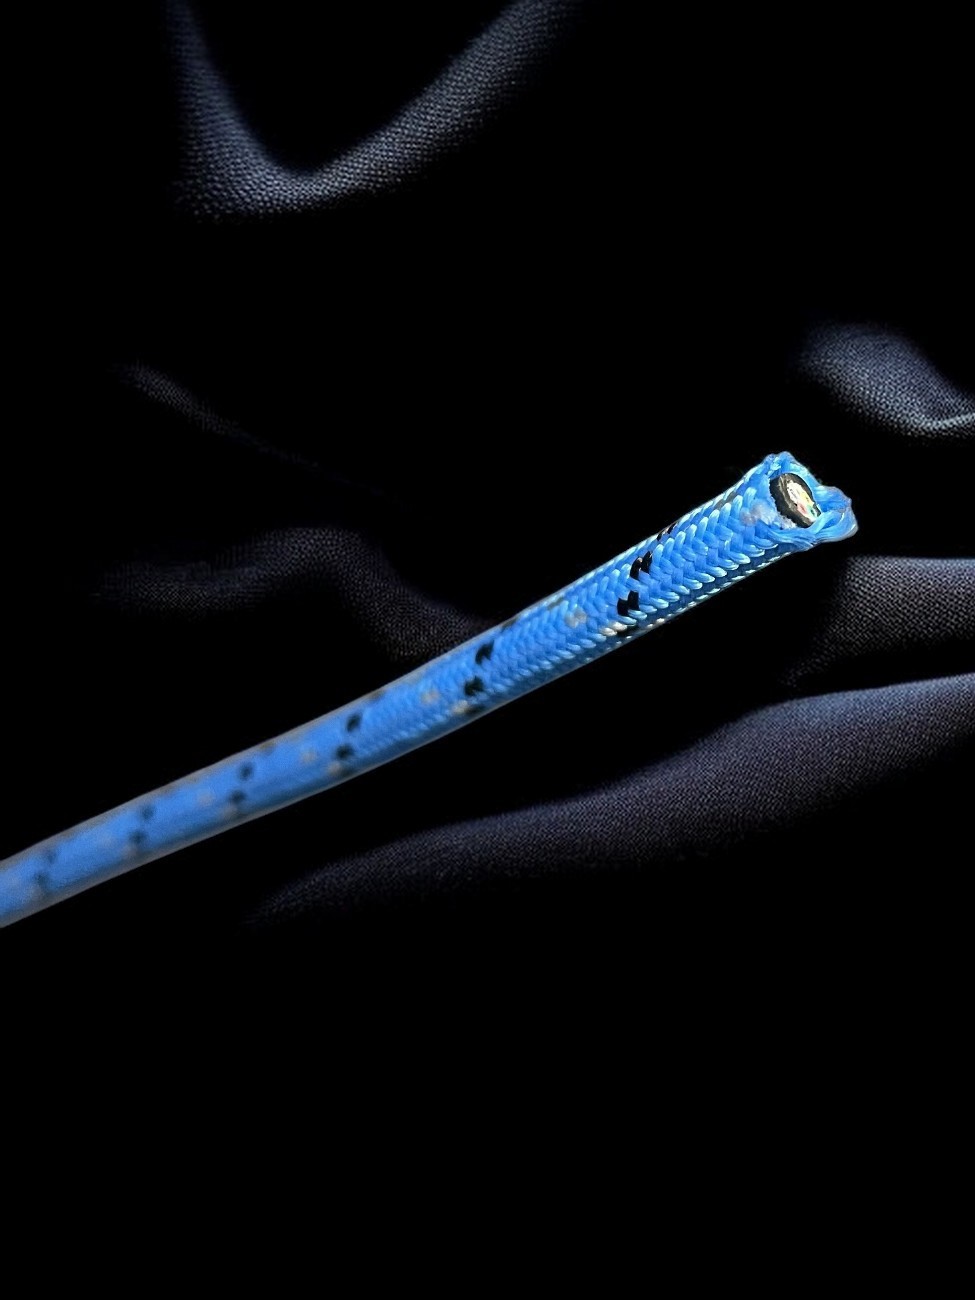 |
| Slide on the desired plug and metal connector housing in the orientation shown. | 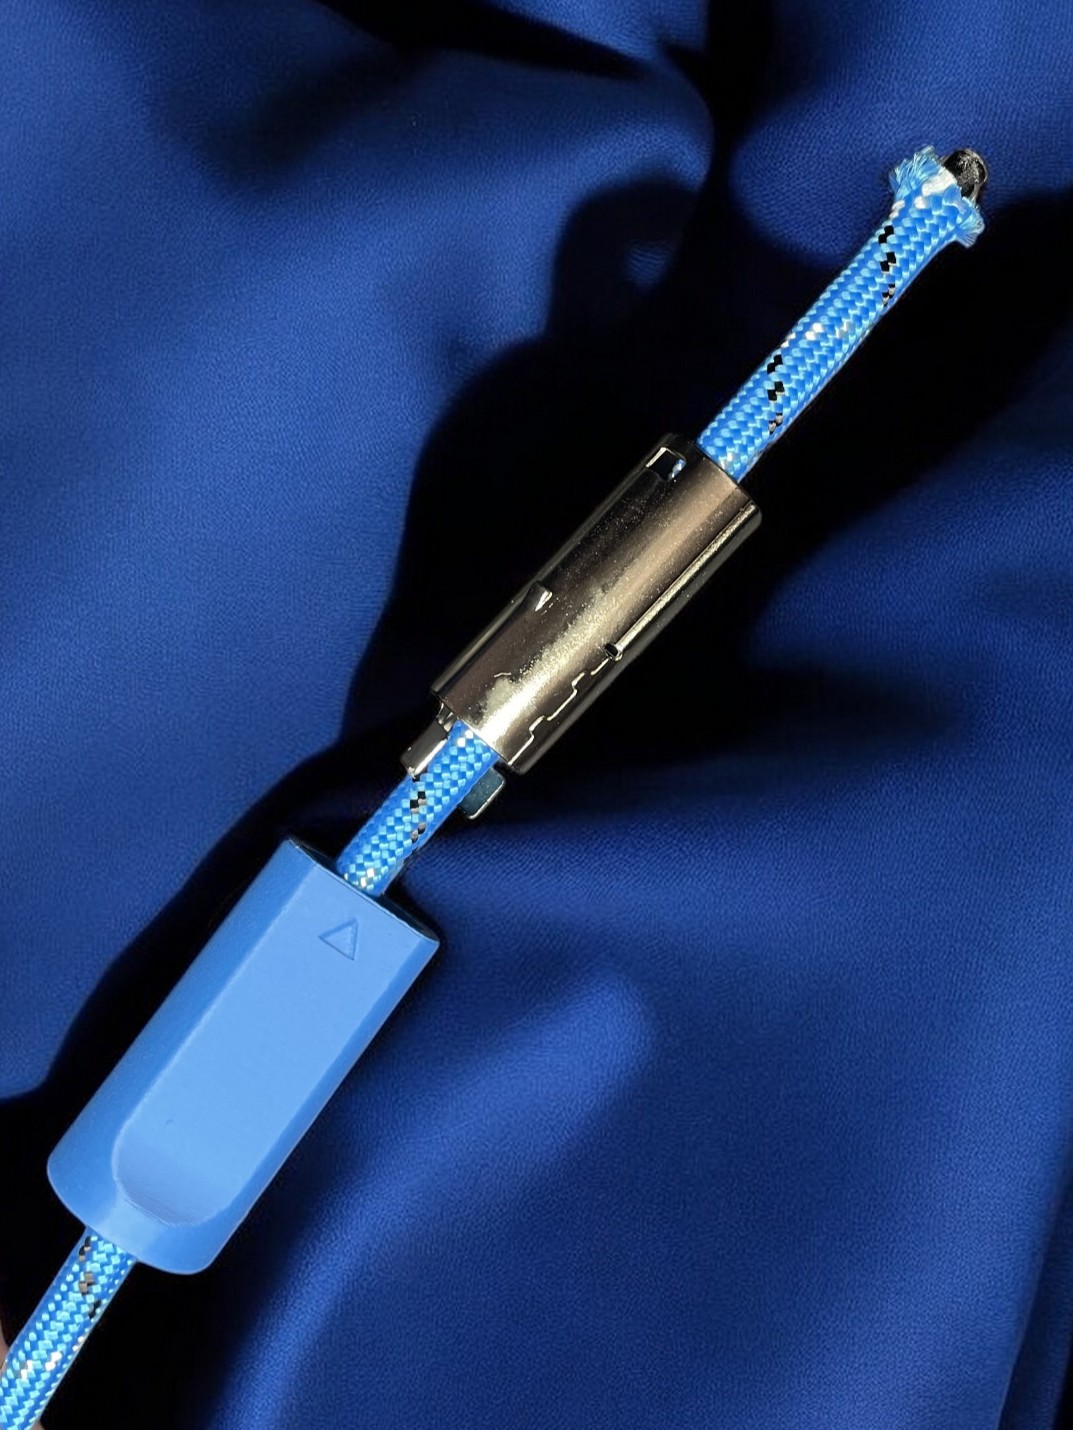 |
| Pull back some of the paracord to expose the cable underneath. | 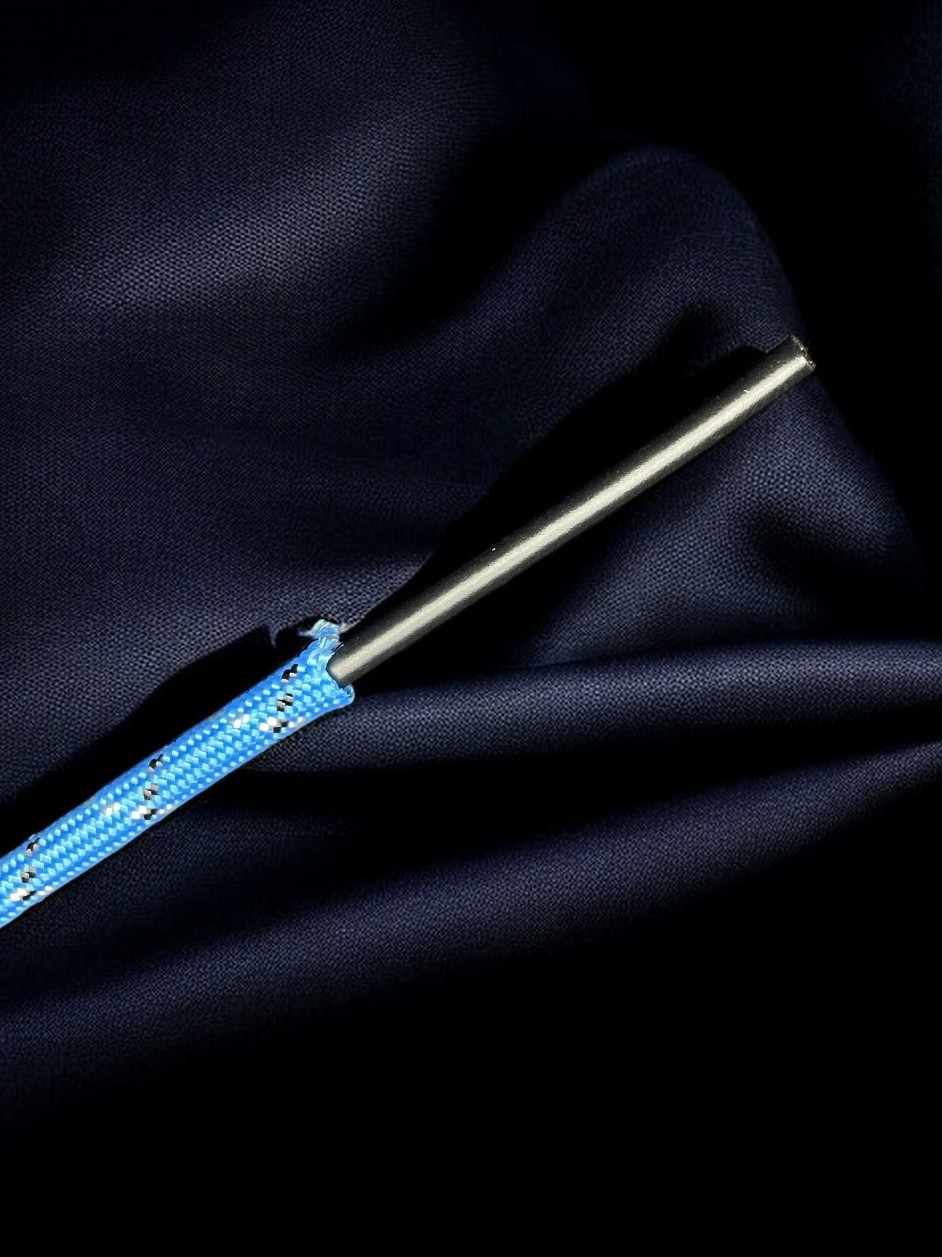 |
| Stip about 20-25 millimeters from the outer sheathing. | 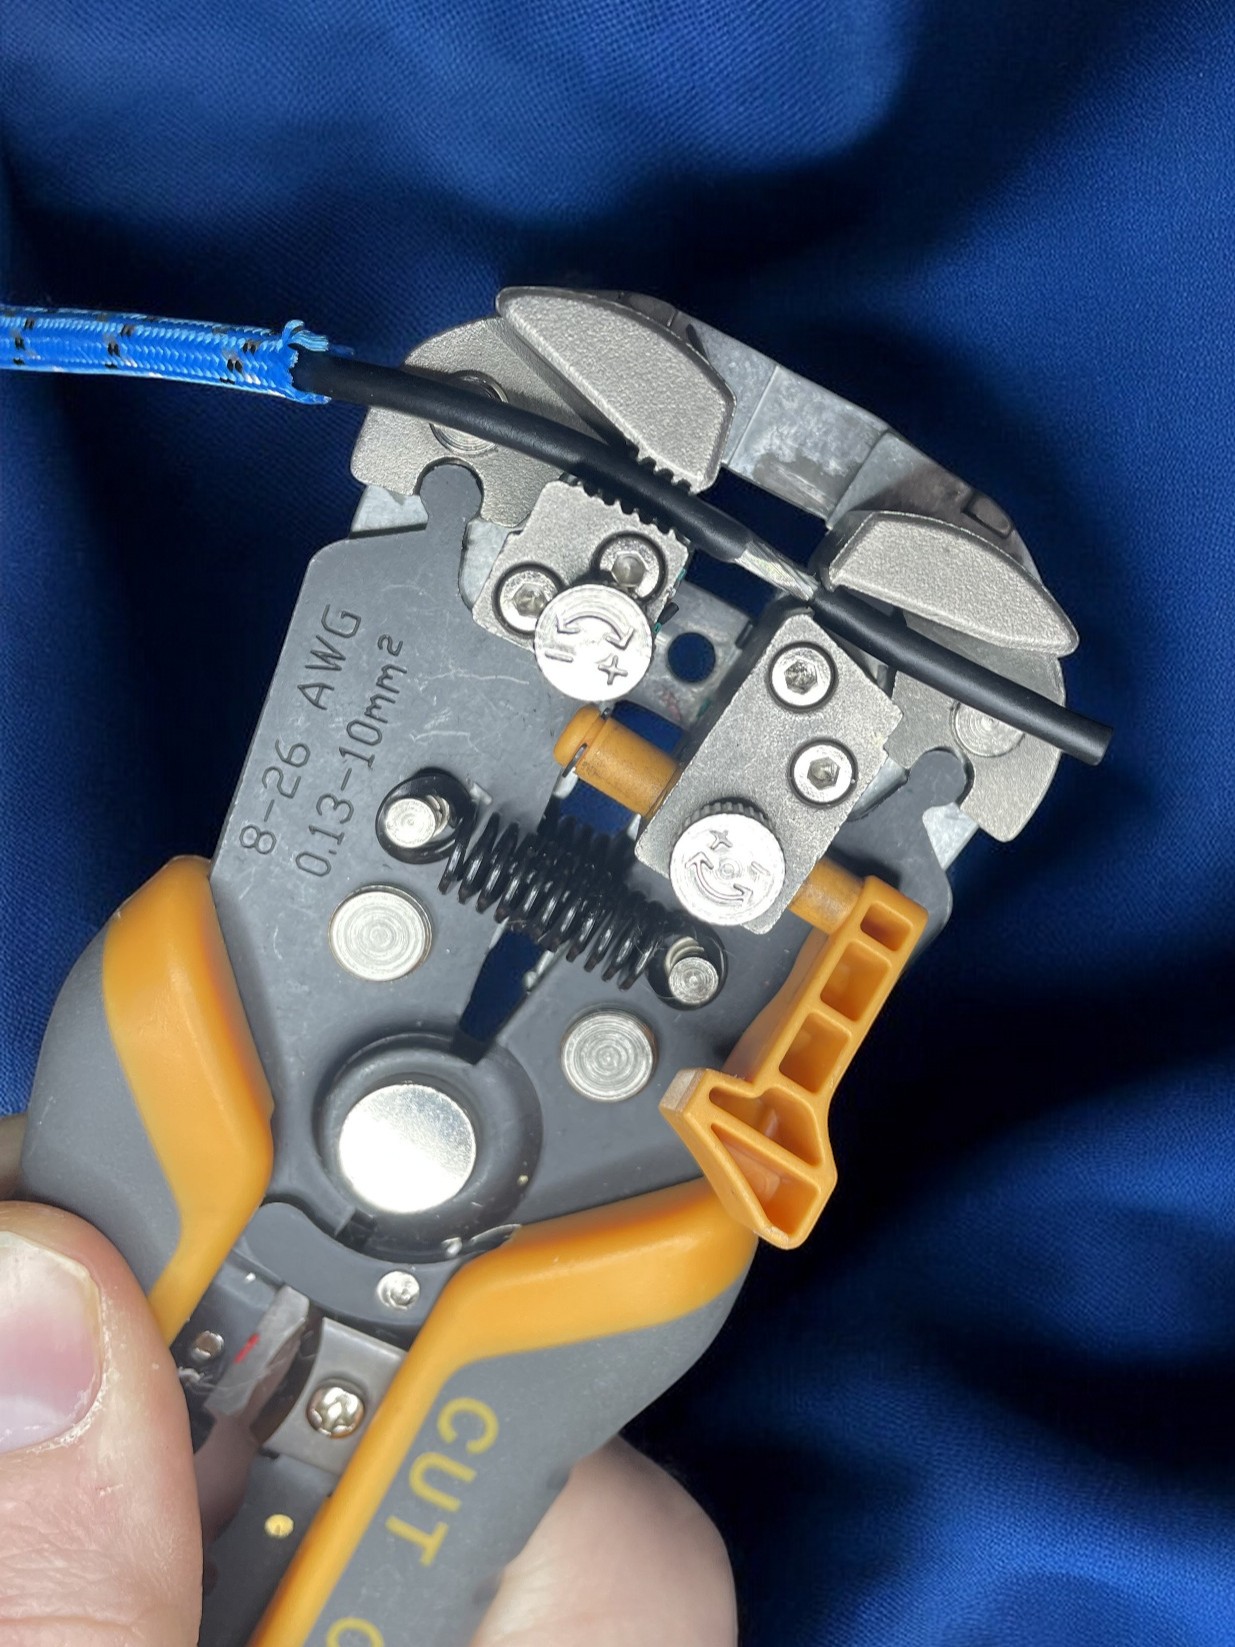 |
| Organize the exposed shielding into a single bunch to serve as the drain wire. | 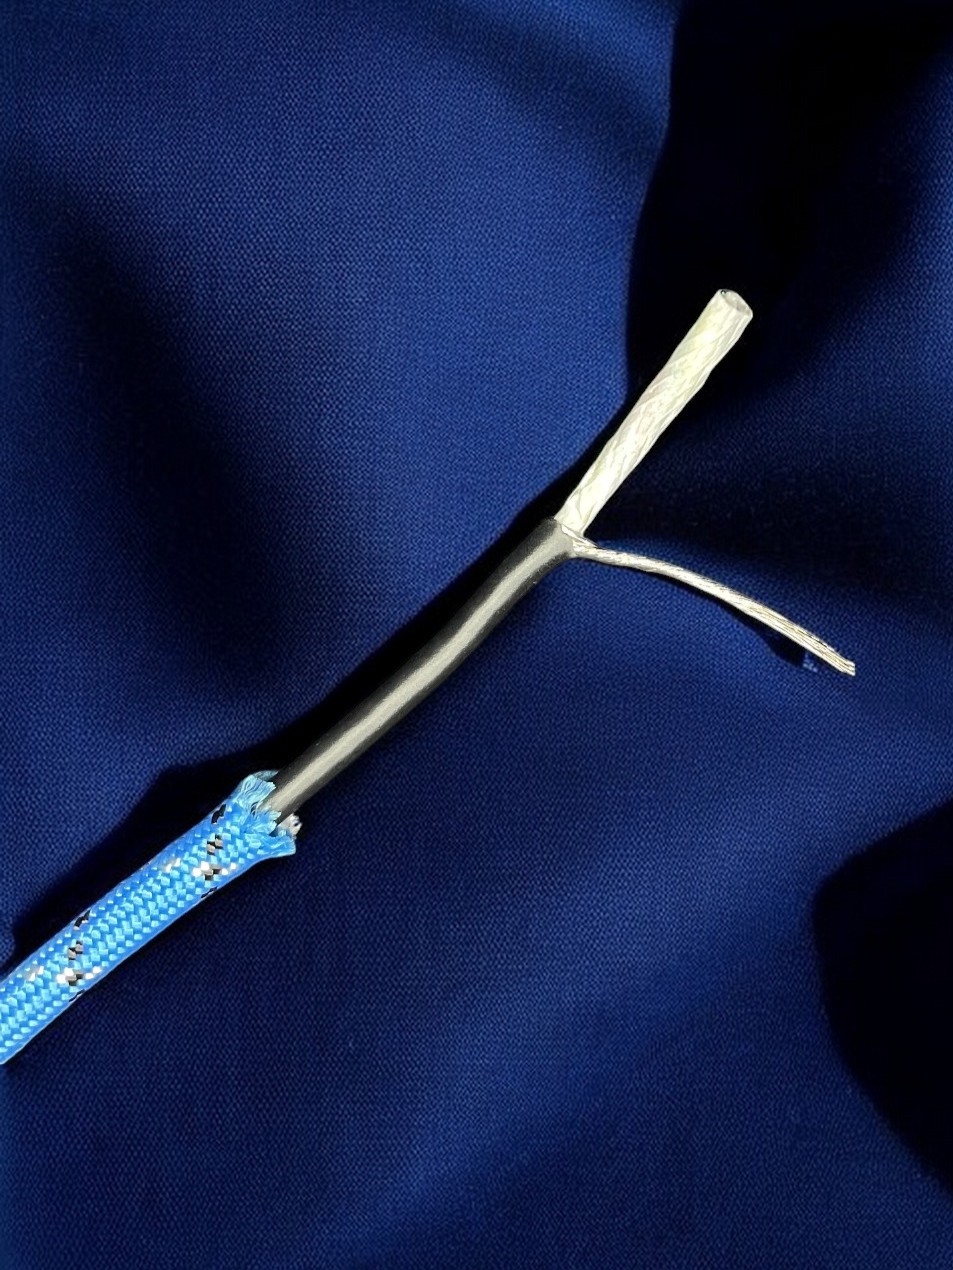 |
| Tear off paper surrounding inner wires. Unravel/unwind 5 inner wires. Cut off 3 soft strings (used as strengthener/ripcord). | 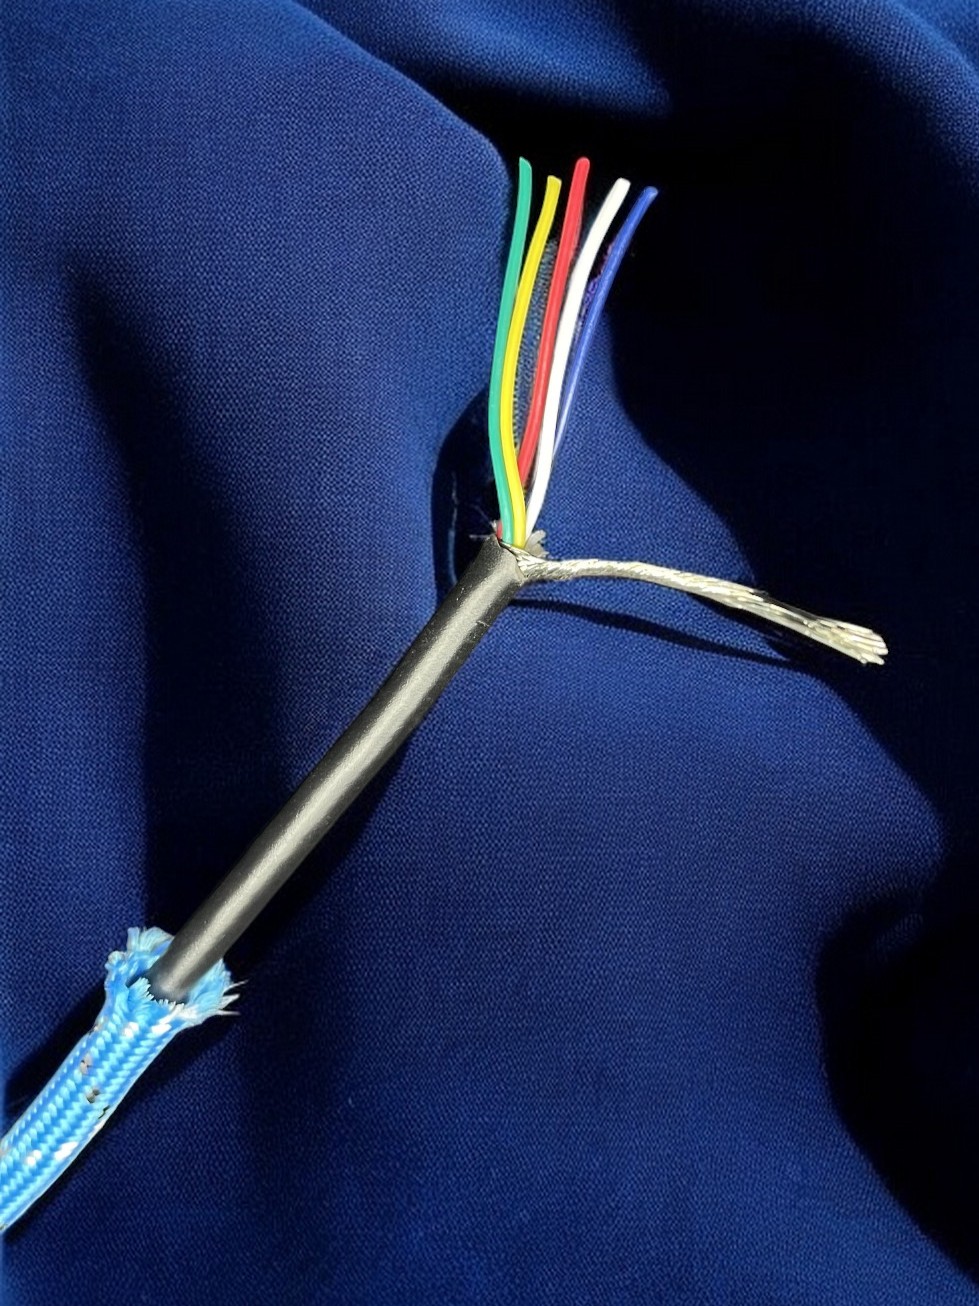 |
| Strip off a few millimeters from each of the 5 colored wires | 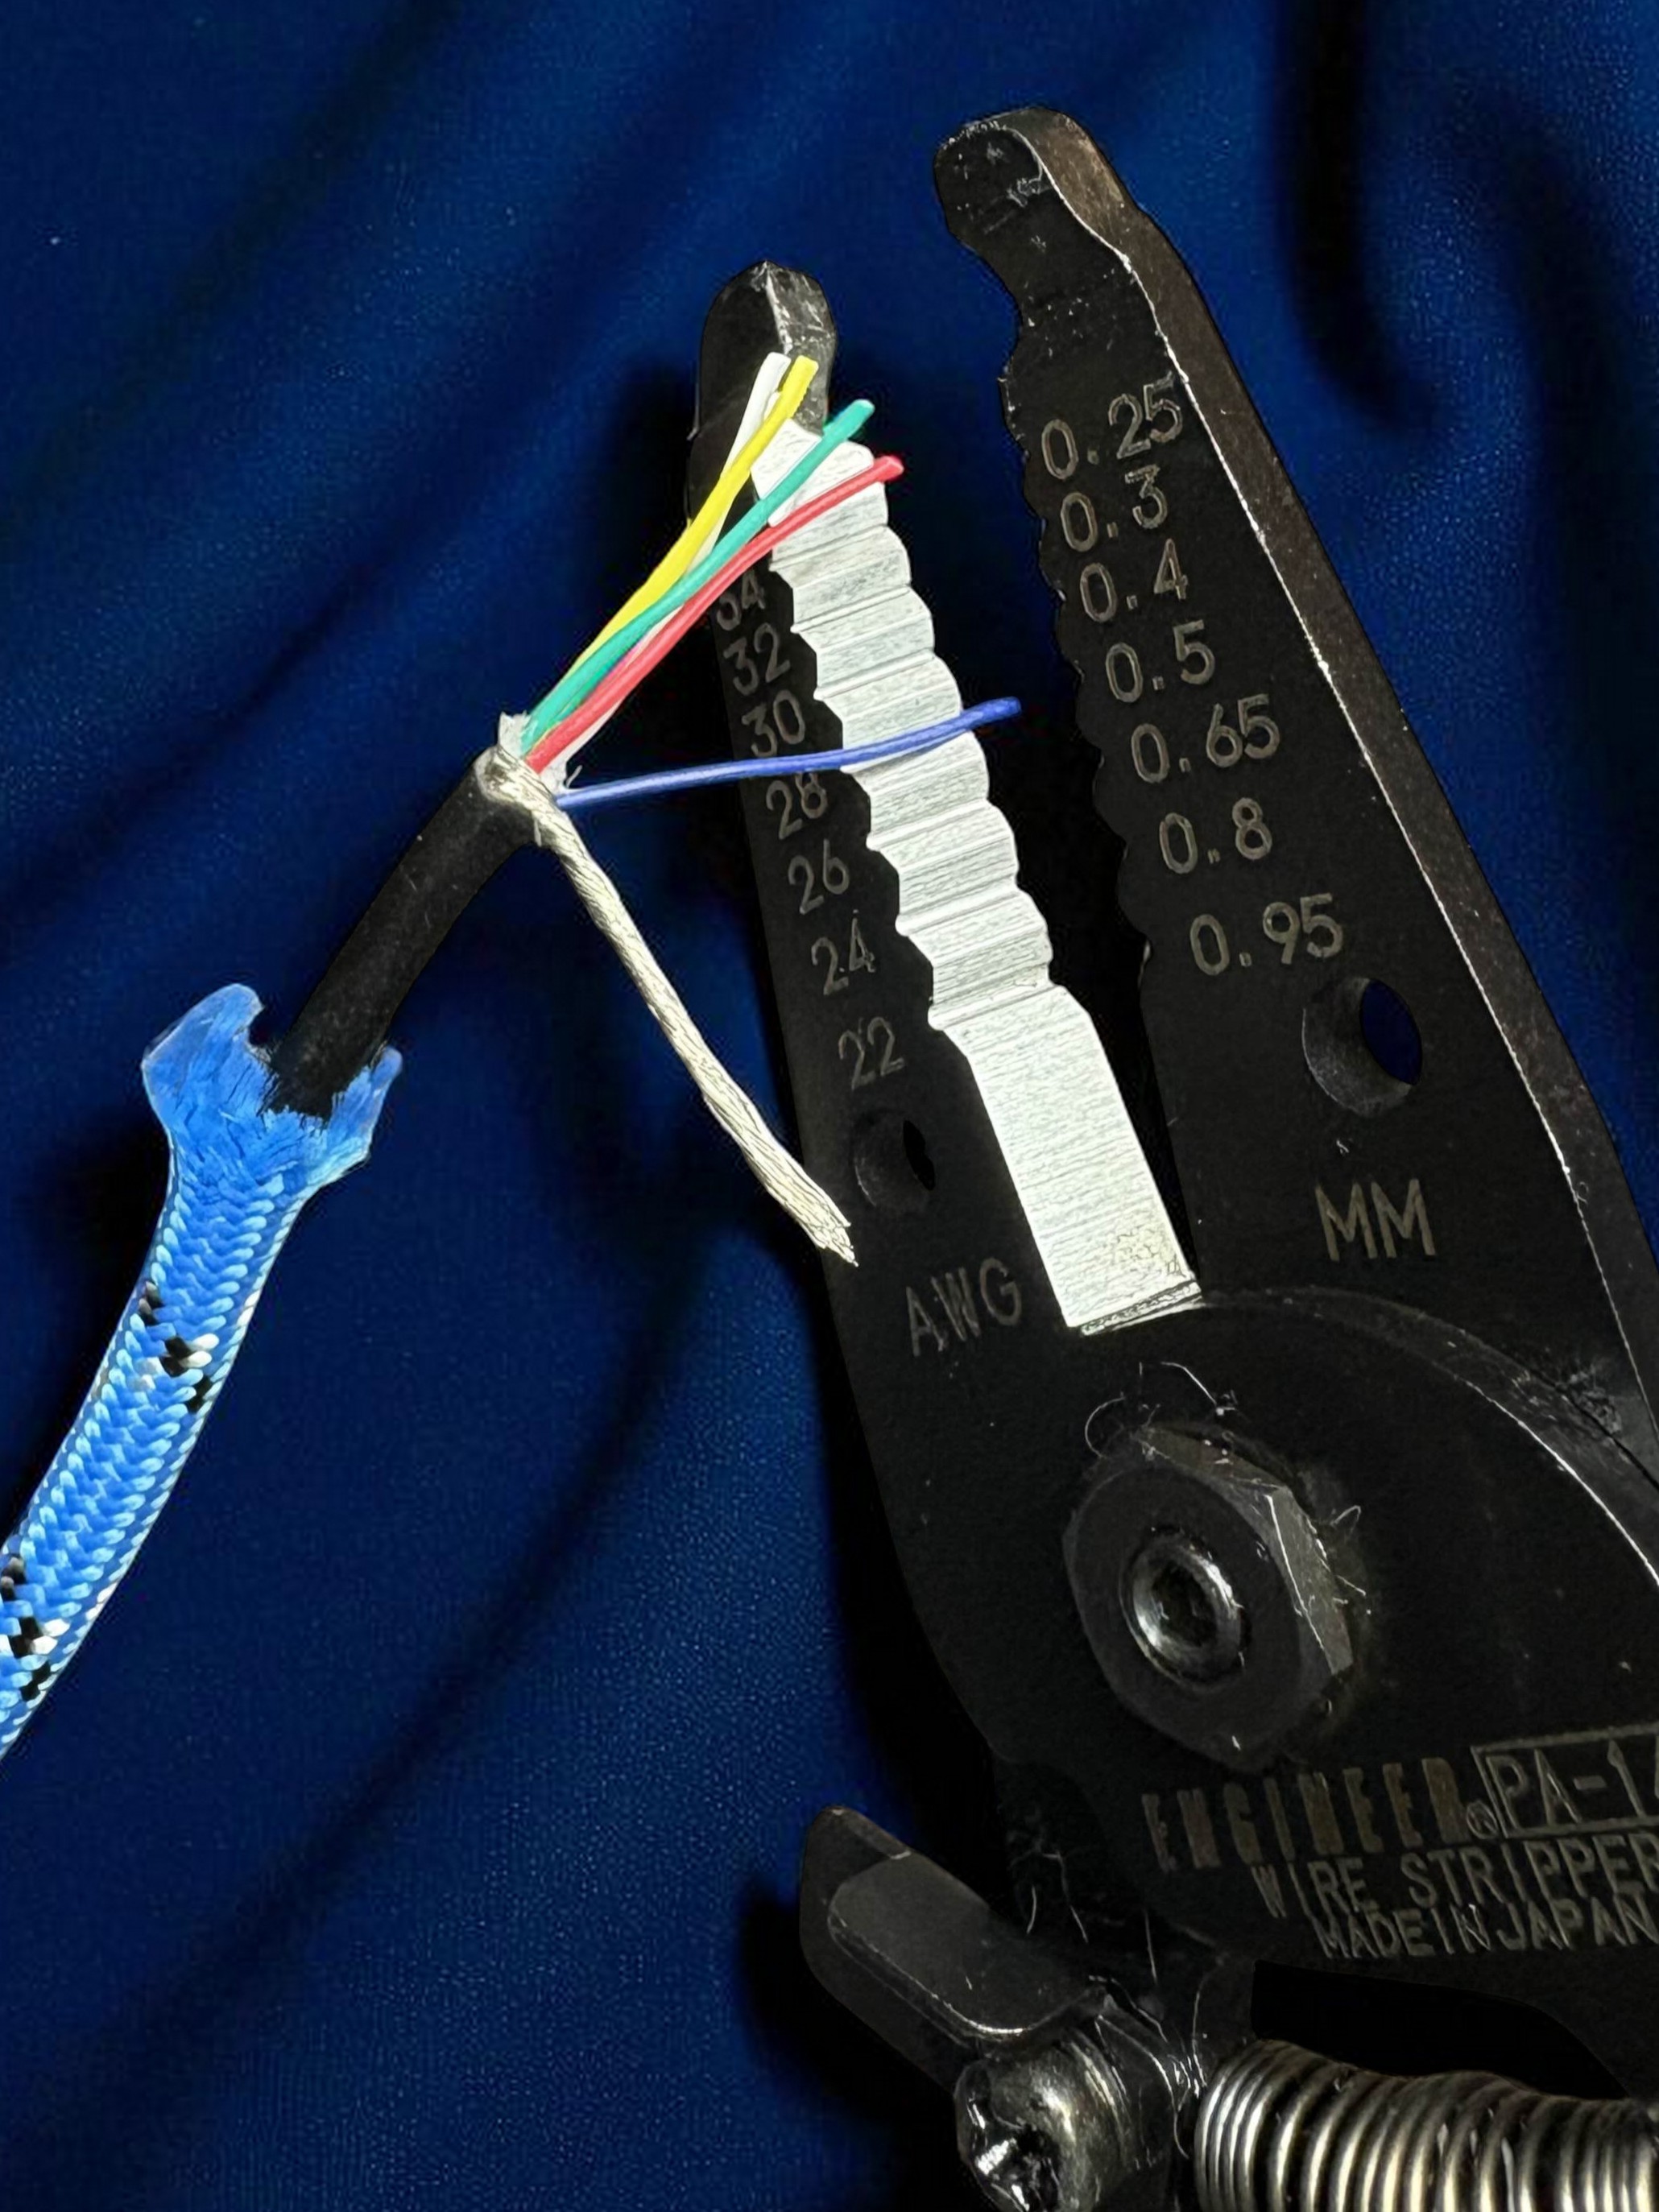 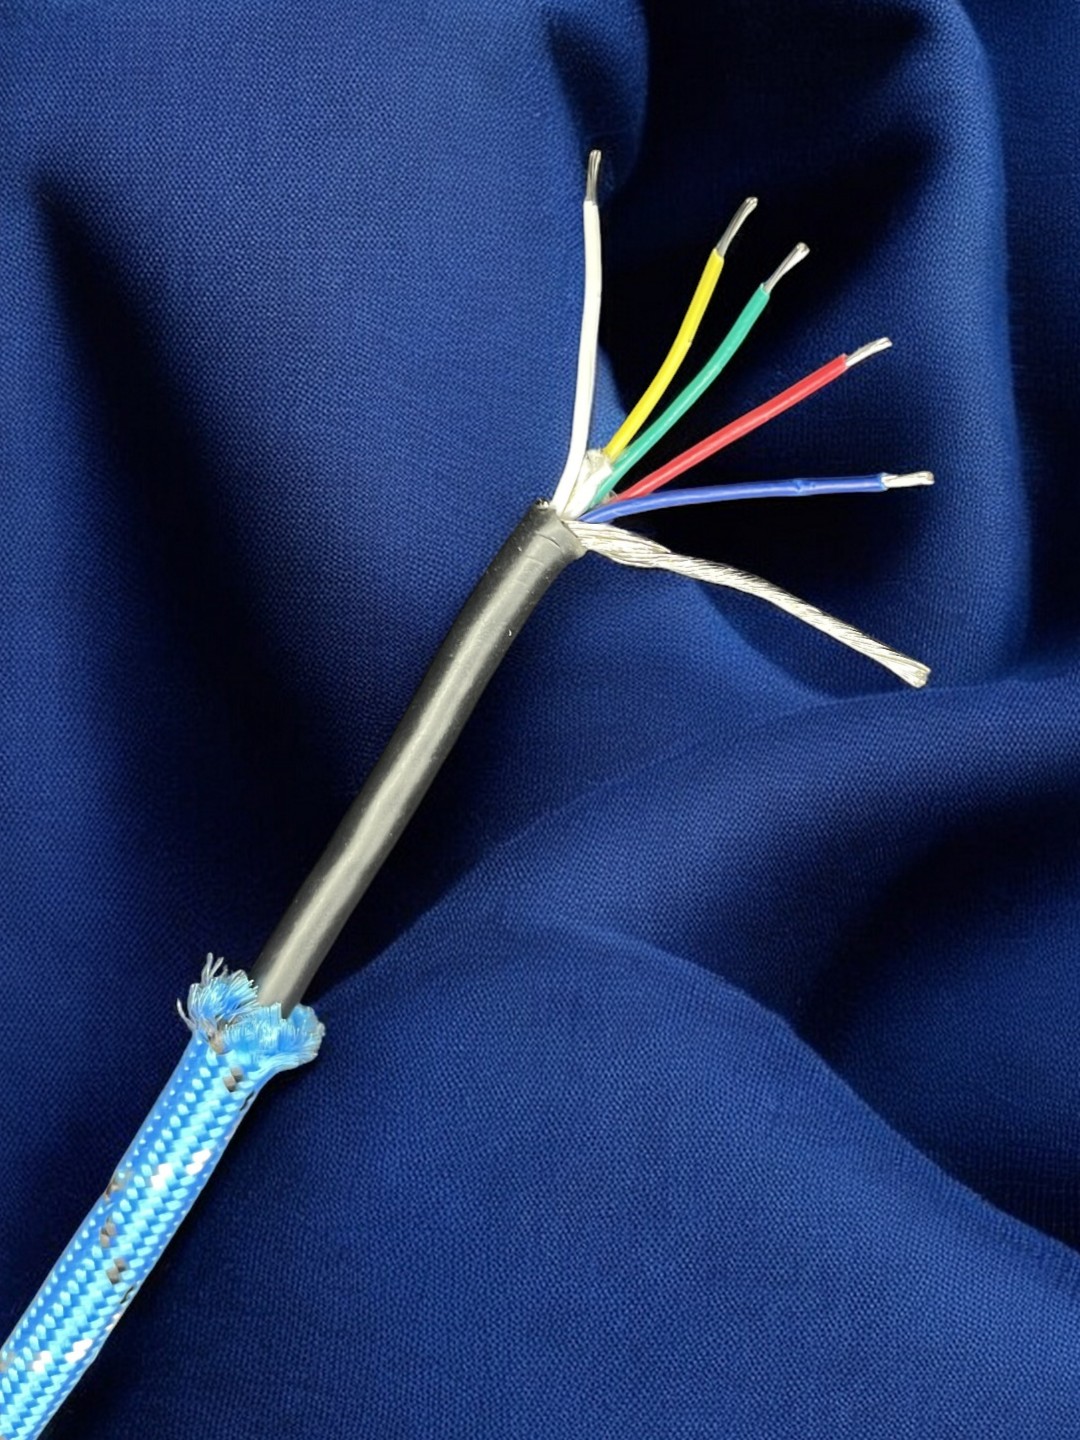 |
| Using your preferred crimping tool for the console-side pins, crimp each. Closely take notice to the second photo provided that shows how the pin should look after crimping. The conductor insulation is crimped by the outer most wing while the conductor itself is crimped by the inner most wing. | 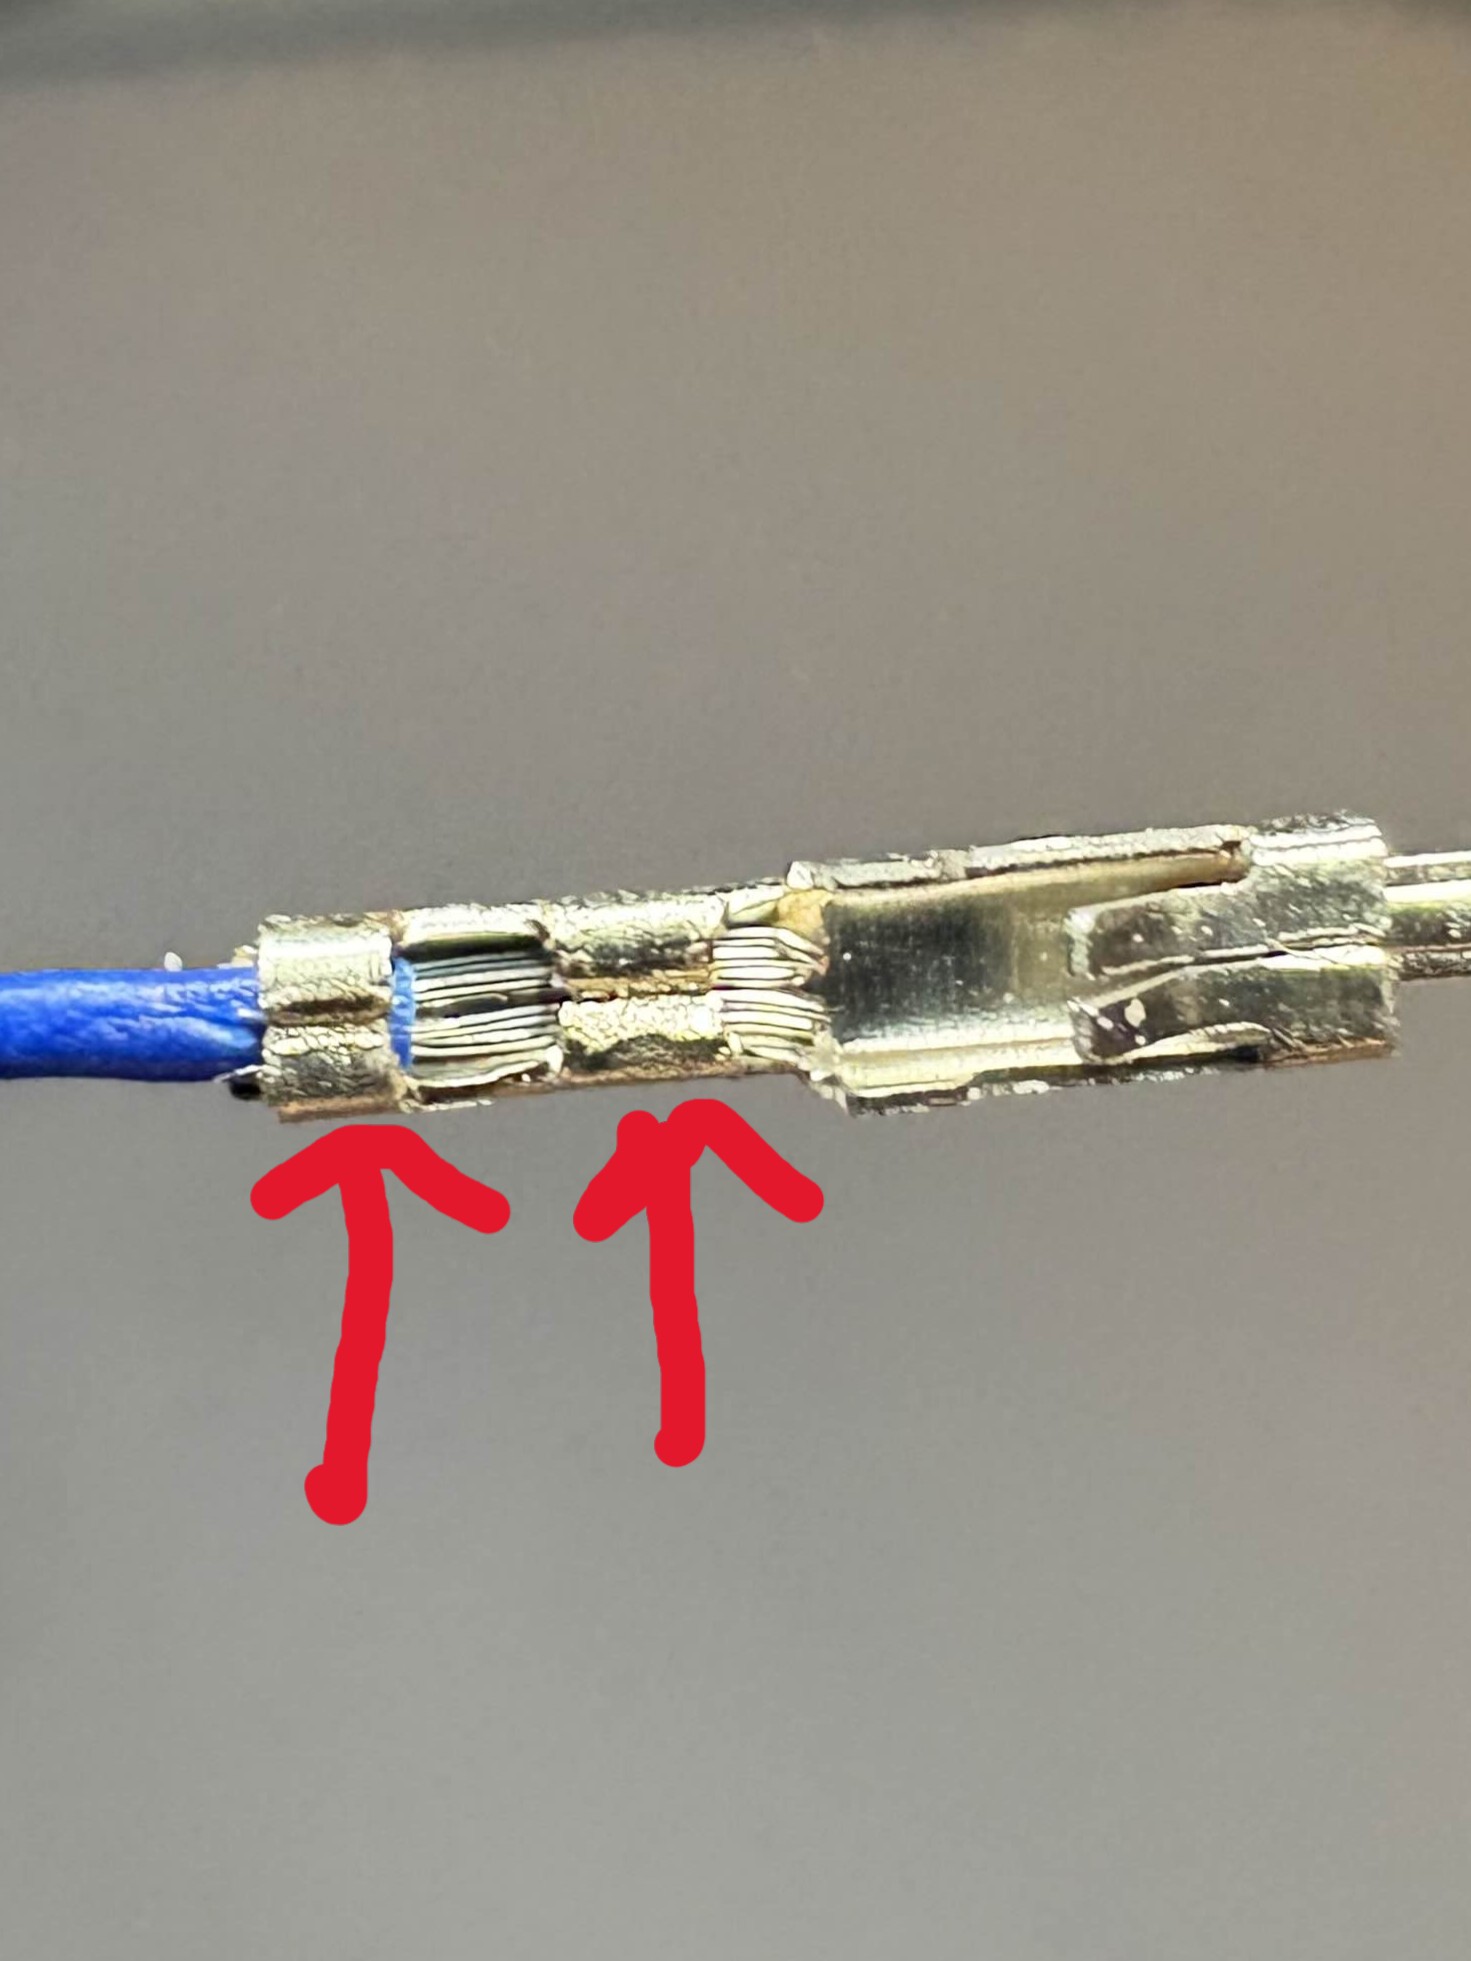 |
| Repeat for all 5 pins | 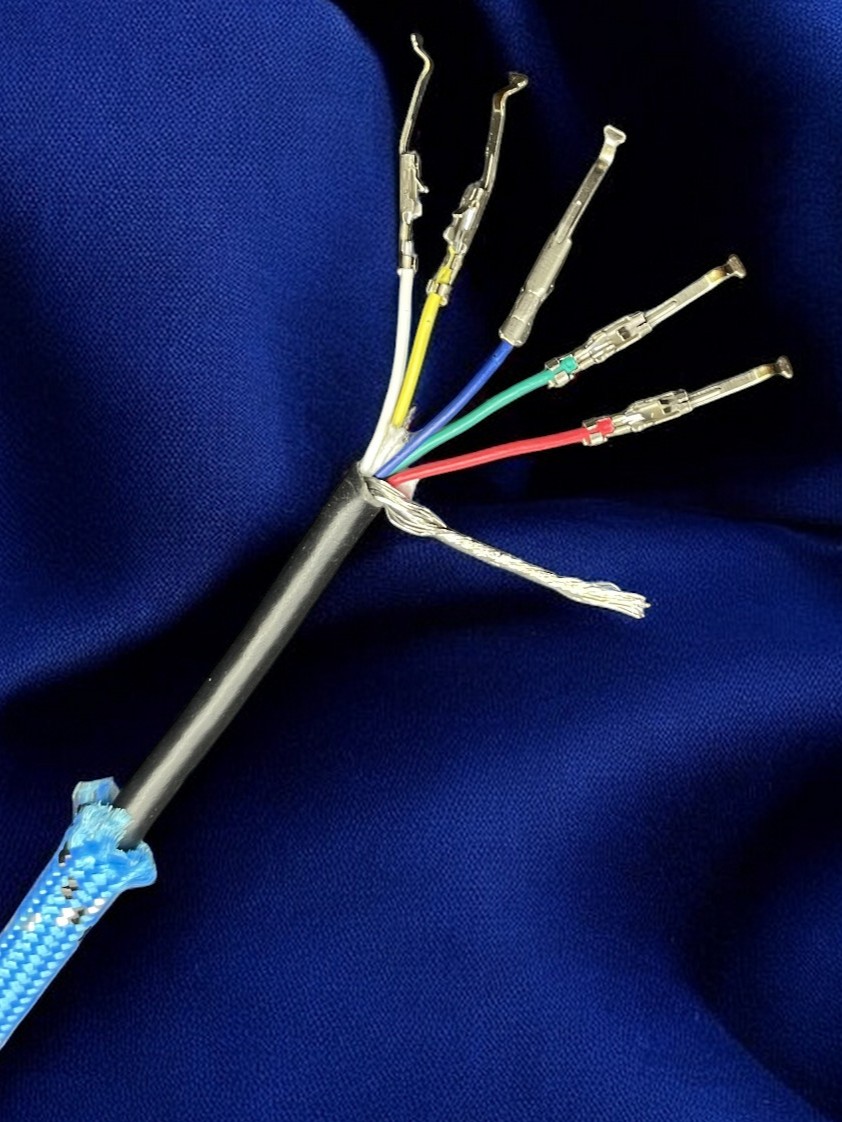 |
| Using the provided pinout insert each pin into the housing. Also keep note of the proper orientation. Note Provided pinout image is only for OEM, Retro Forge, or other cables that have the same insulation colors | 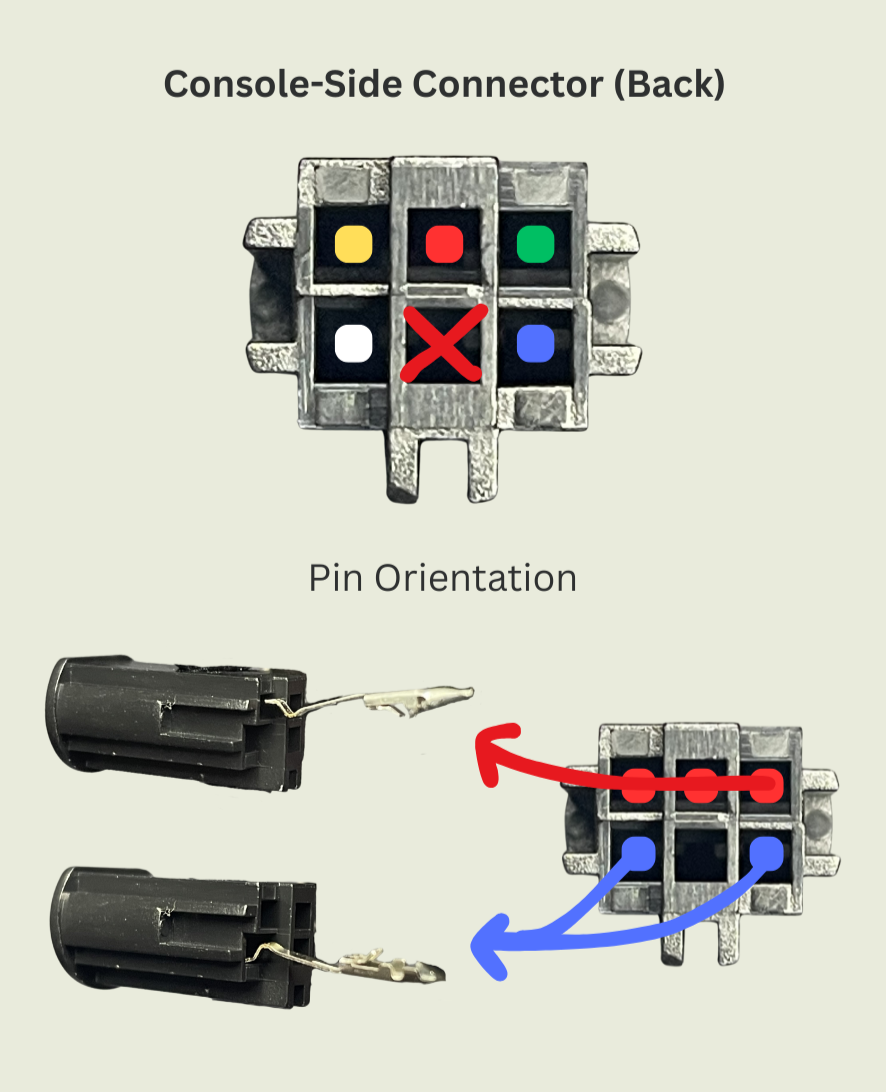 |
| Once done, pull the paracord back up until it meets the twisted bunch of shielding | 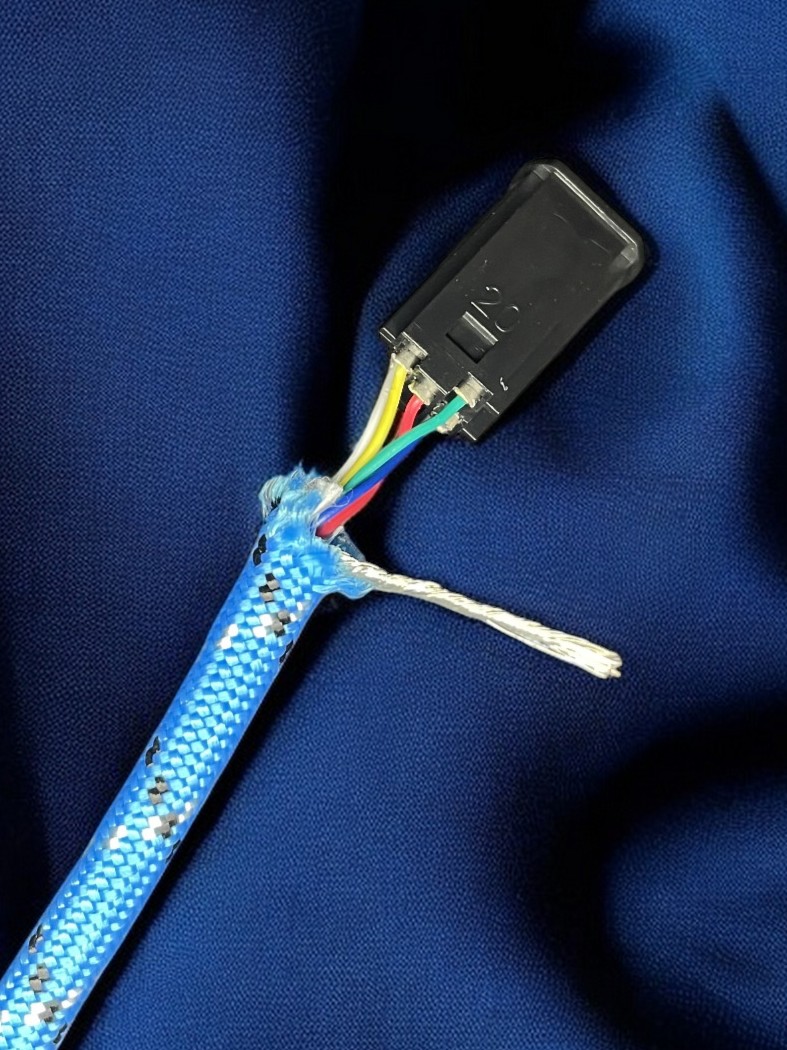 |
| Slide the metal casing up and over the twisted shielding and onto the black plug housing. Tuck the shielding underneath the paracord so that it sits as shown in the photo. | 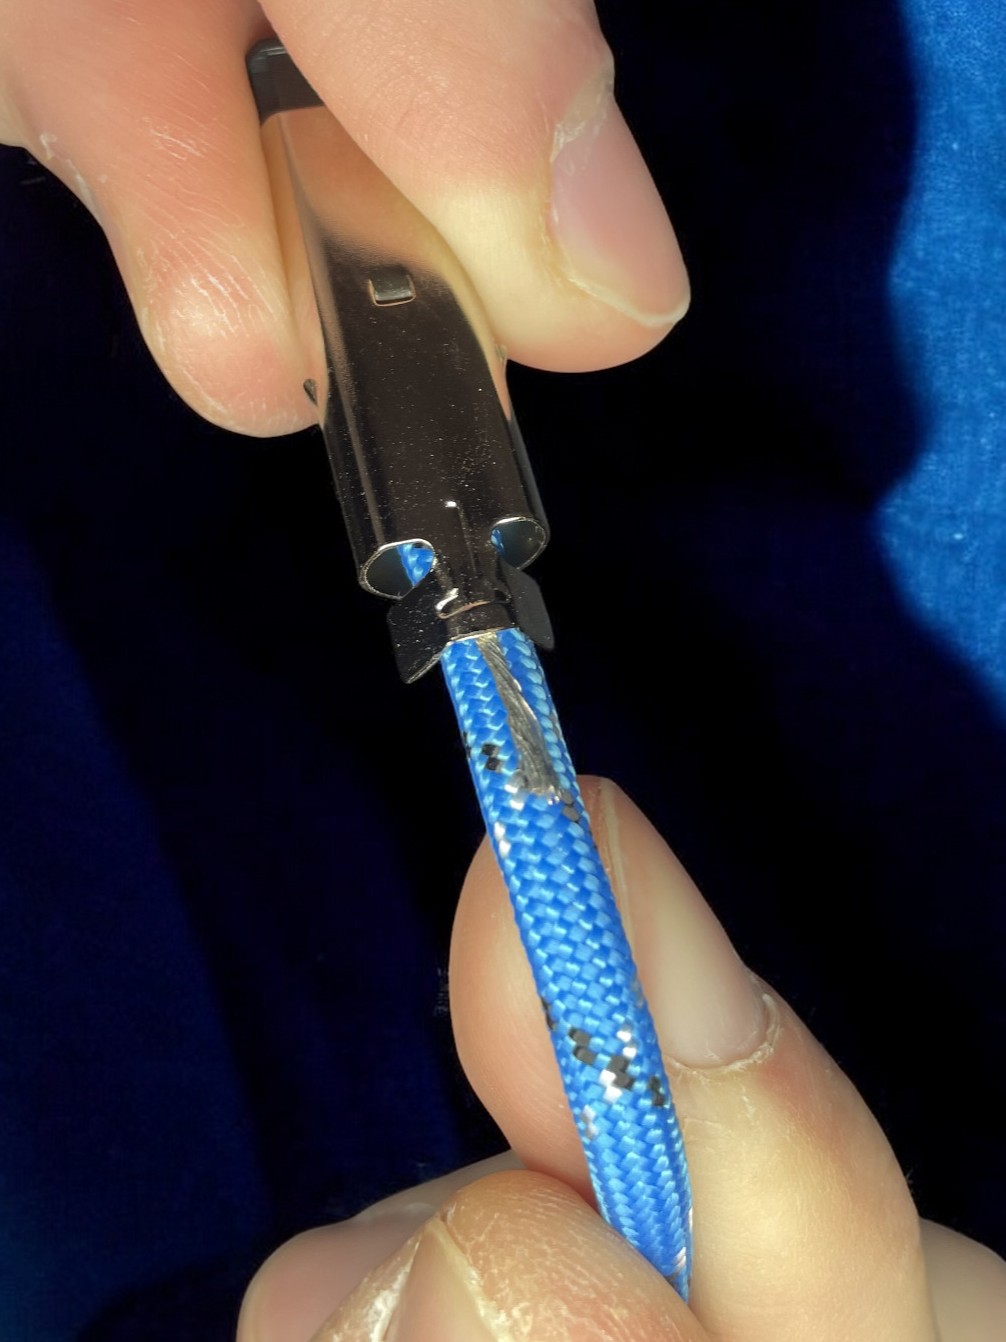 |
| Using a pair of pliers, bend/crimp the wings inward to form around the cable. | 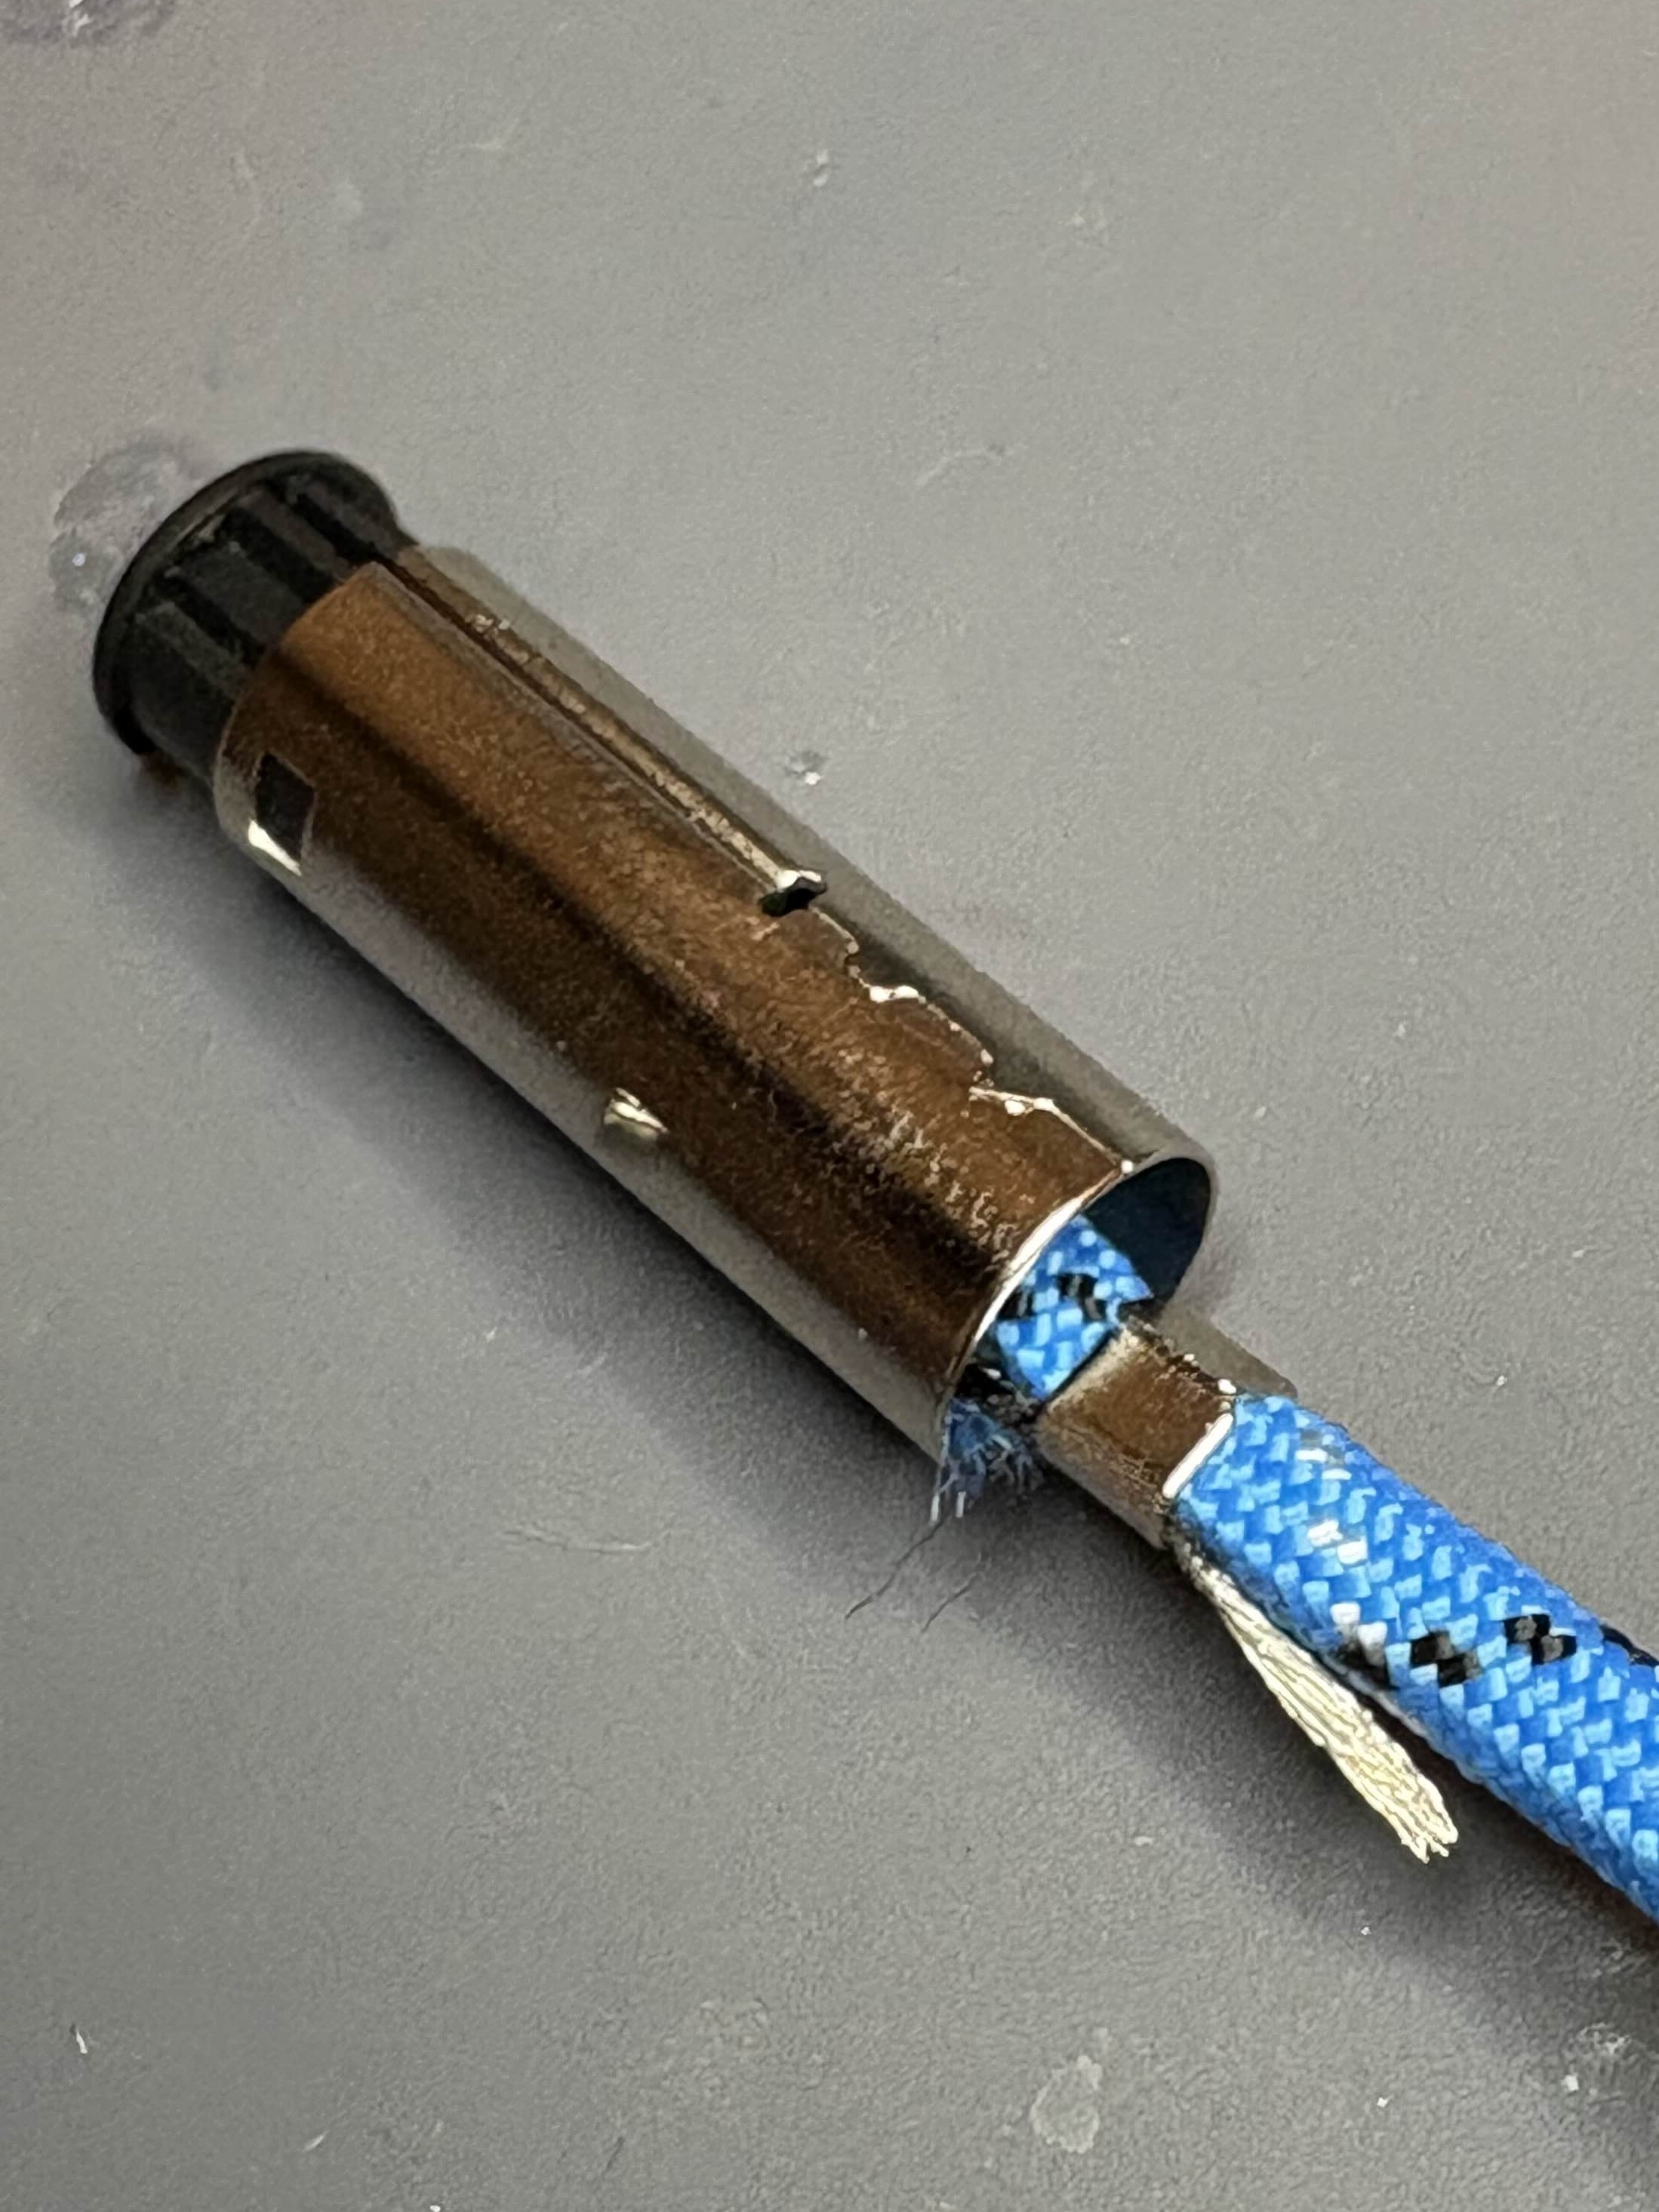 |
| Open up a ferrule/spacer, place it around the wings you just crimped, and tightly crimp. Ensure it's snug by tugging on the cable; we don't want it coming out when players YANK them from the ports! | 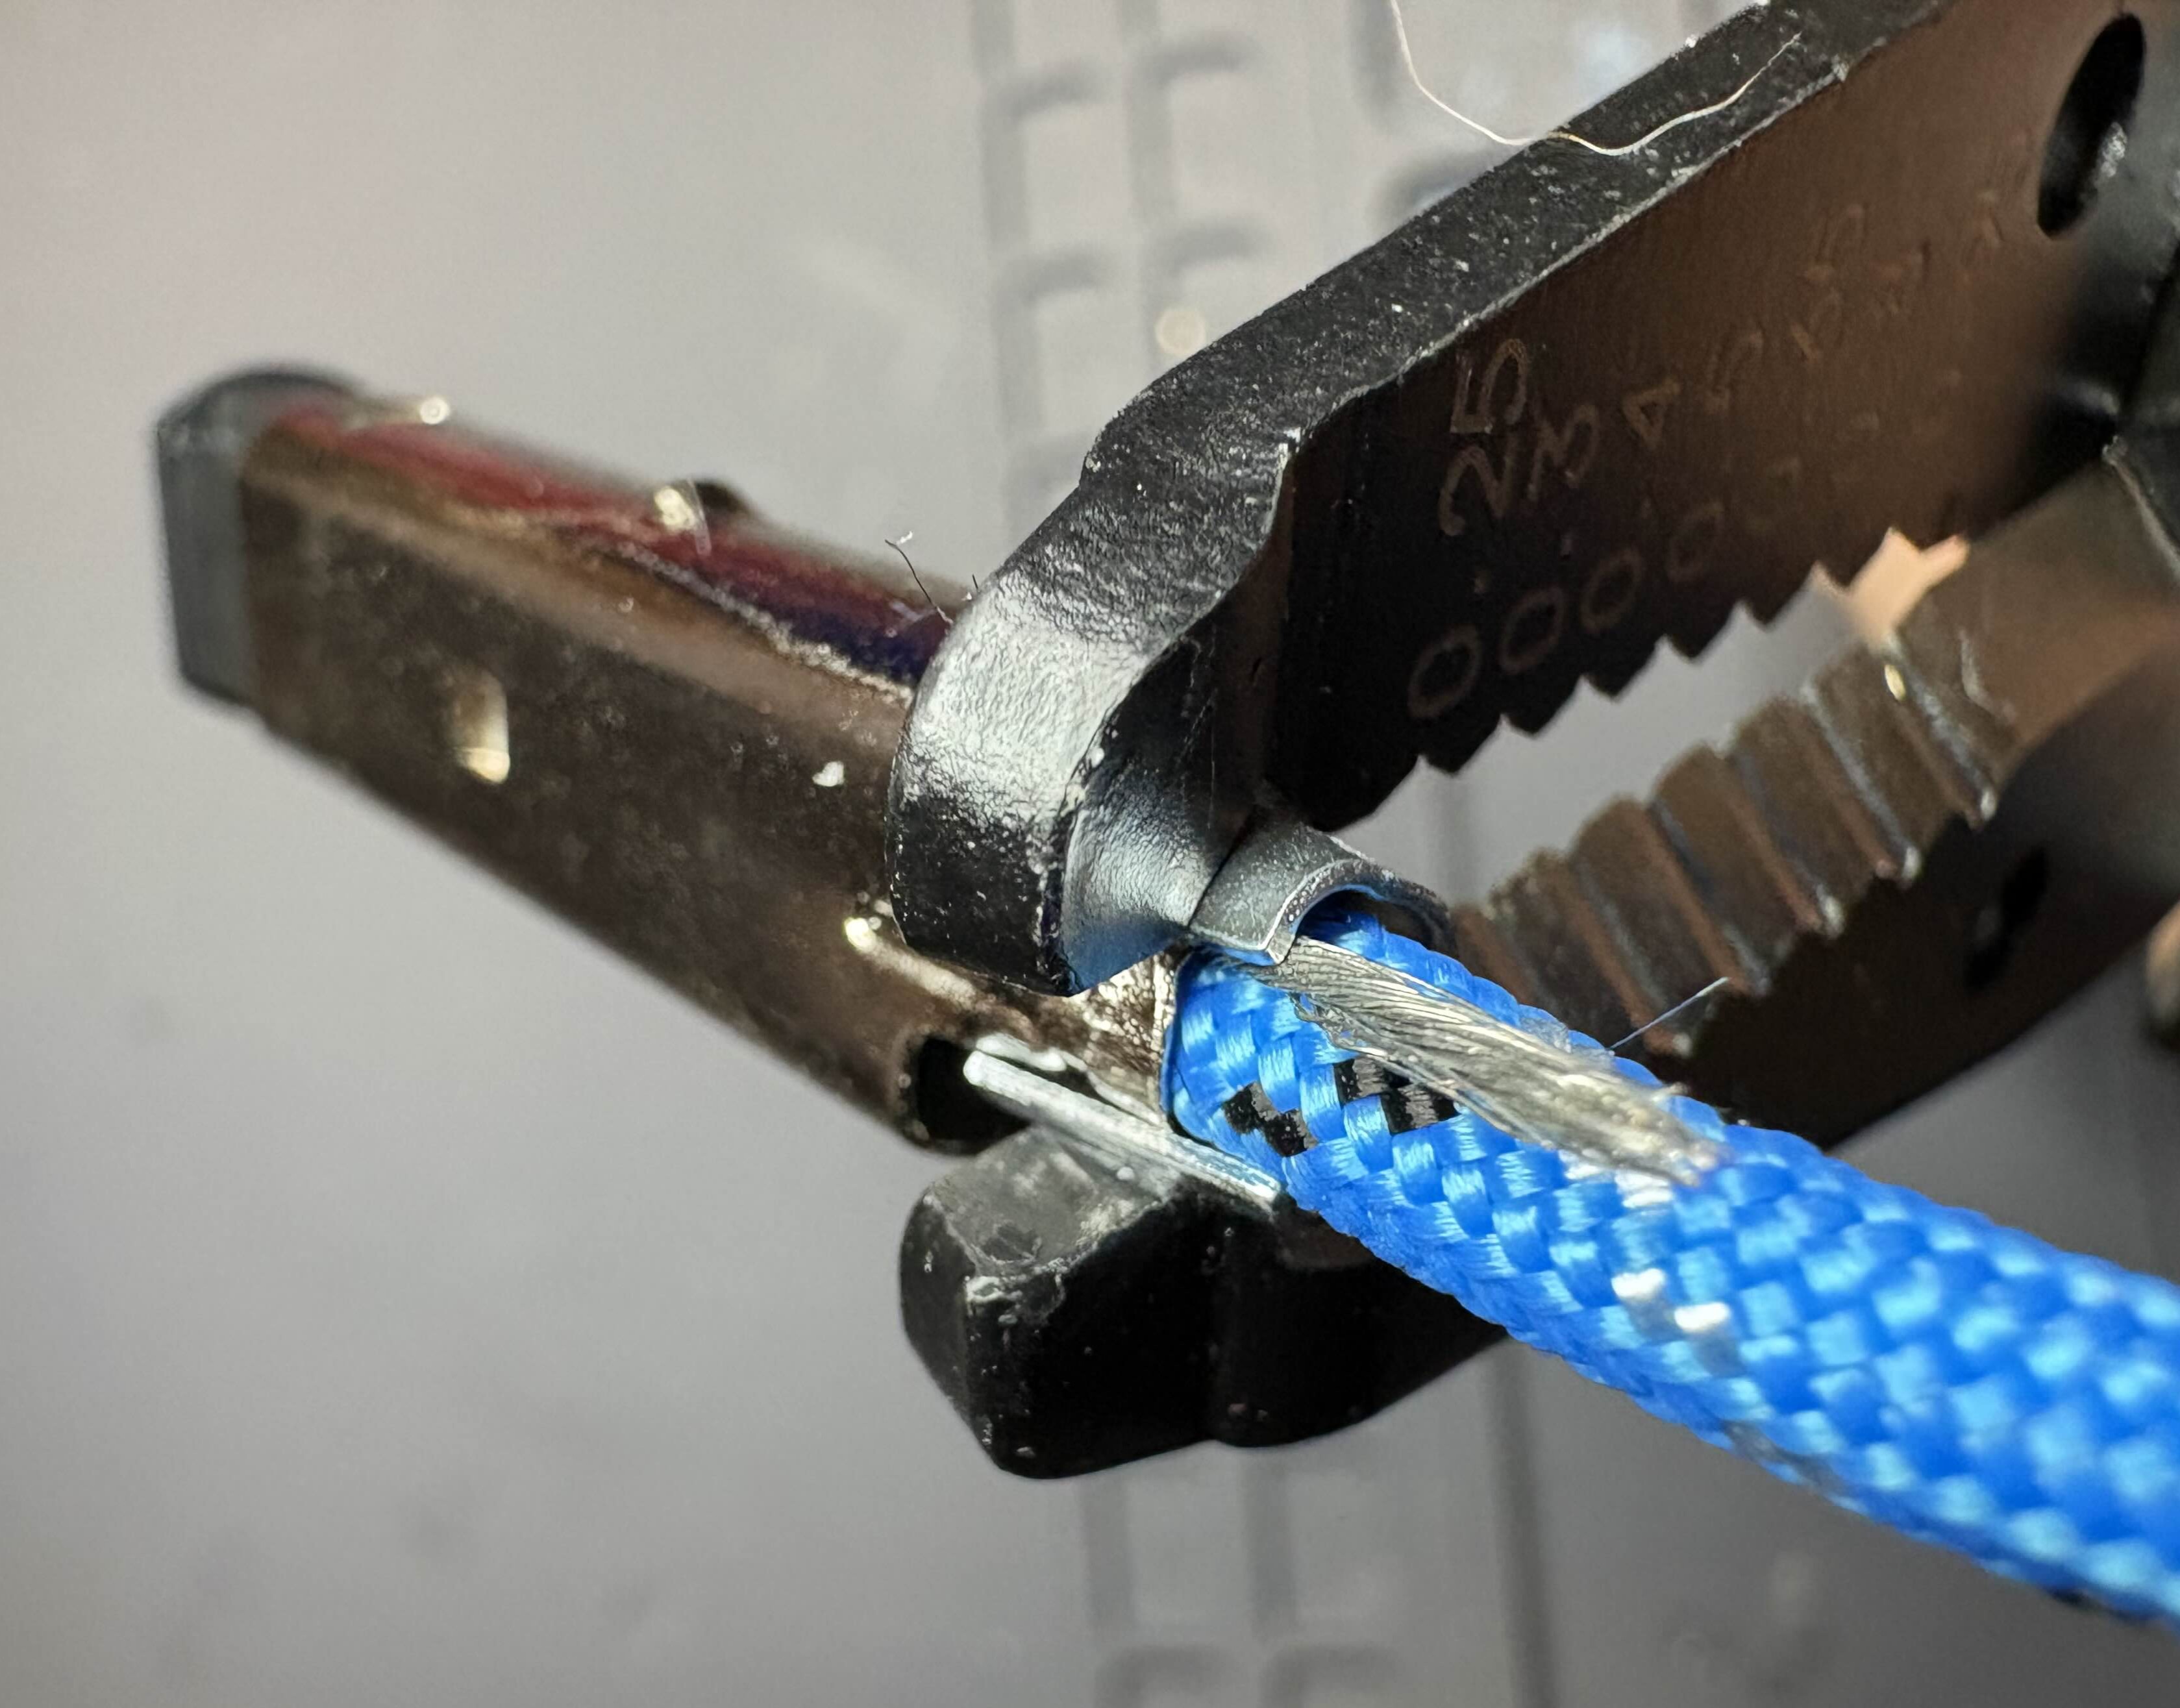 |
| Finally, squeeze together all parts to complete the console end of your cable. This may require some force depending on the plug. | 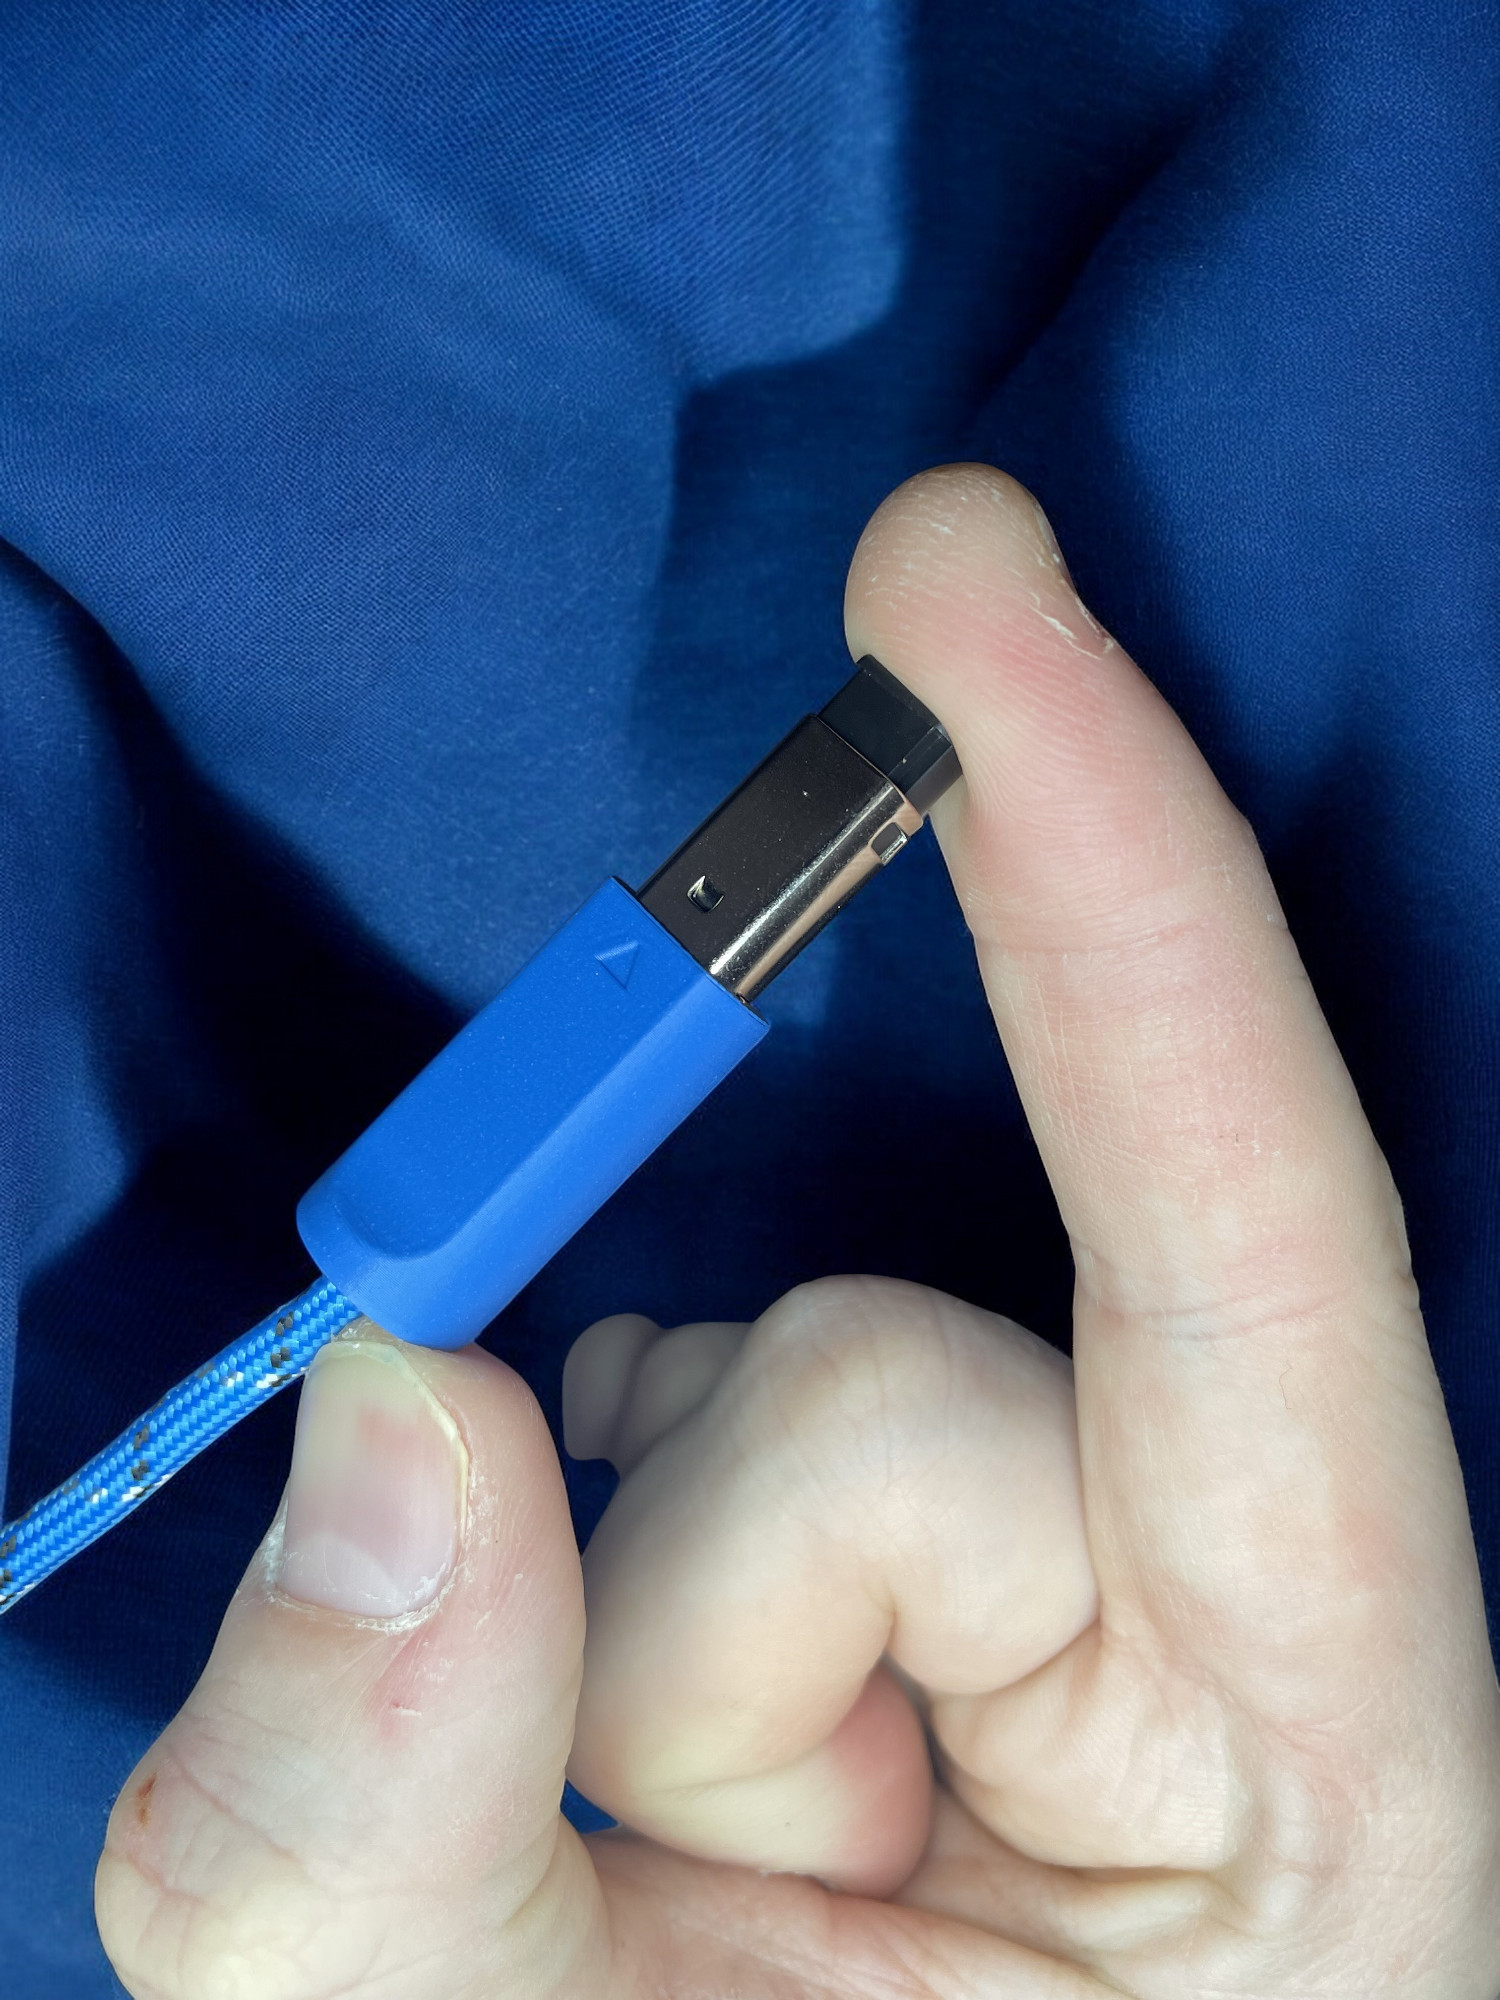 |
Stop
After completing the console end, take your hand and guide it along the entire length of the paracord towards the unfinished end to get out any loose paracord.
Controller Connector
Prep
| Directions | Image |
|---|---|
| Cut a piece of 1/4" heat-shrink tubing (adhesive-lined preferred) about 20mm in length (a little less than 1 inch) and slide it on the cable over top of the paracord. | 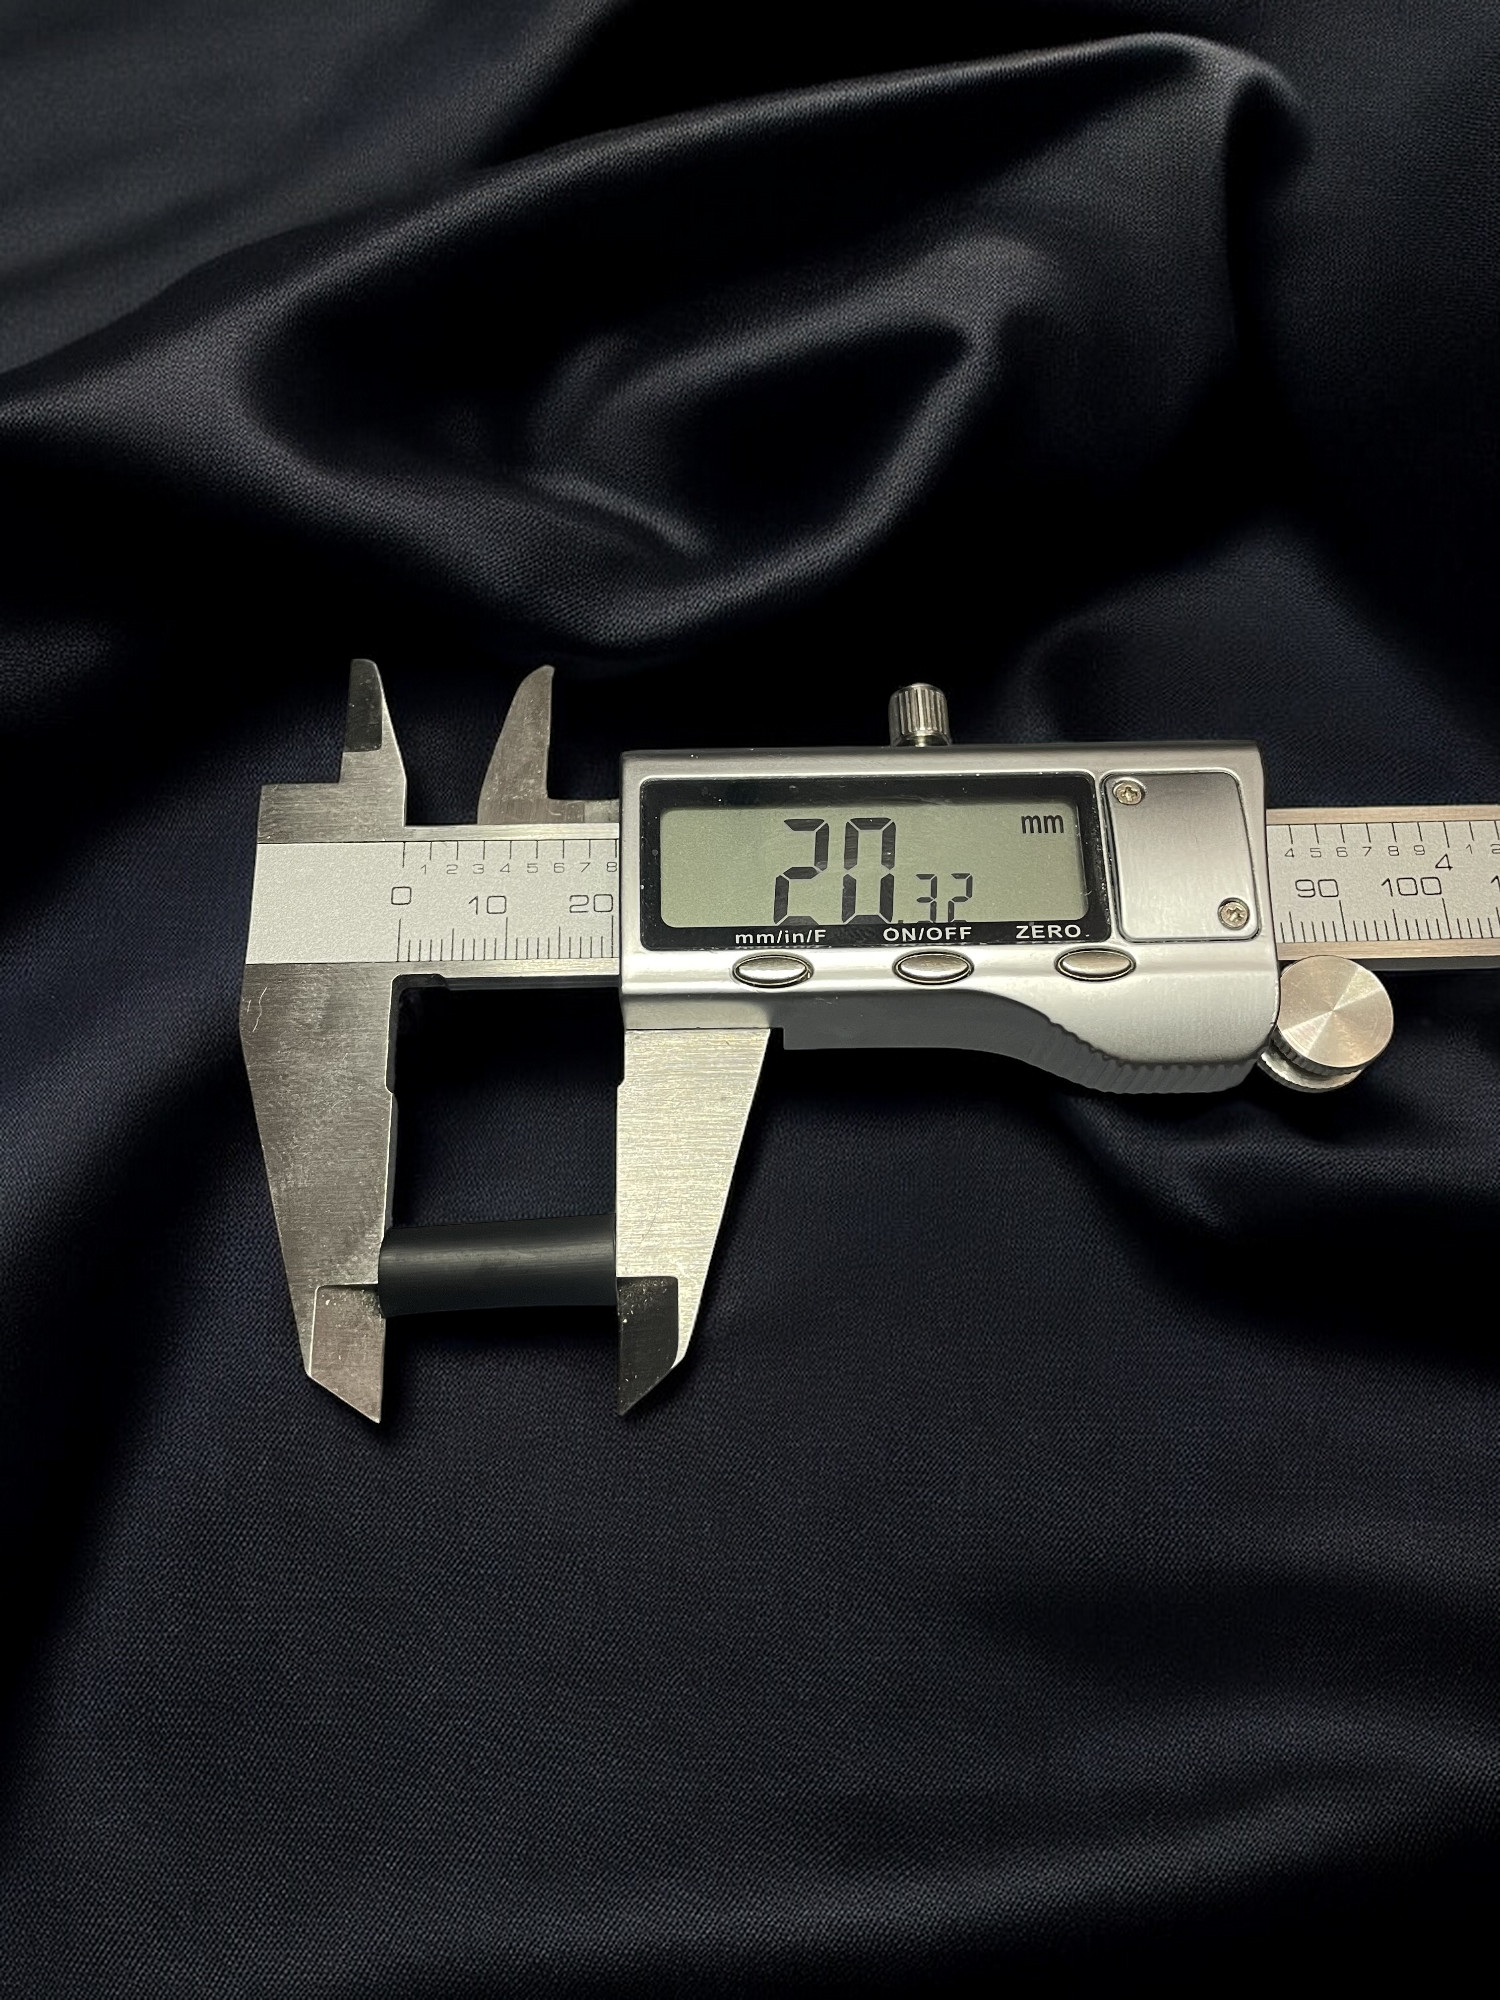 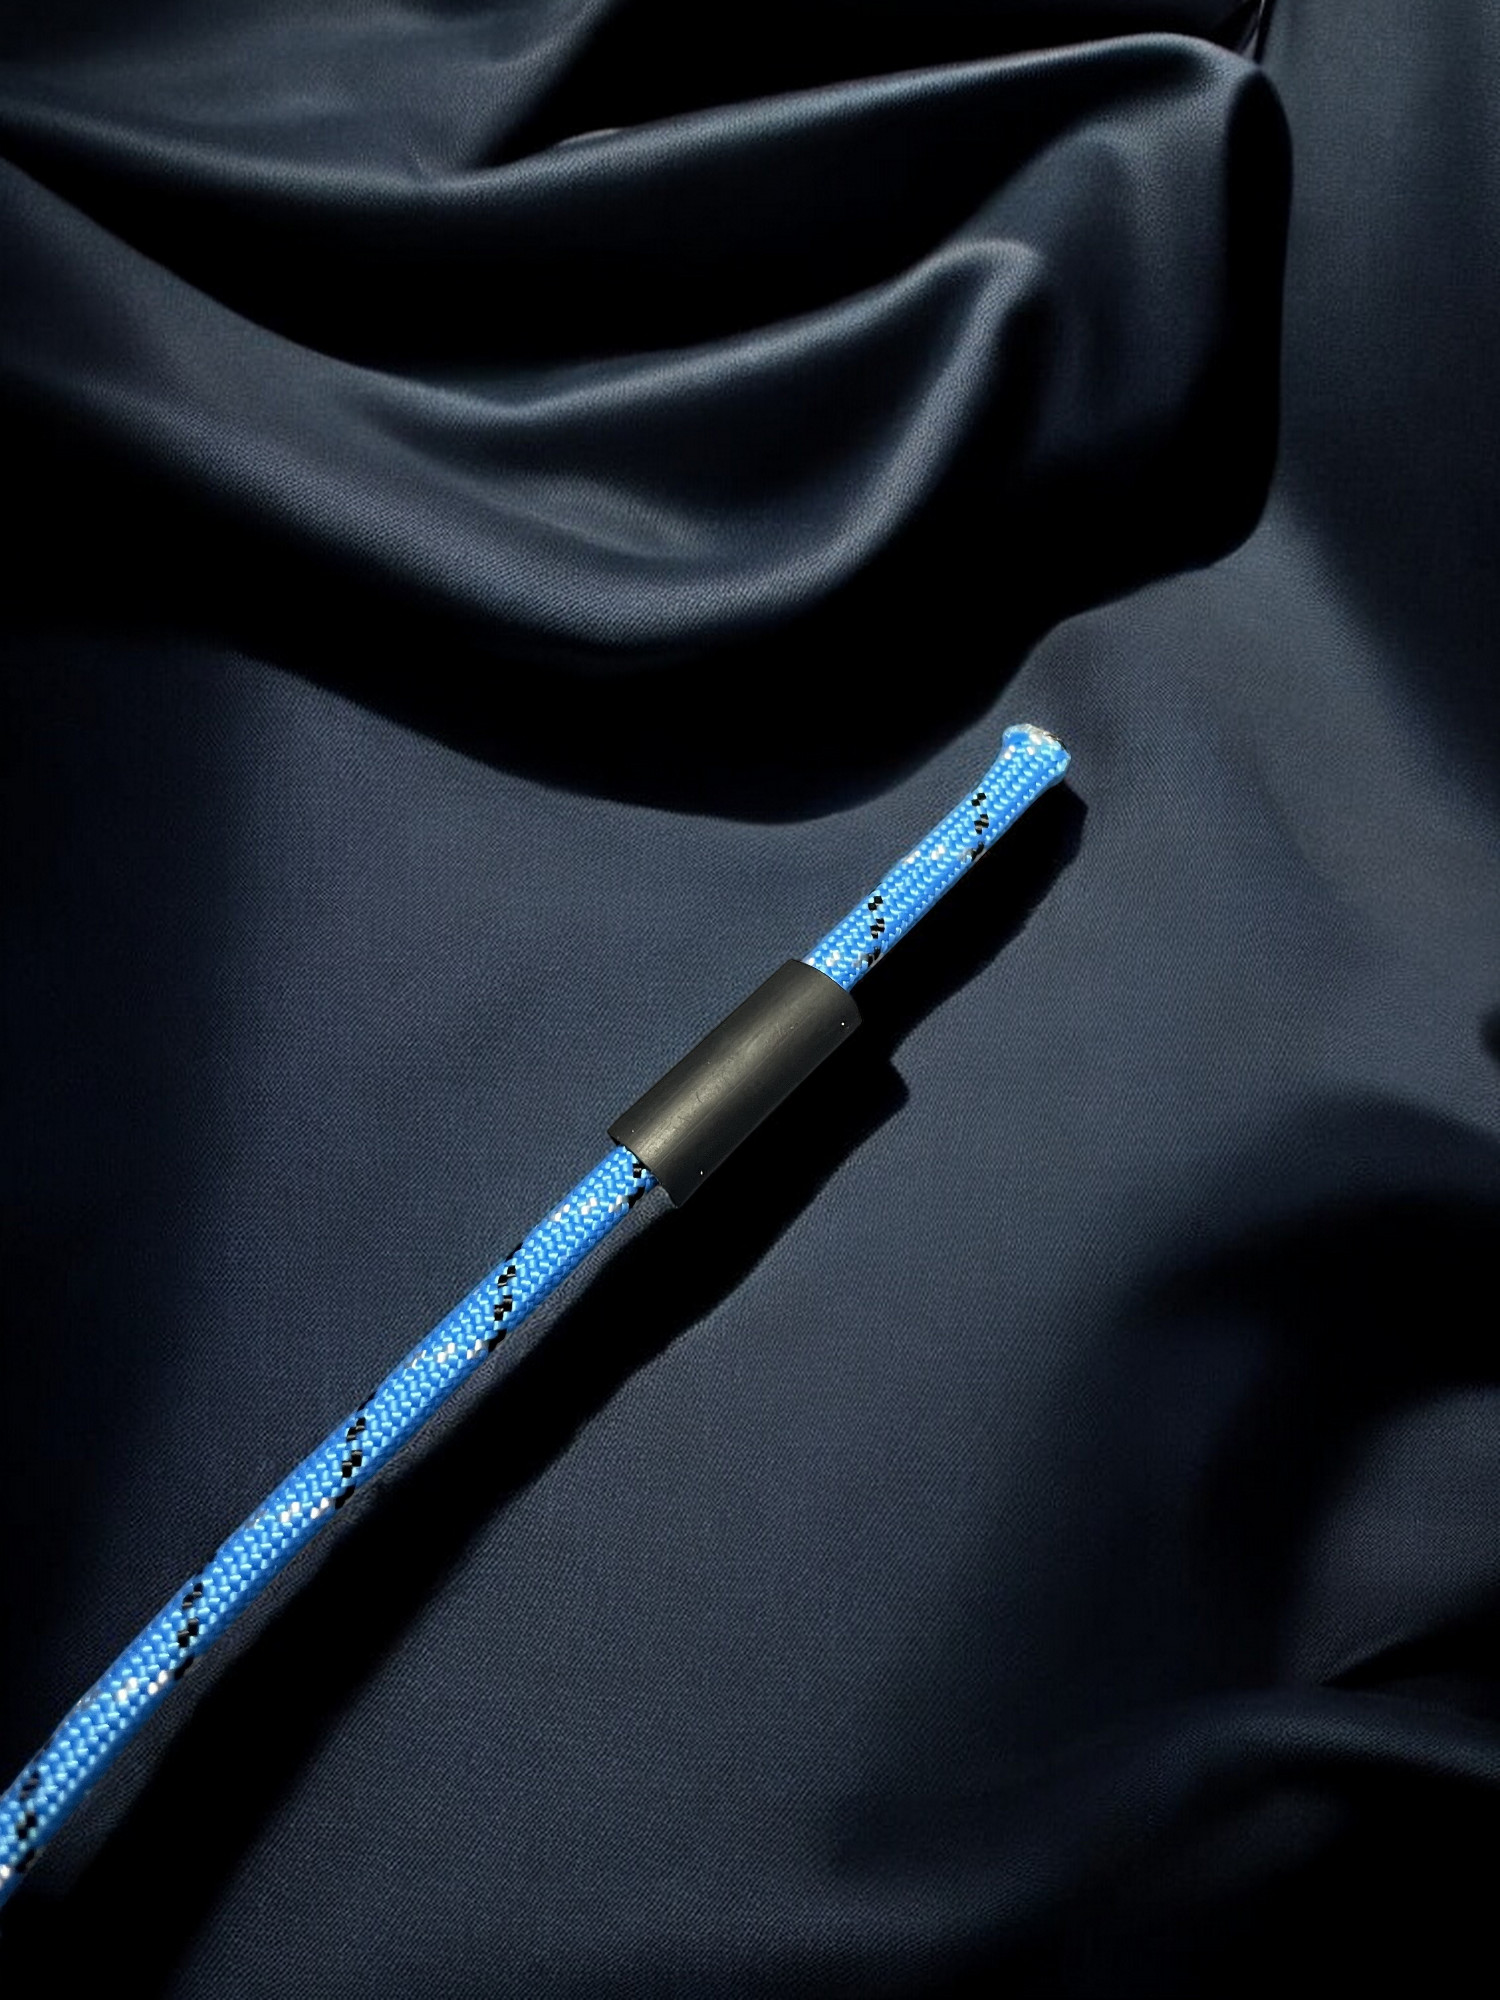 |
| Pull back the paracord to expose some cable underneath (picture shows tape from sleeving step). | 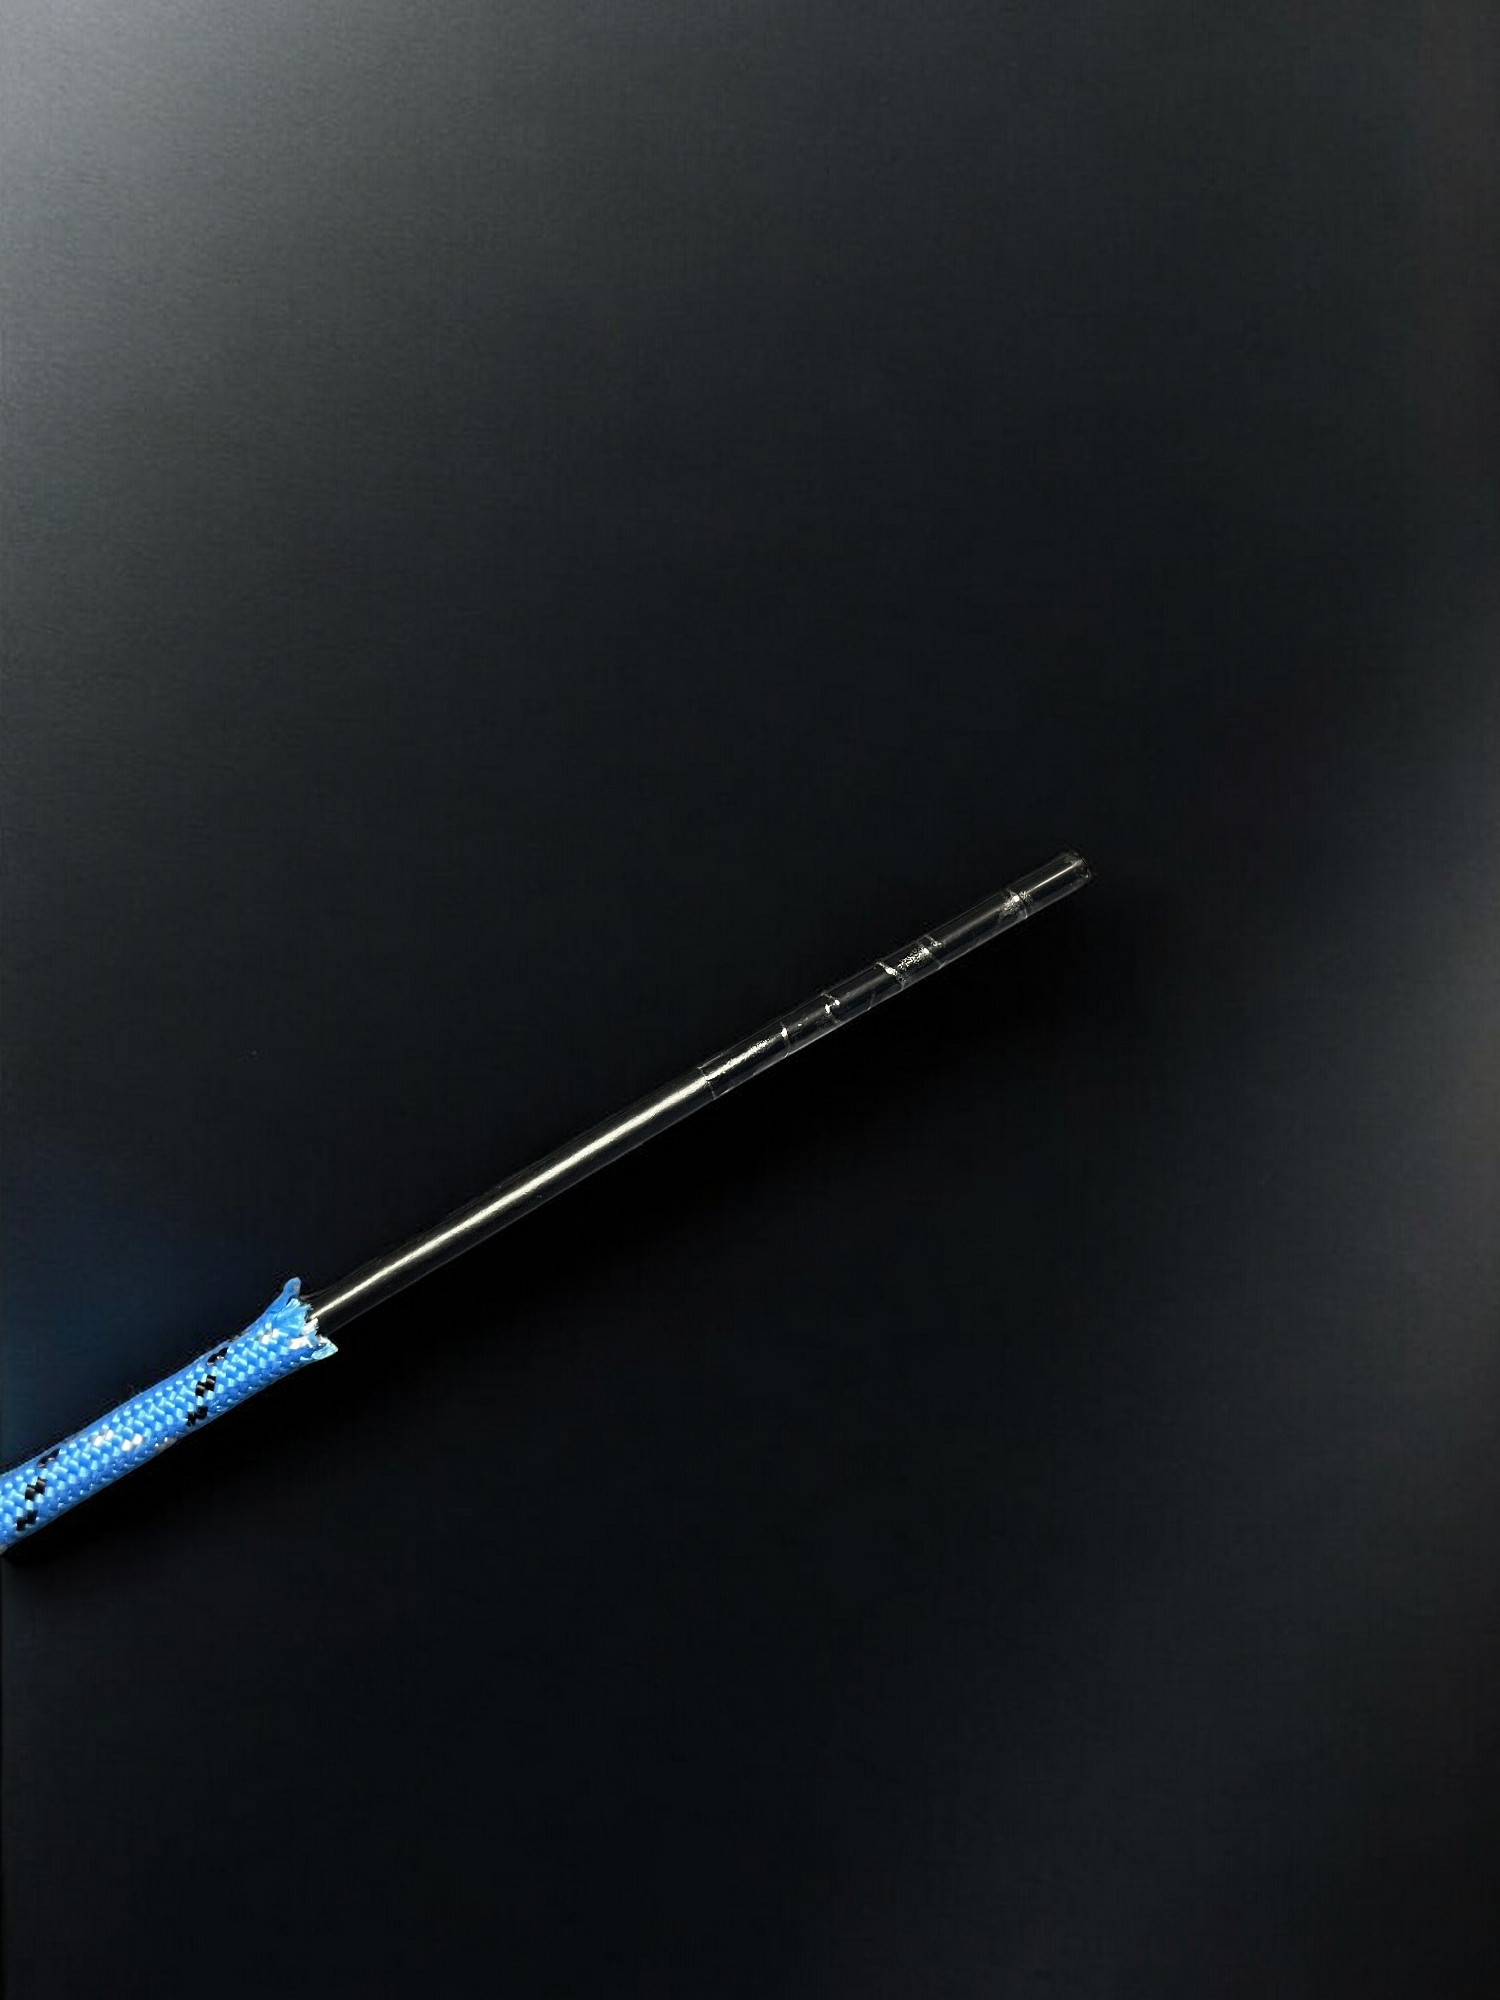 |
| Strip off sheathing and expose somewhere around 30-40mm of wire. | 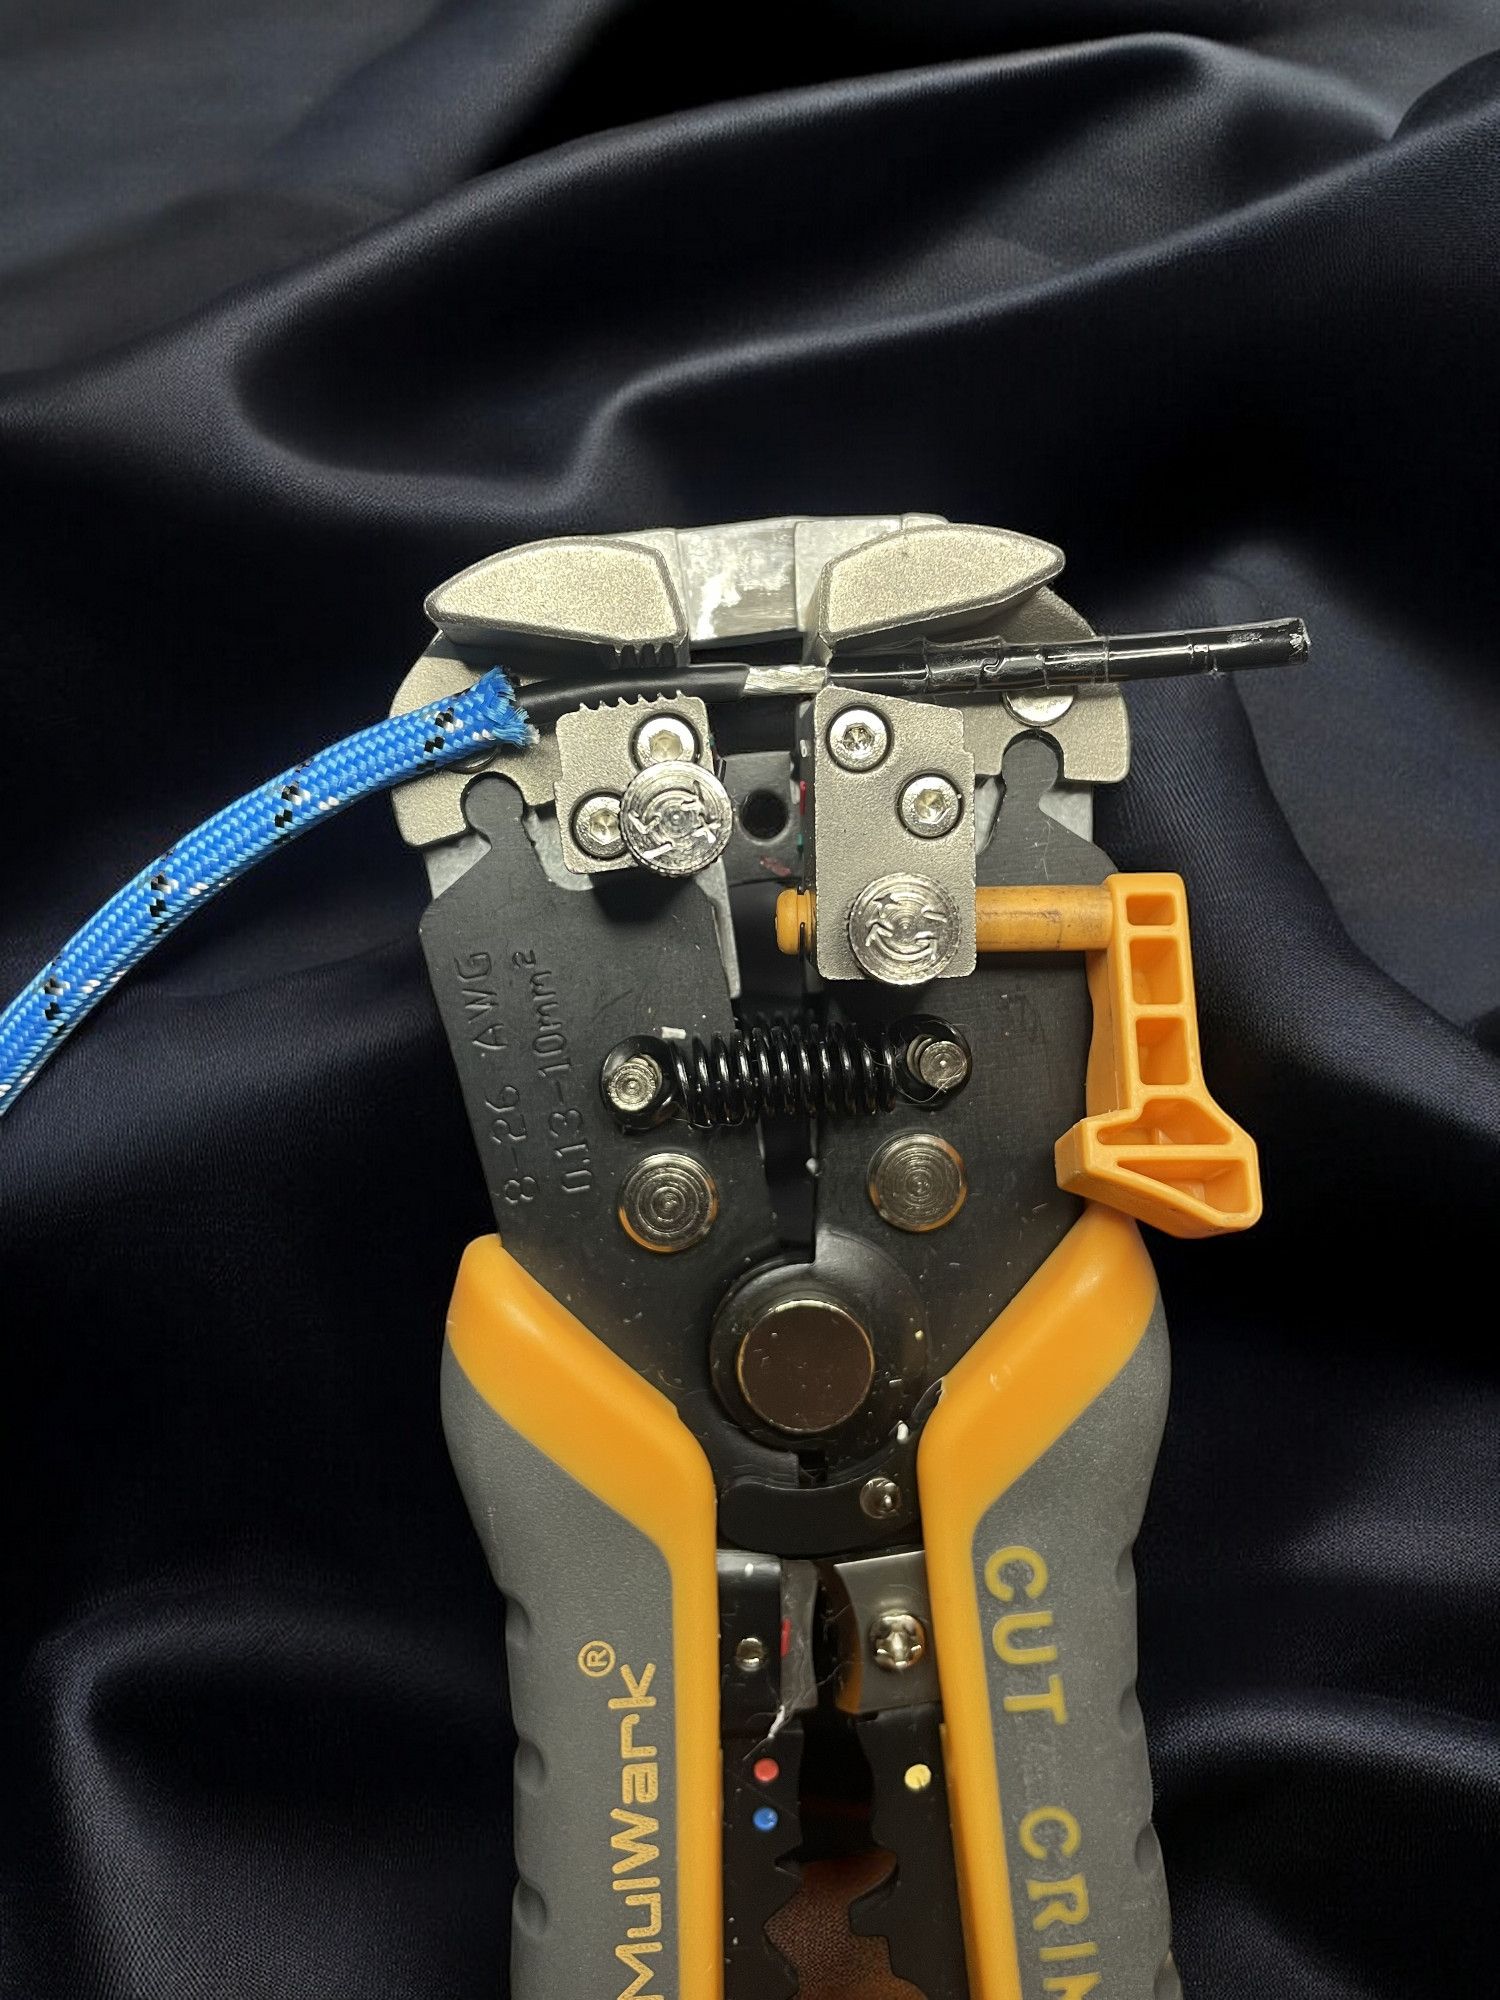 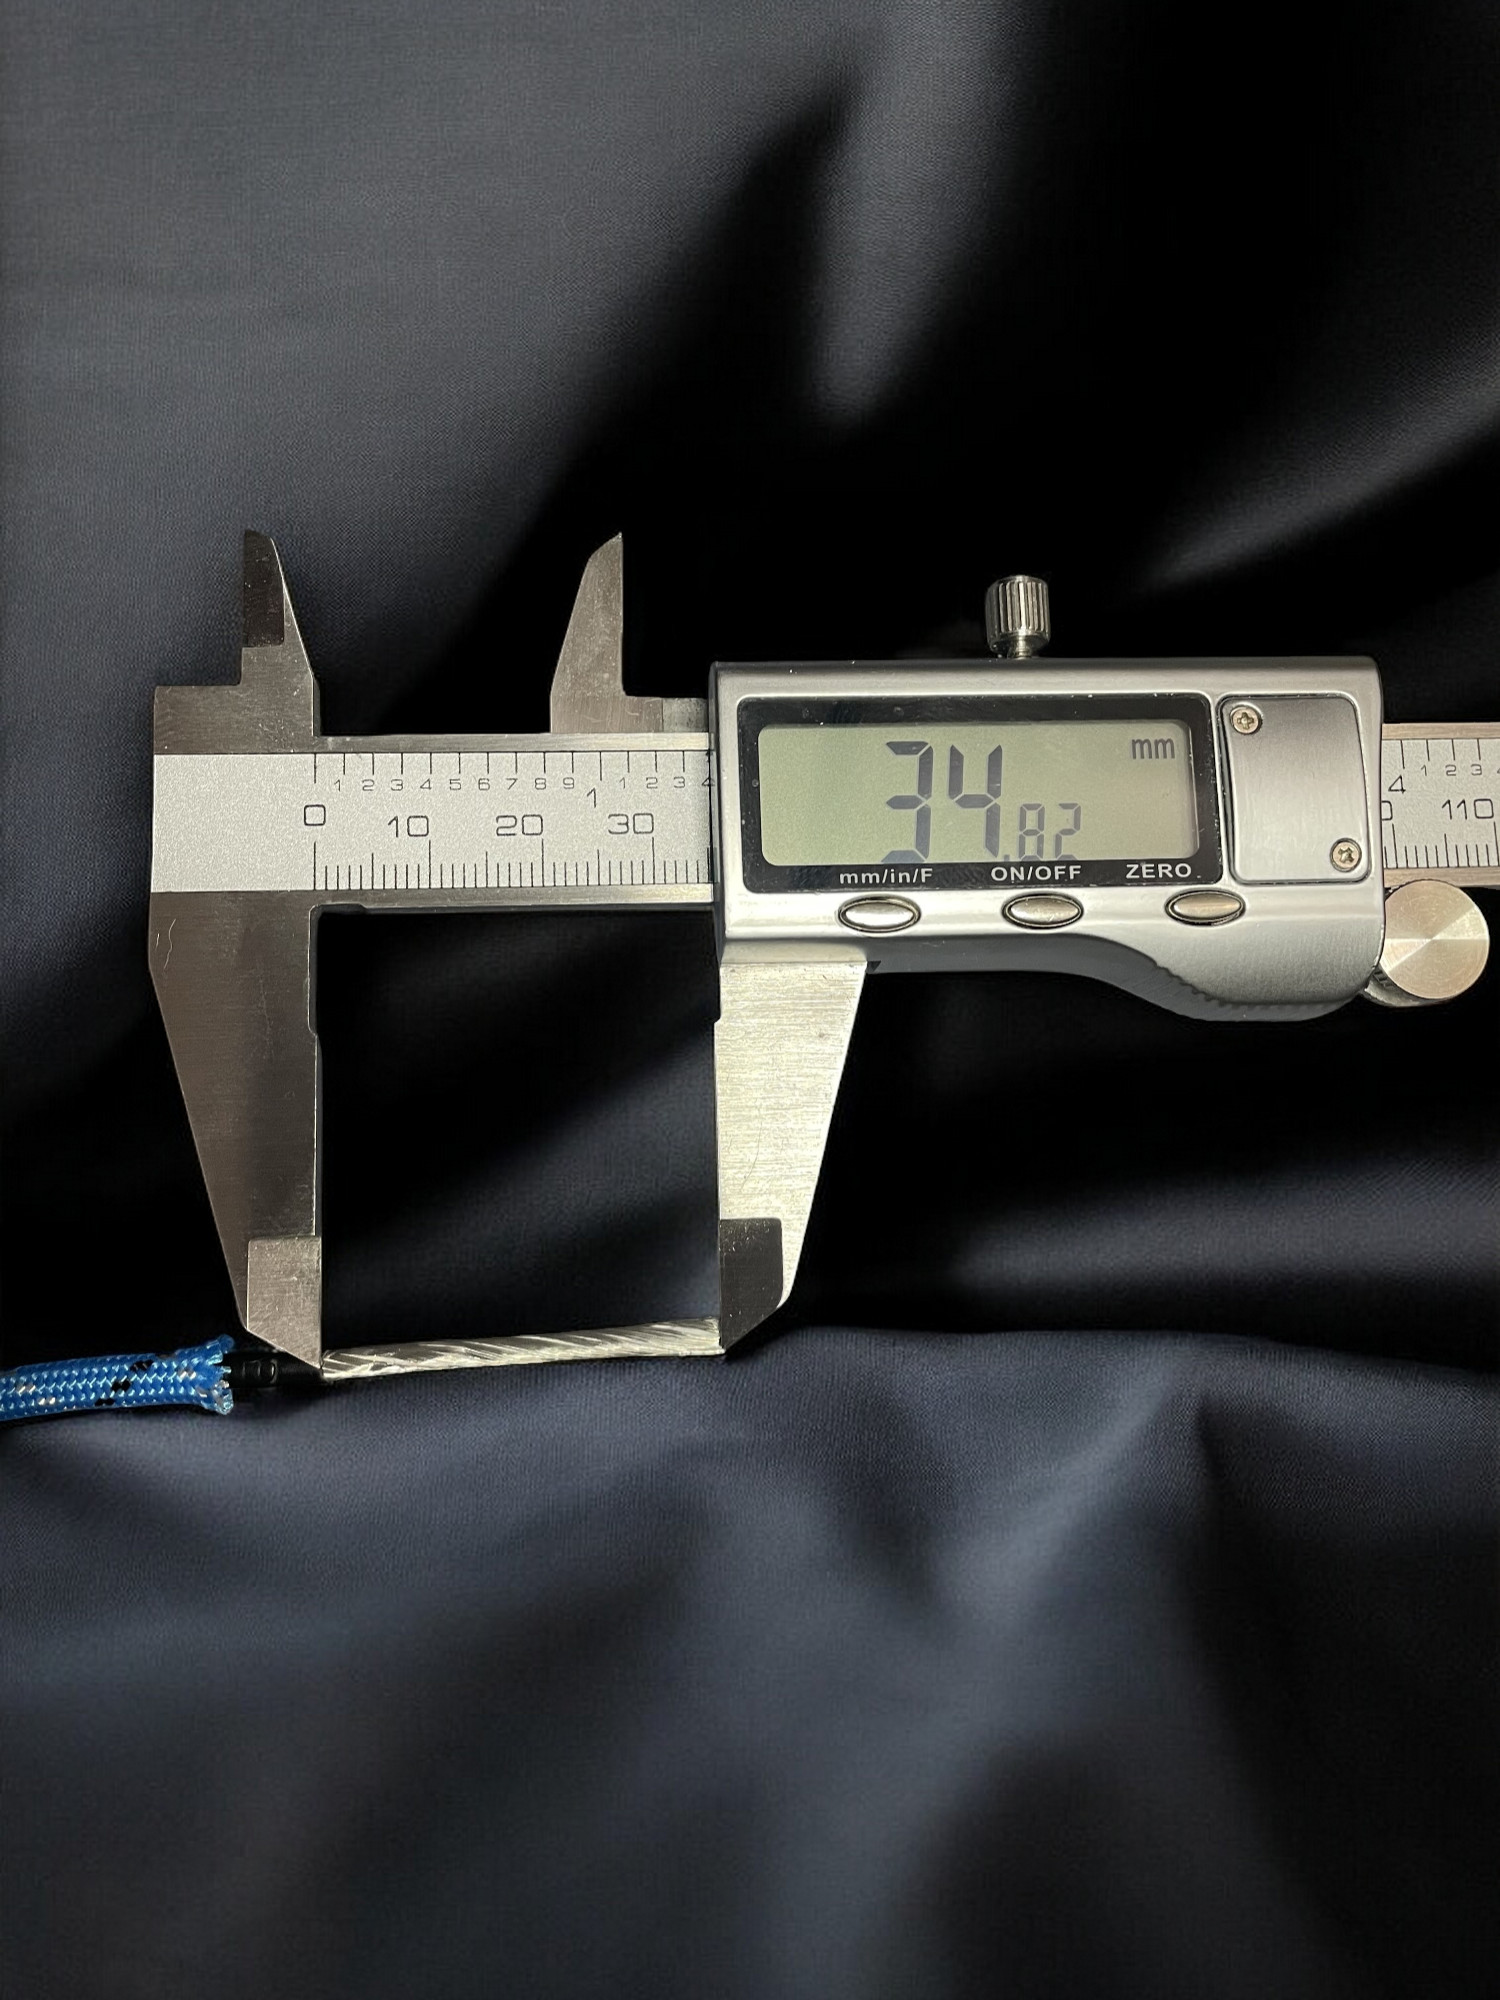 |
| Separate exposed shielding into two halves (doesn't have to be perfect, just approximate). Cut and discard one of the bunches off at the bottom. We do this so that the bunch is small enough for our JST pins. | 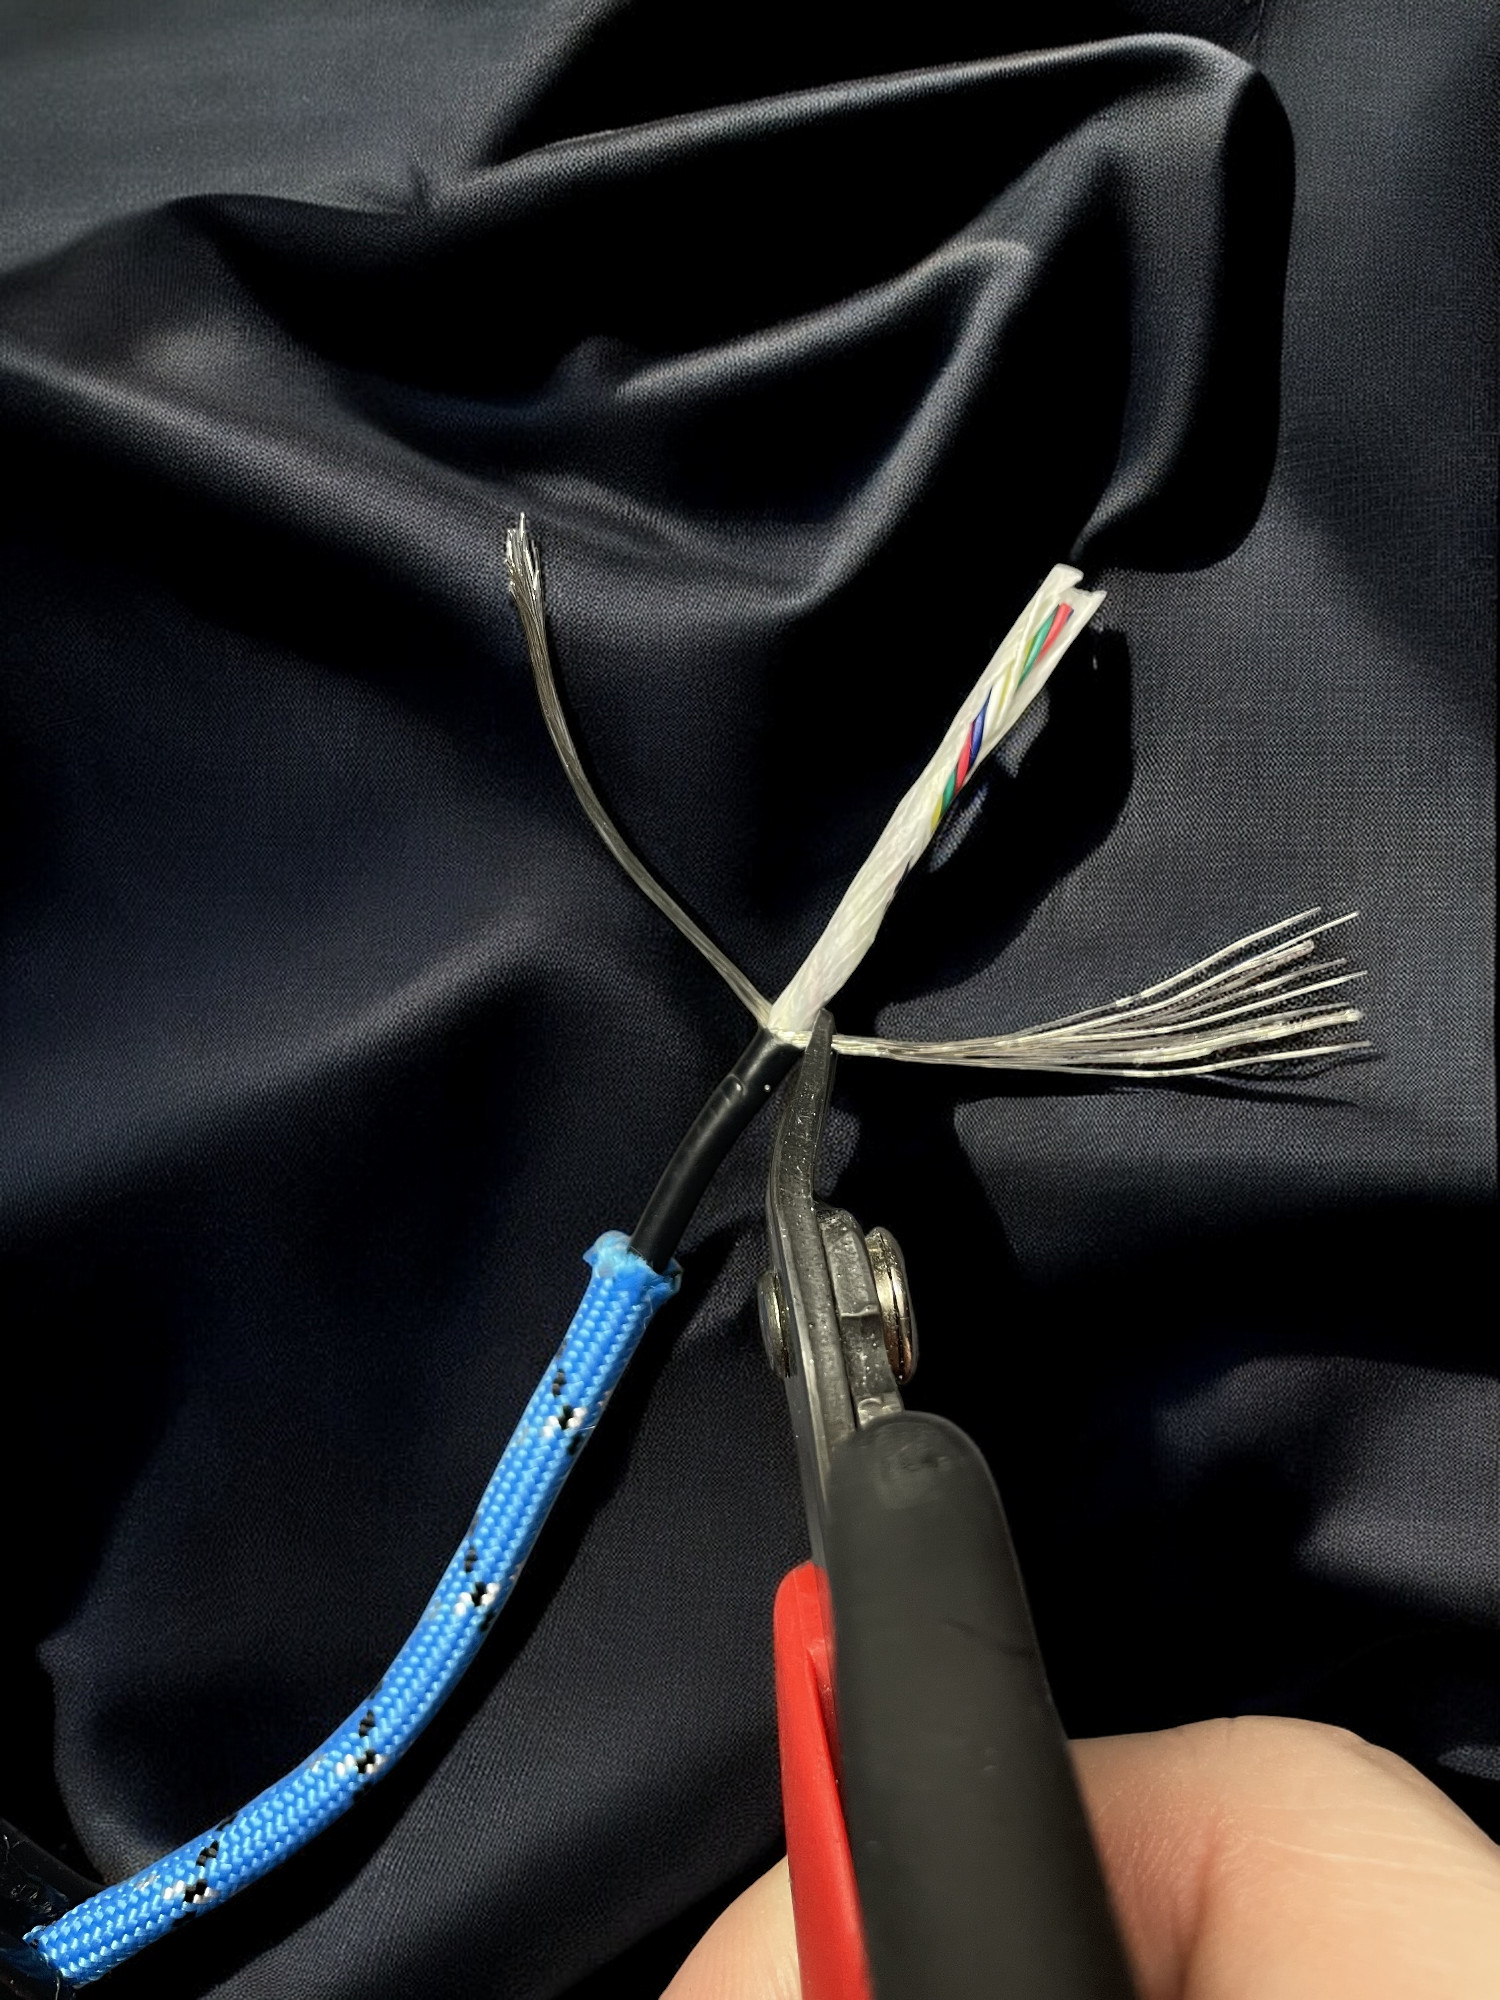 |
| Tear off paper surrounding inner wires. Unravel/unwind 5 inner wires. Cut off 3 soft strings (used as strengthener/ripcord). | 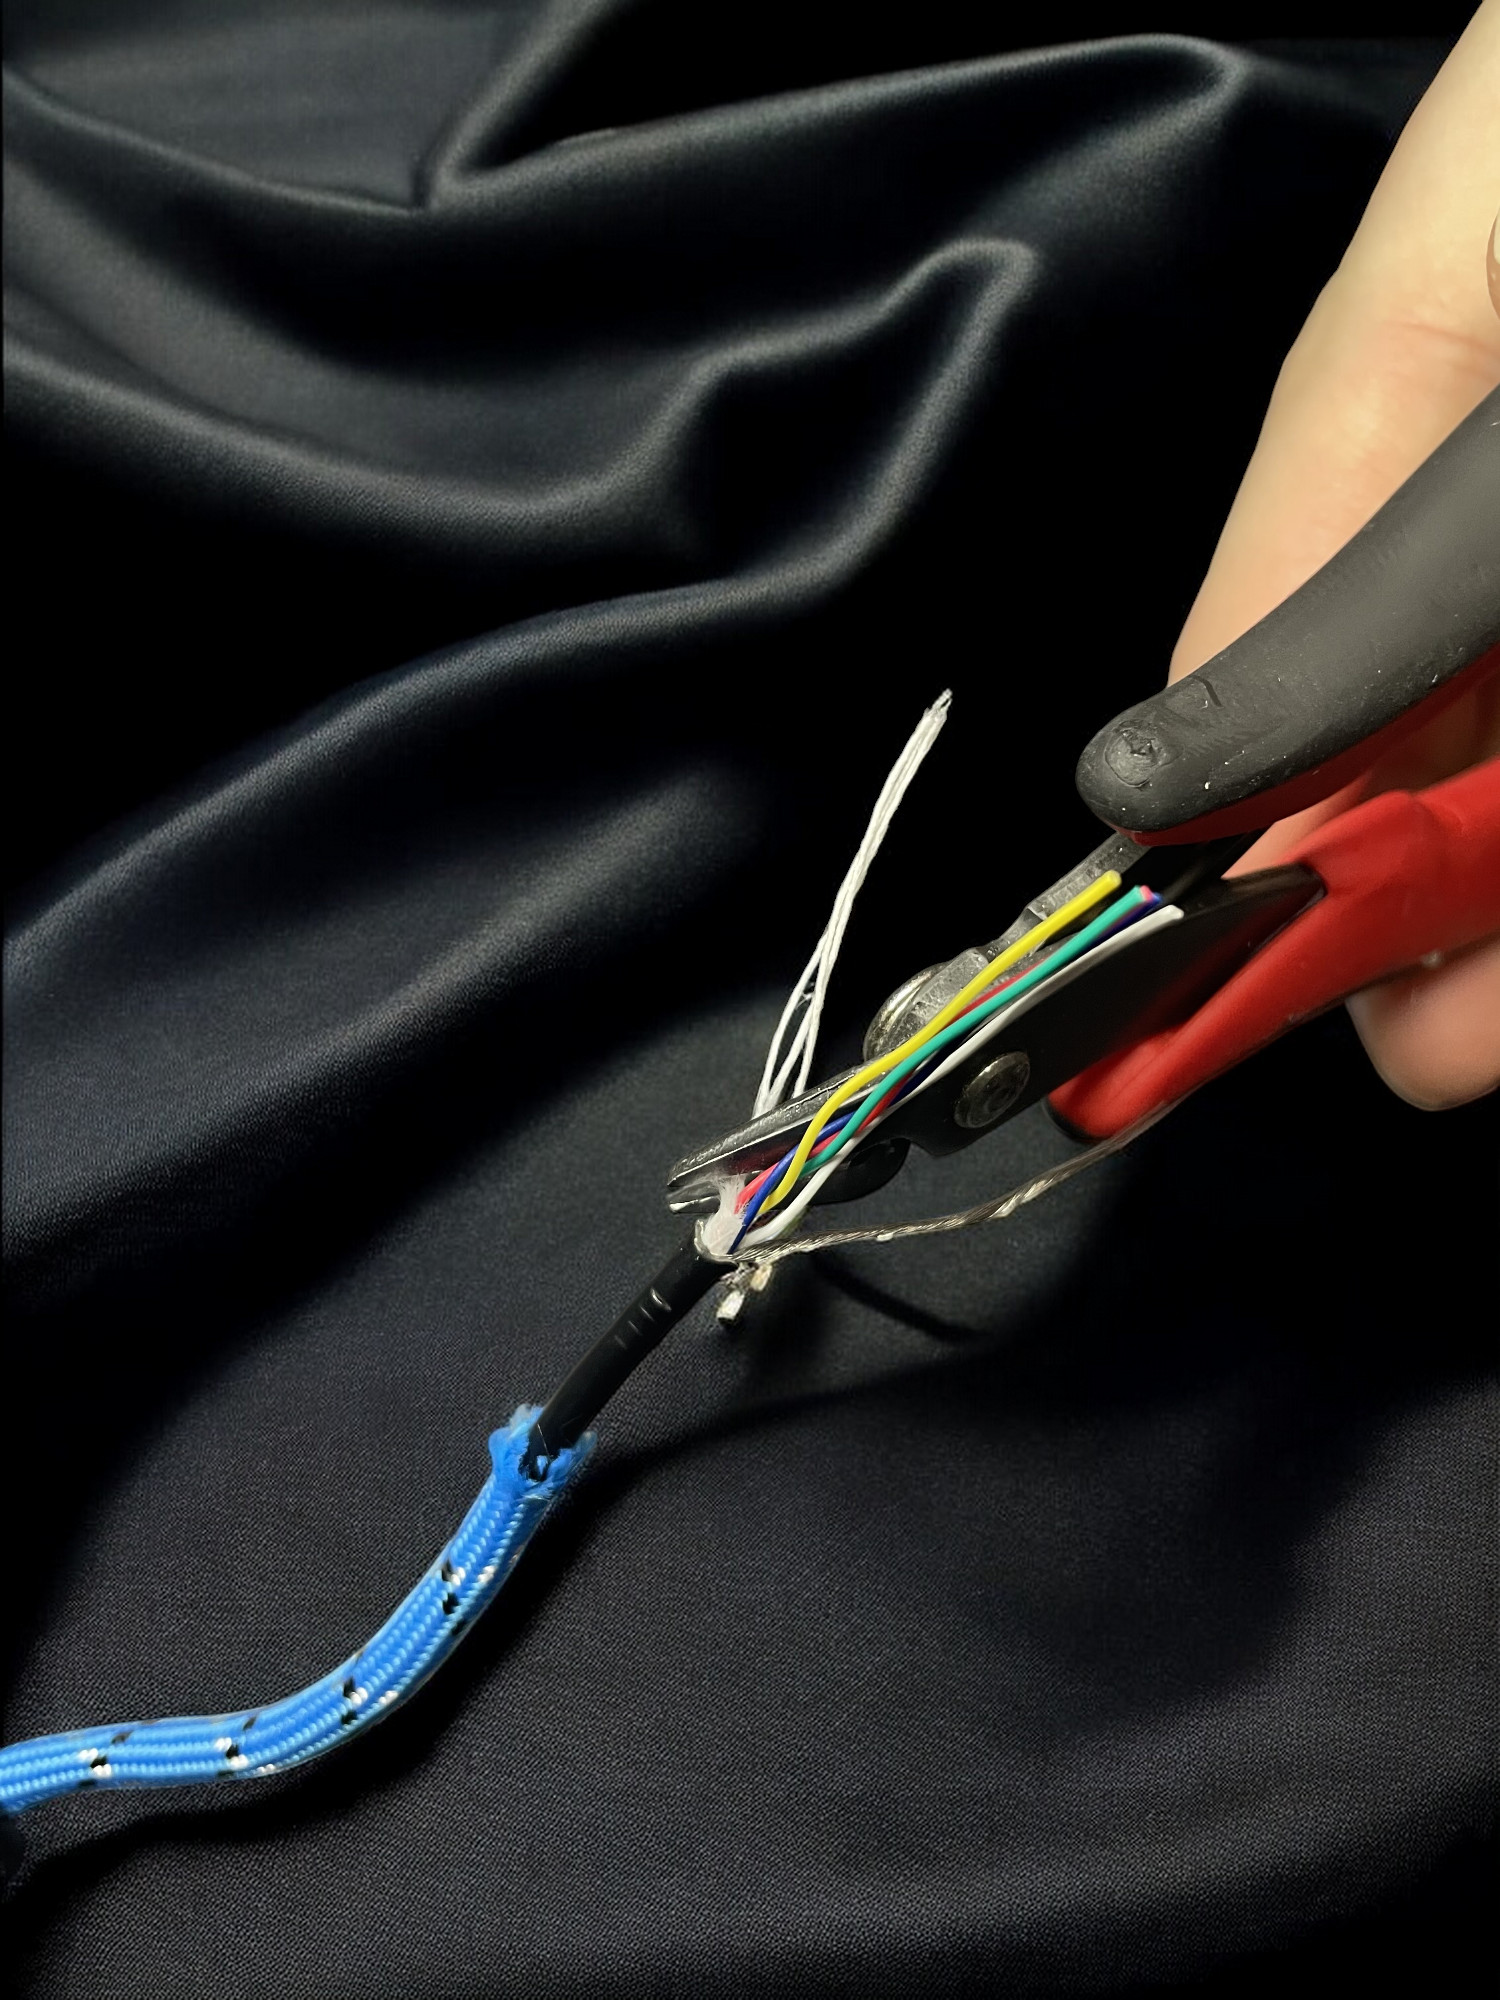 |
| Go back to the single remaining bunch of exposed drain wire and continually wind up in either direction until stiff. Ensure there are no loose strands flying in random directions. Using flush cutters or sharp scissors, cut off a very small portion near the tip so that they all sit nice and even. | 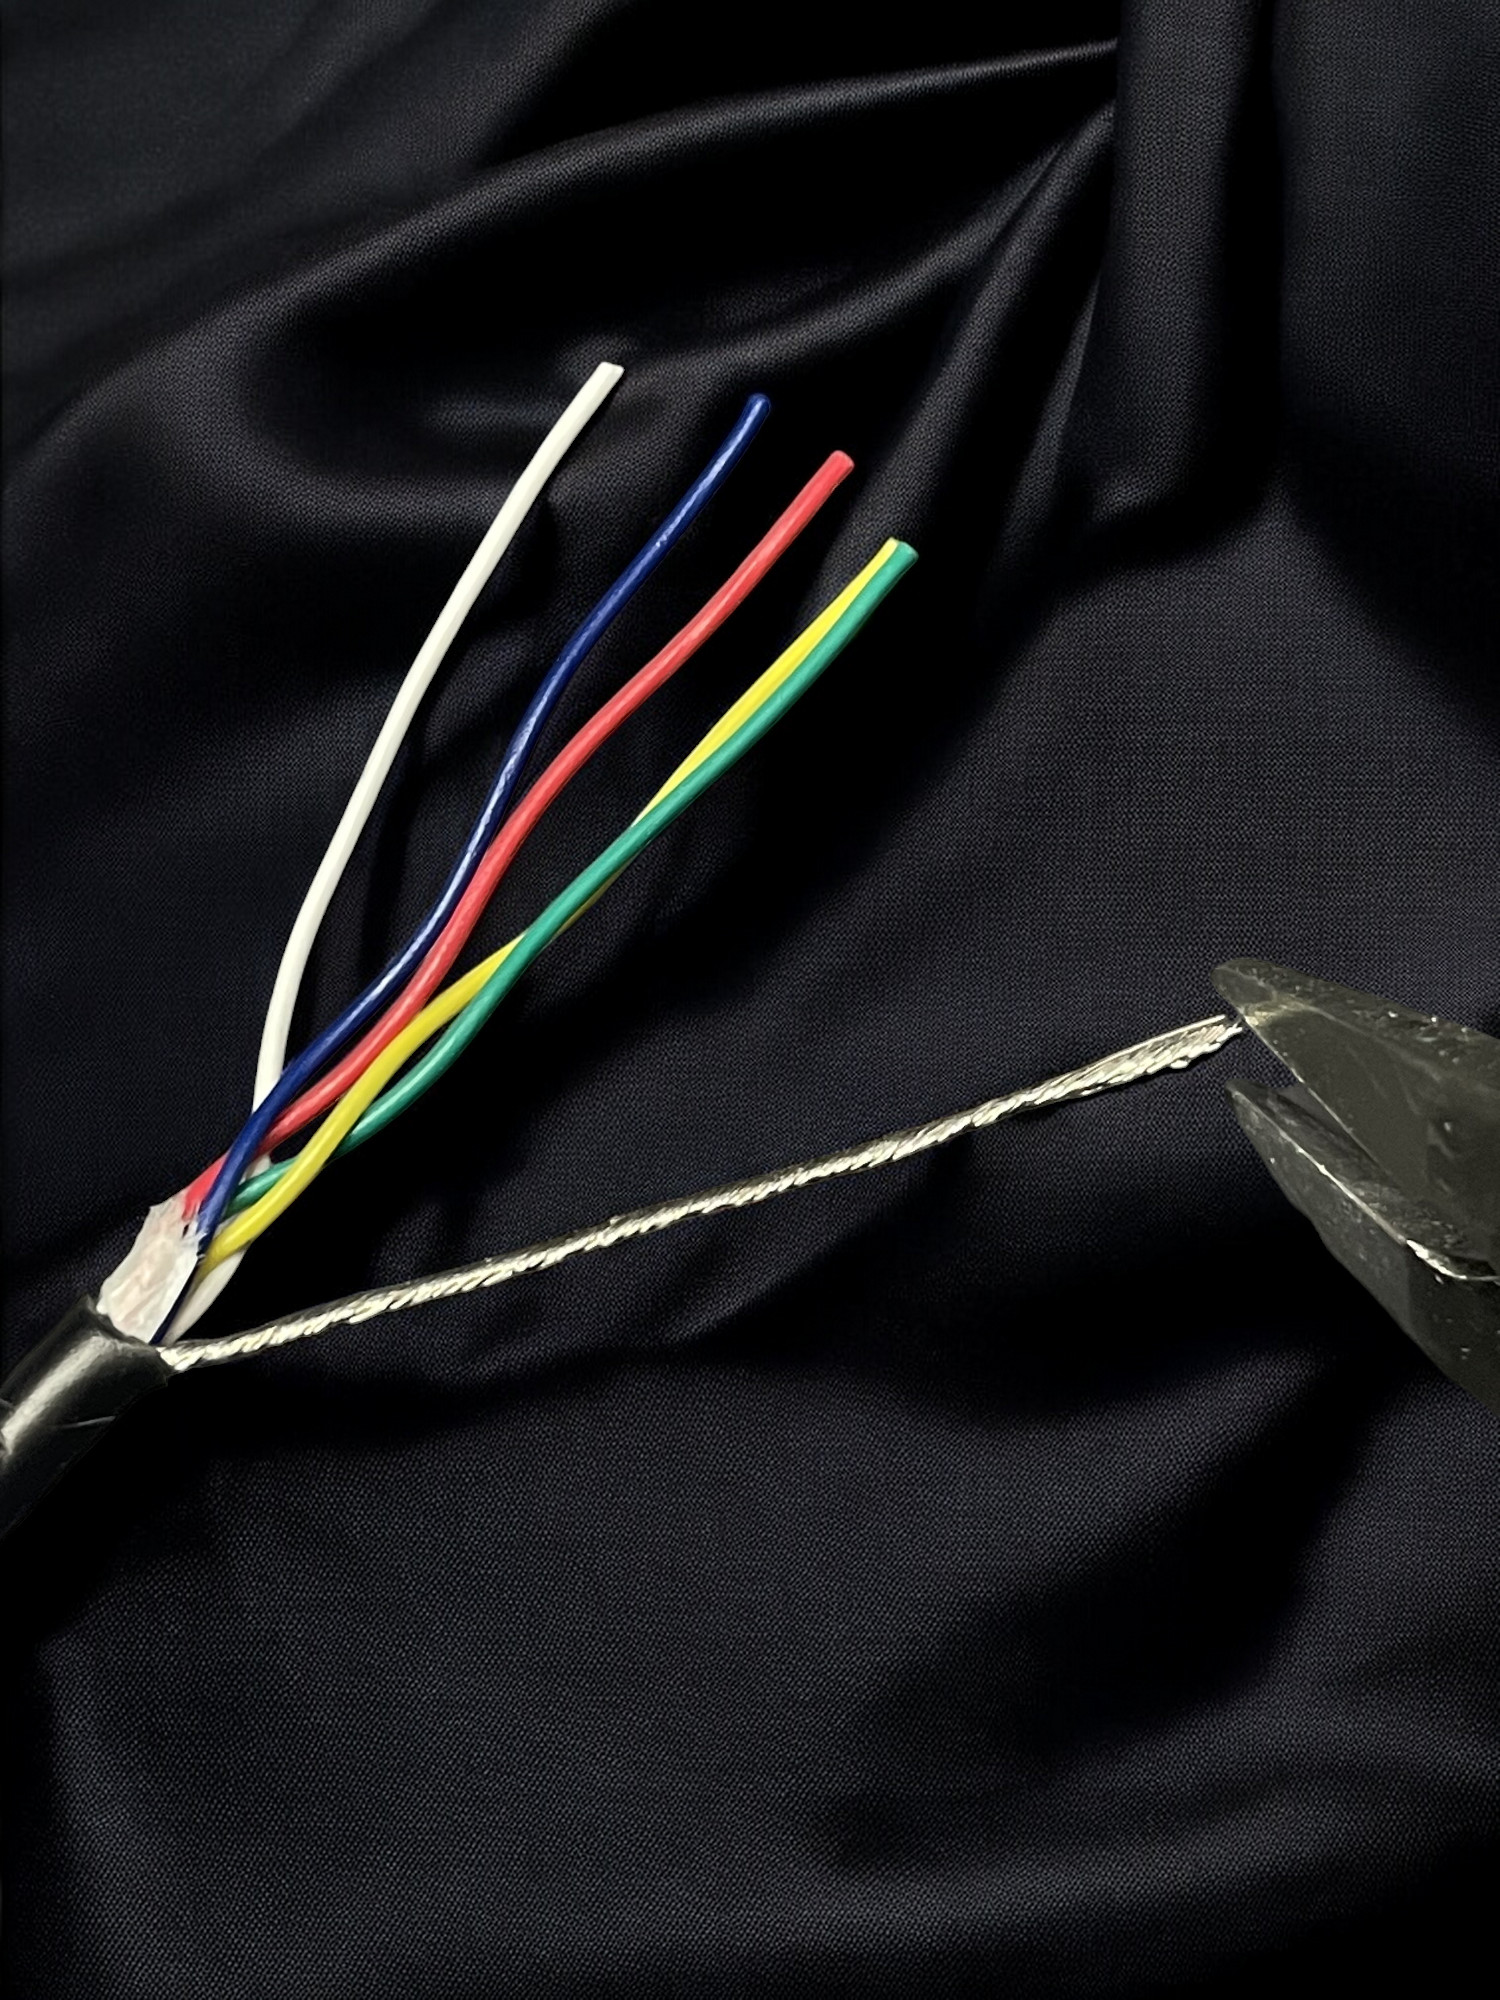 |
| Cut a piece of your 1/42" heat shrink tubing to cover the exposed drain wire, leaving approximately 2-3 millimeters of room at the end for the terminal pin. Place it over the wire and apply heat to shrink. | 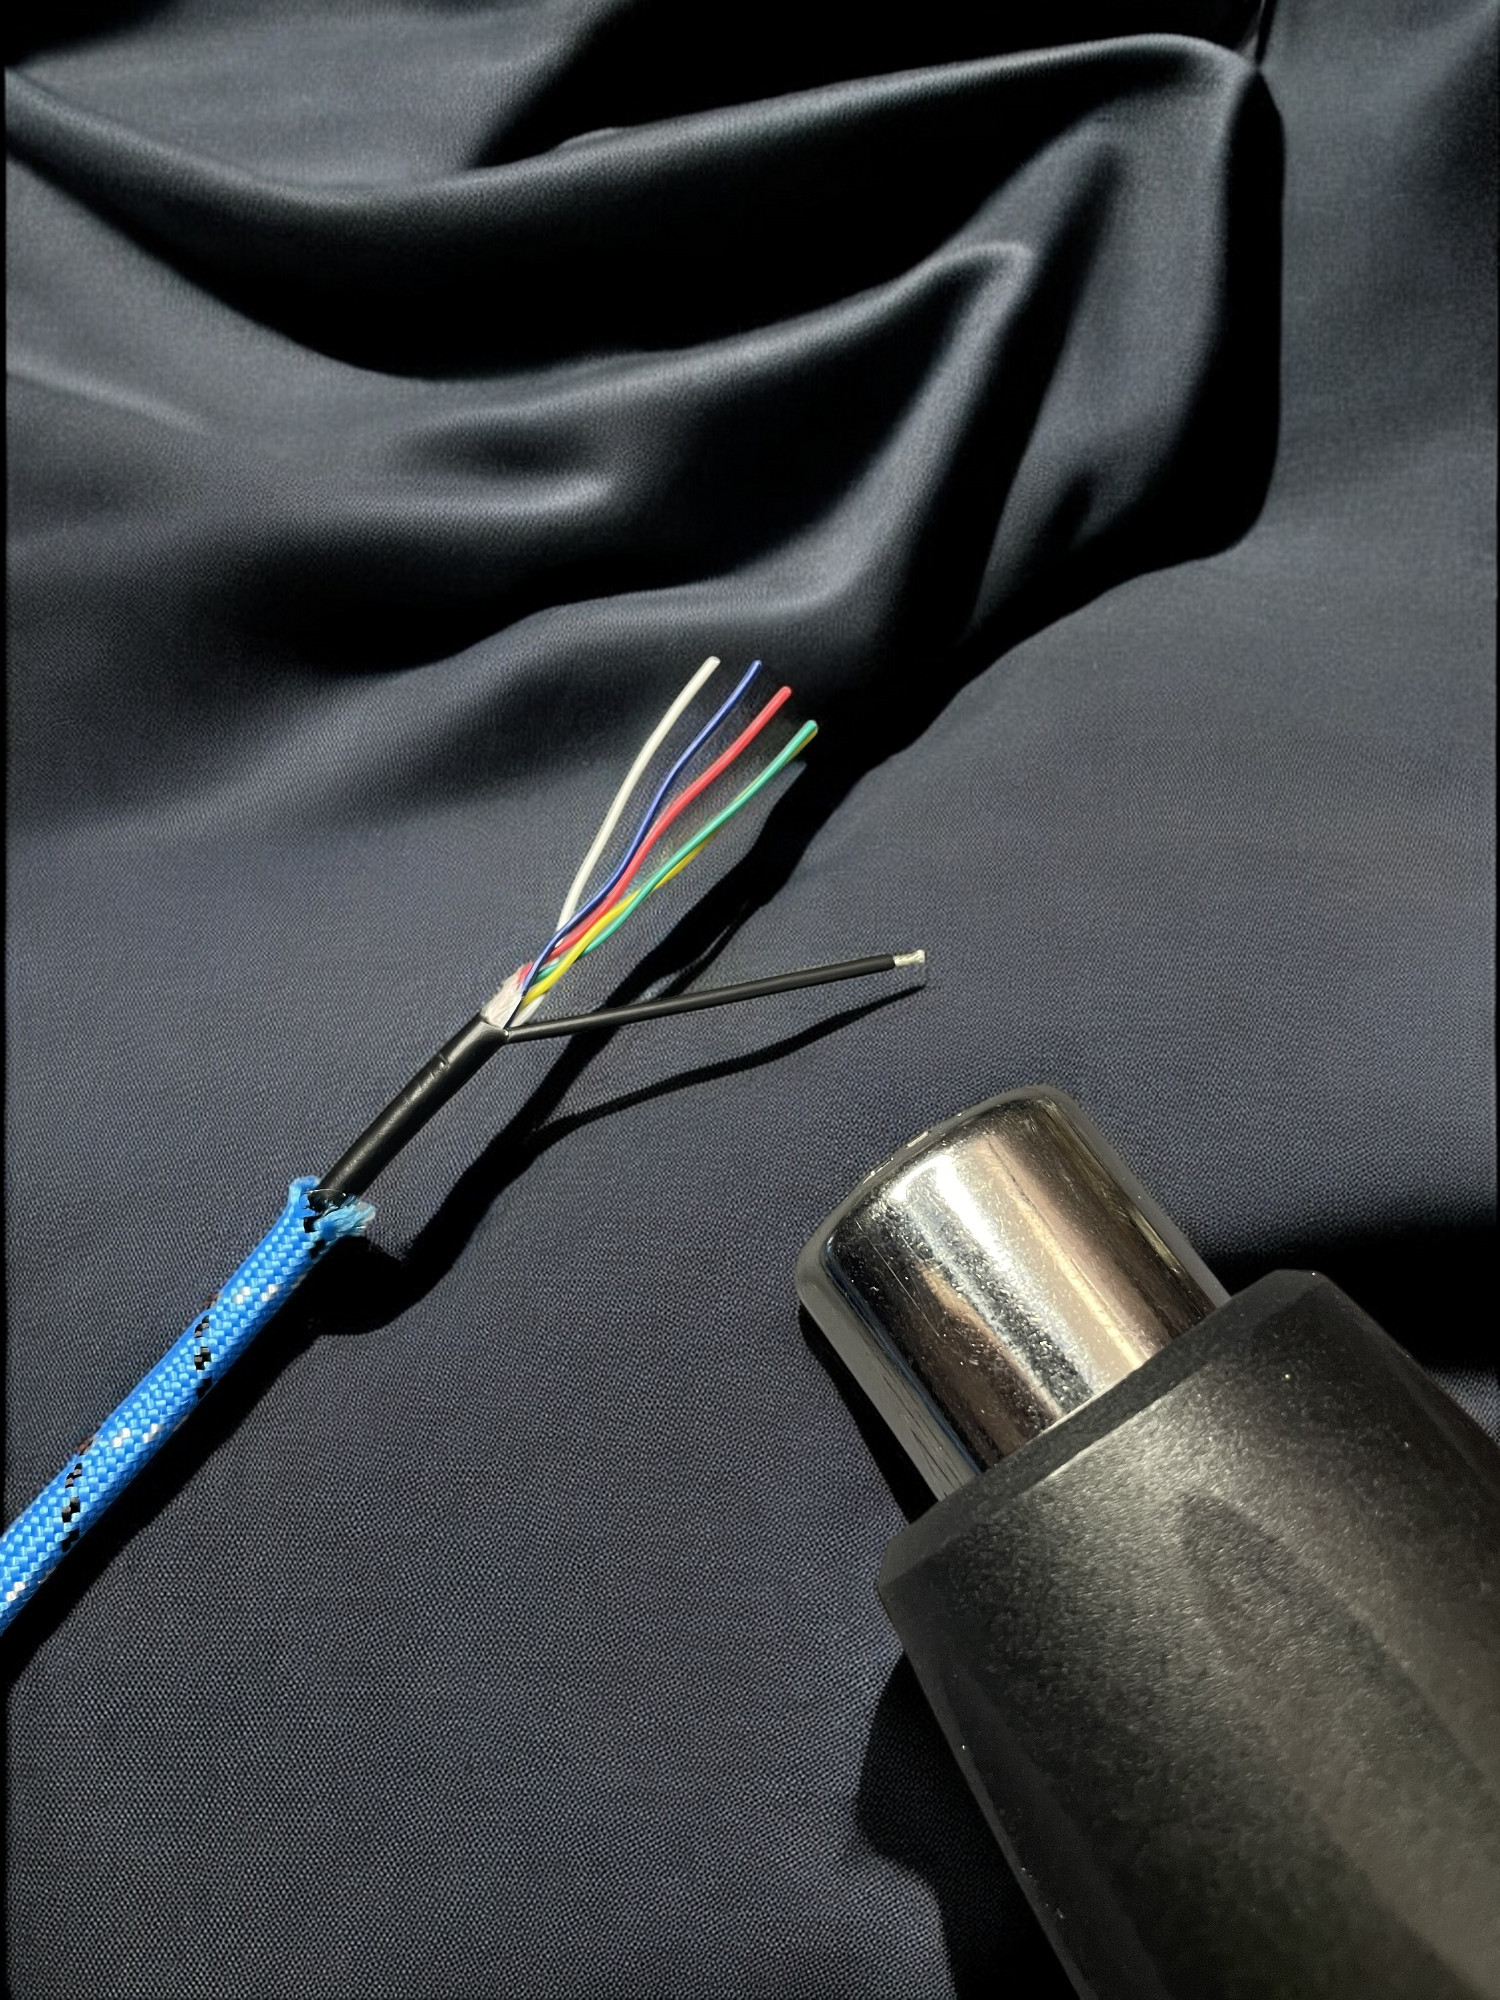 |
| Strip 2-3 millimeters from the other 5 wires. | 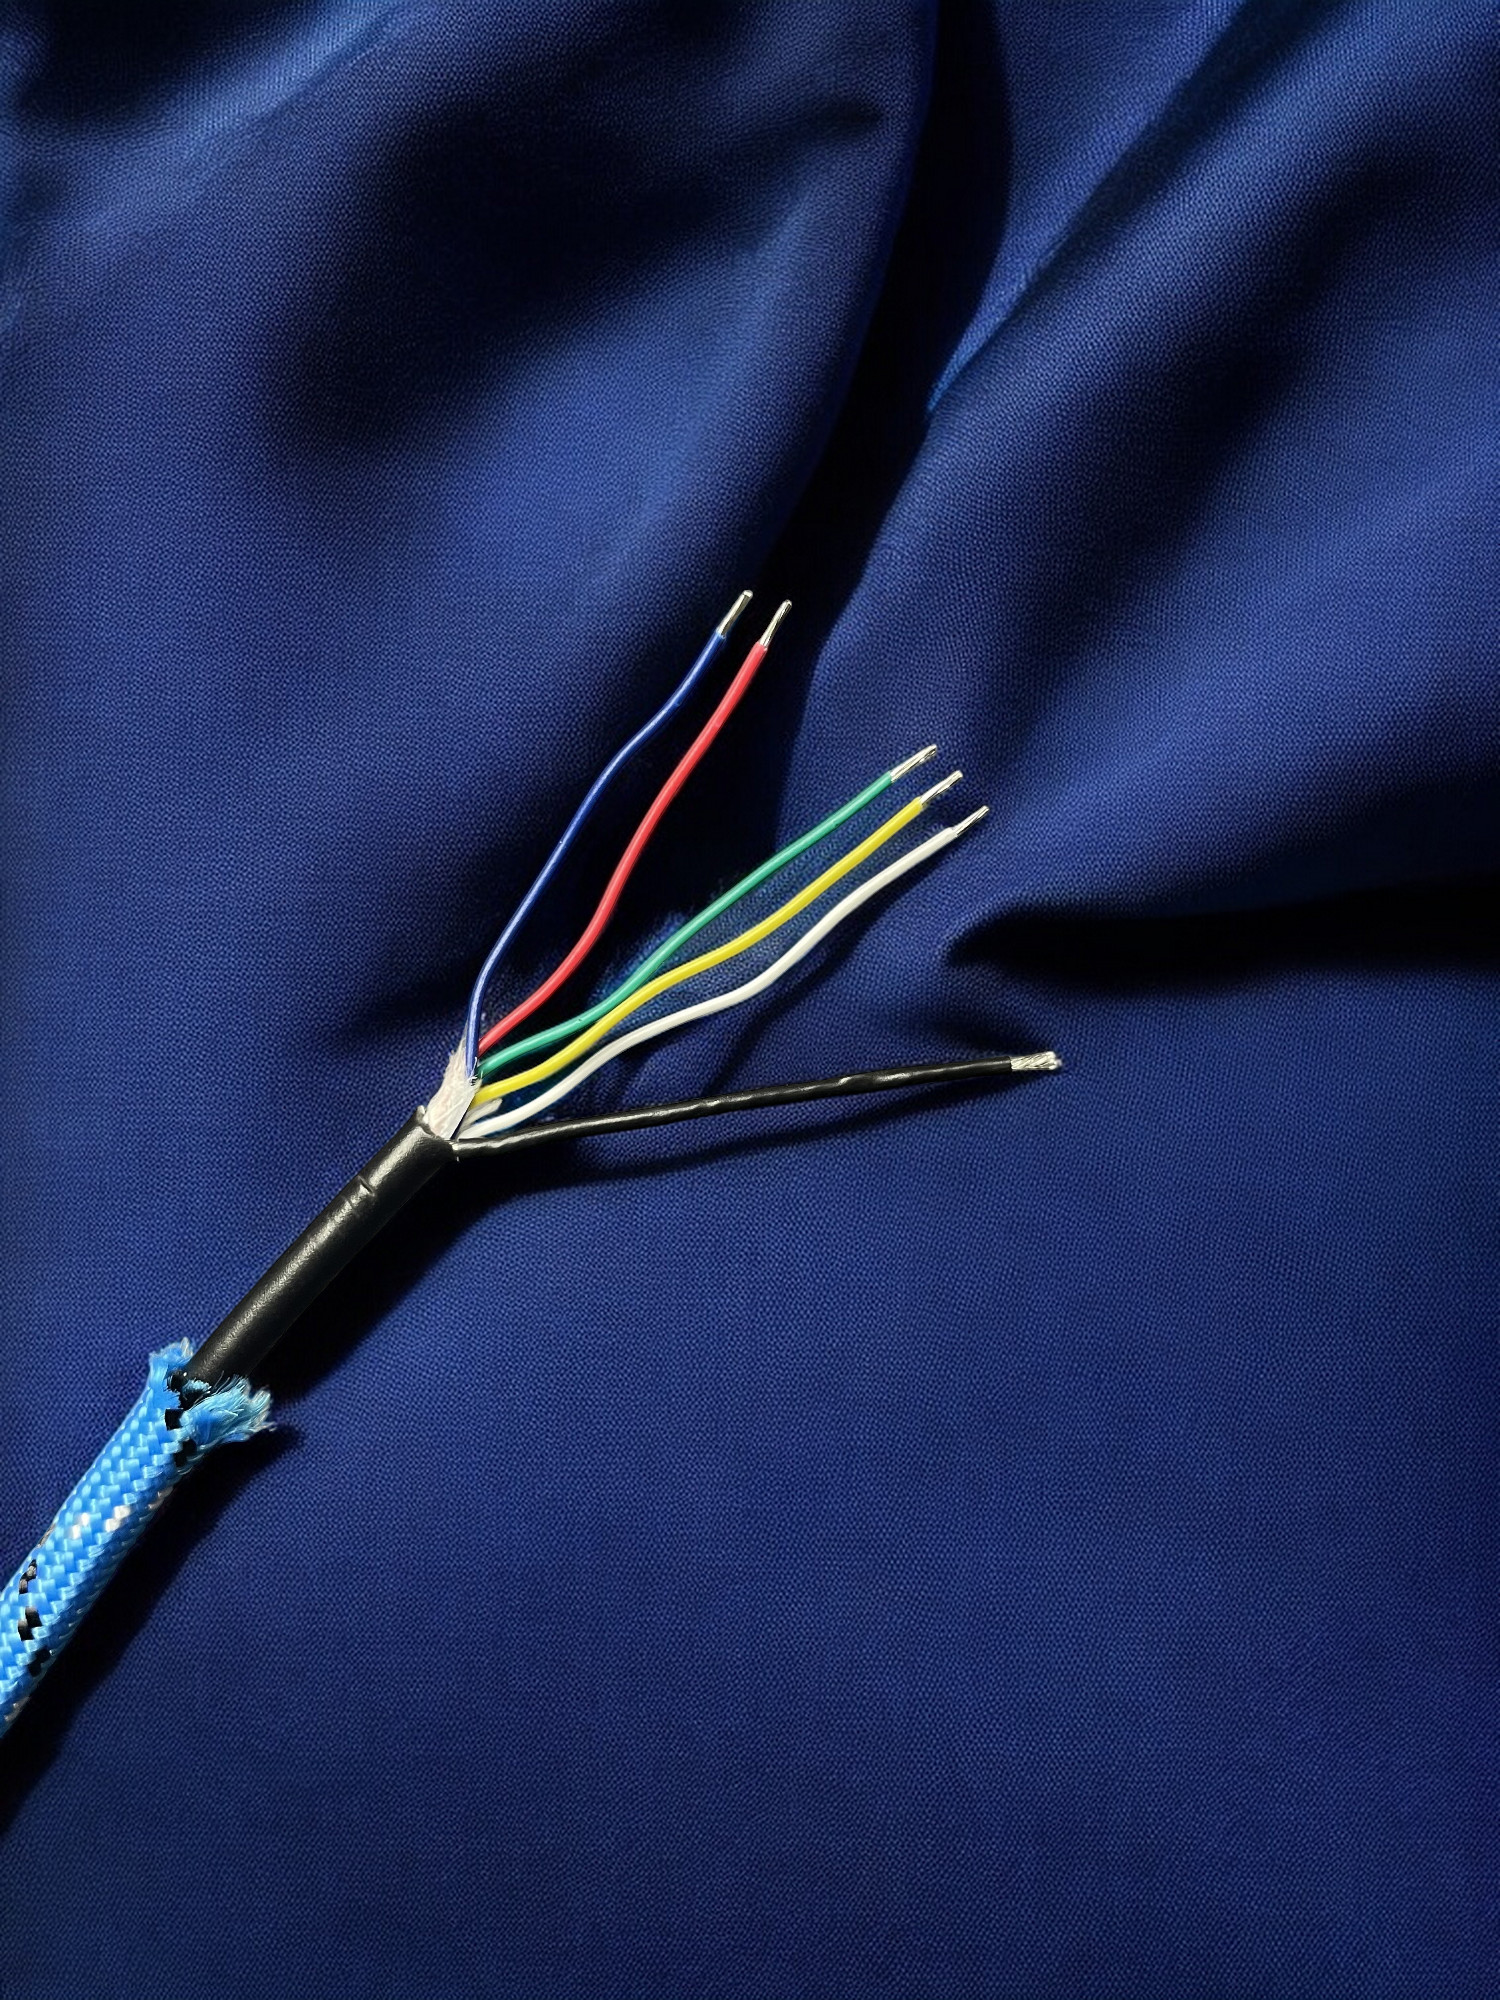 |
Crimp
| Directions | Image |
|---|---|
| Given the extremely small size of both 28 AWG wires and JST PH 2.0 pins, it's important to use proper lighting. Using the recommended iCrimp ratcheting barrel crimper, "pre-load" the pin into the jaws and slightly ratchet down enough so that it's firmly held in place. Insert the stripped end of one of the 6 wires into the terminal just enough so that the colored insulation enters about 1-2 millimeters. Firmly crimp. | 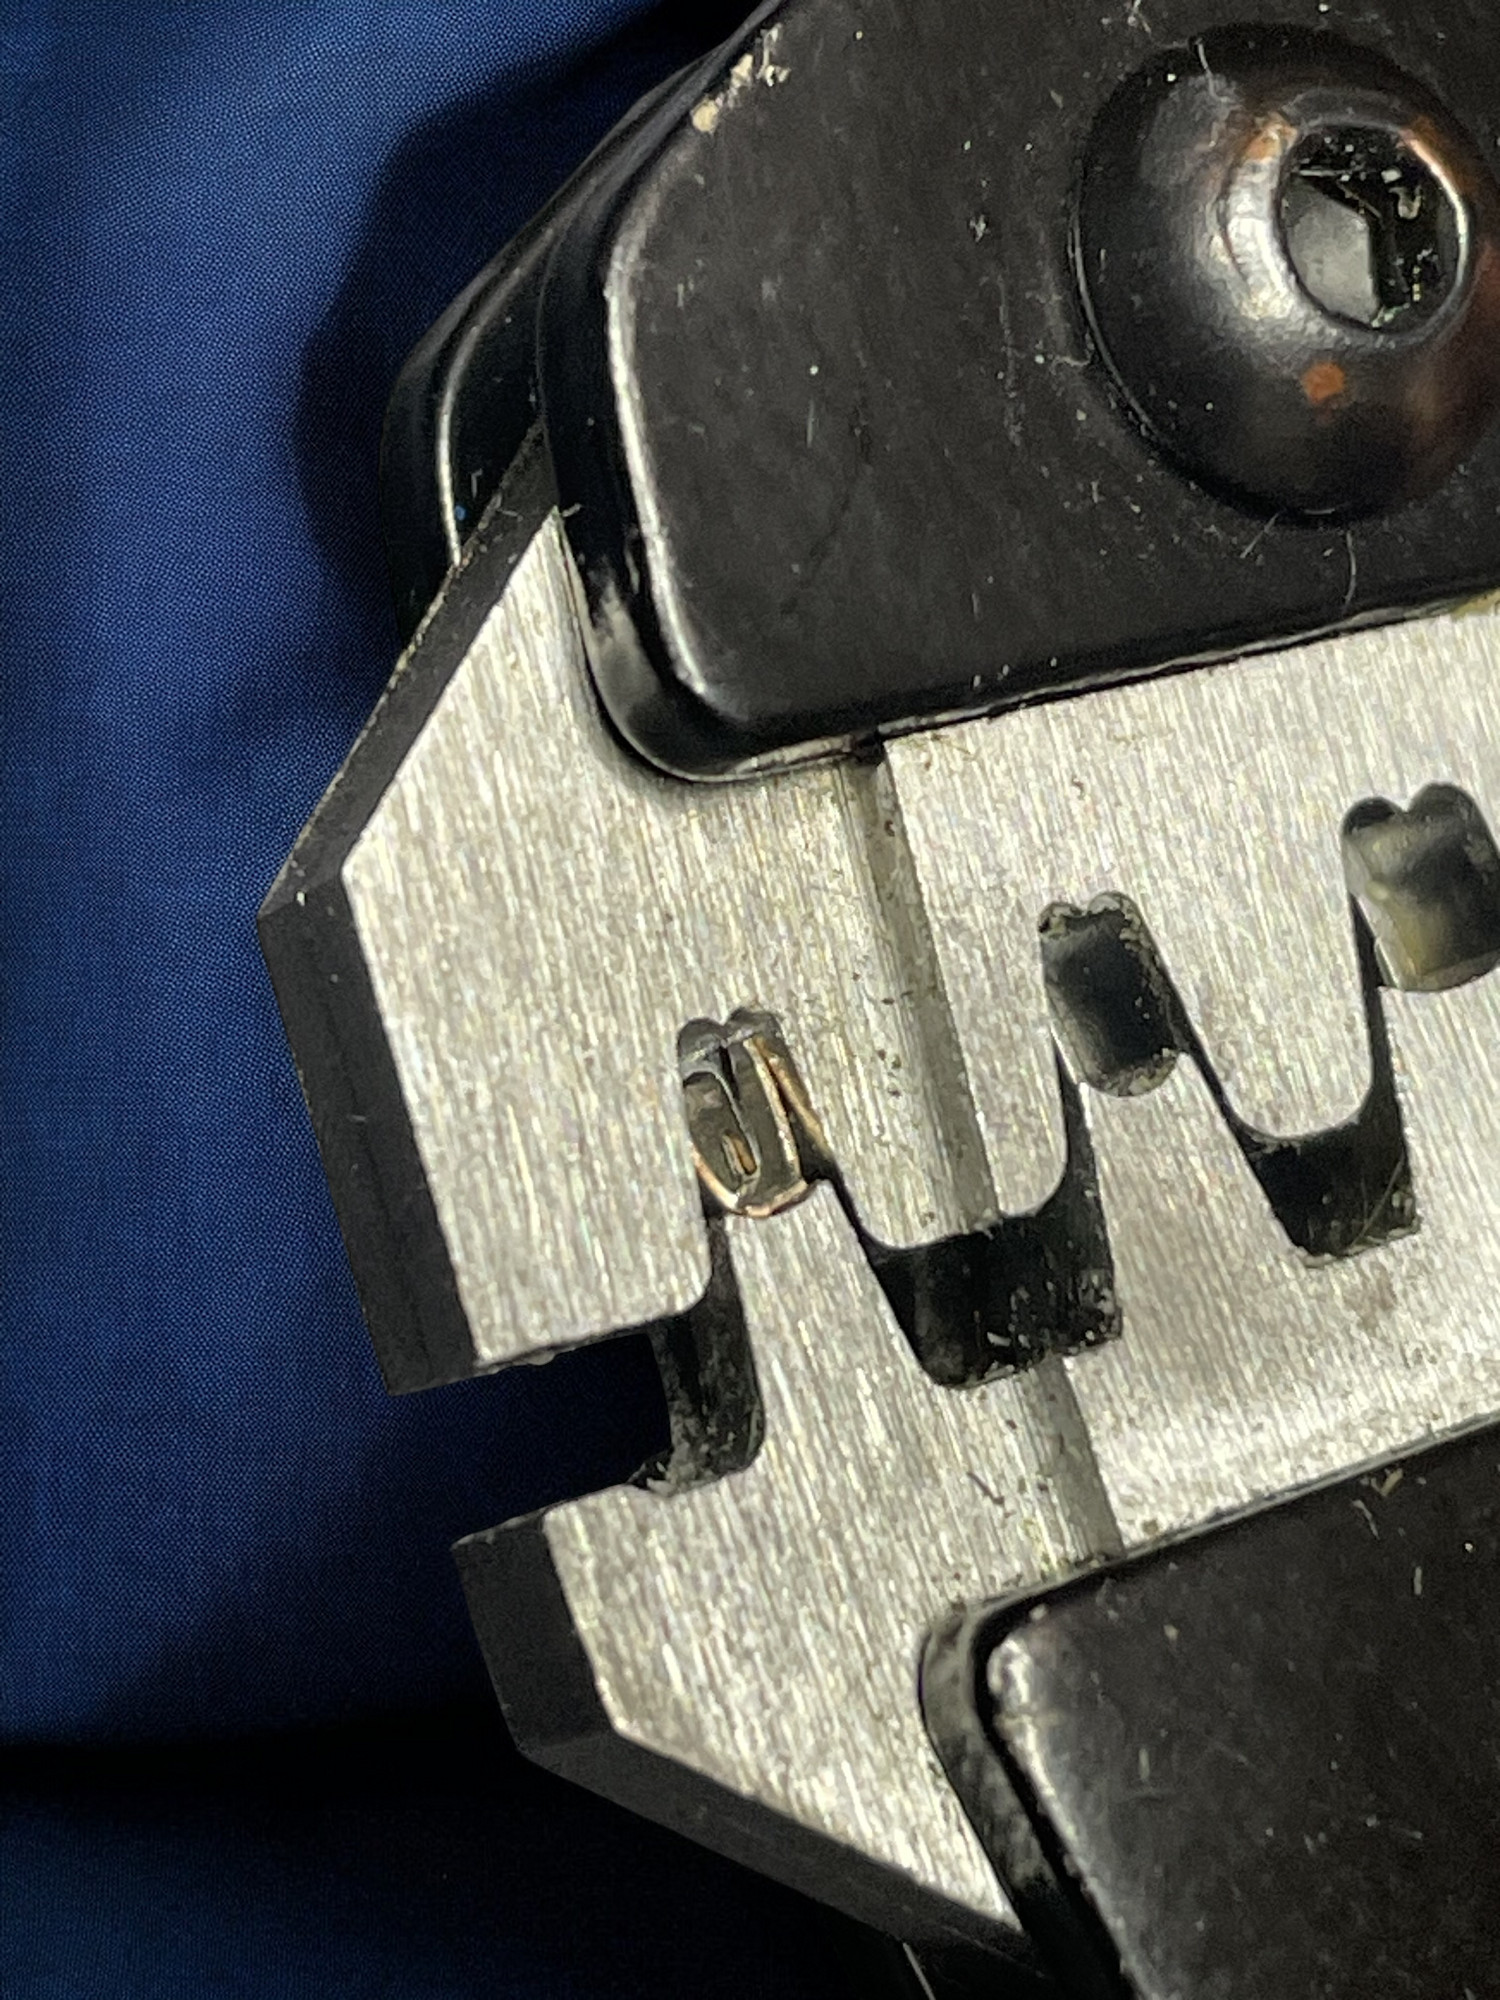 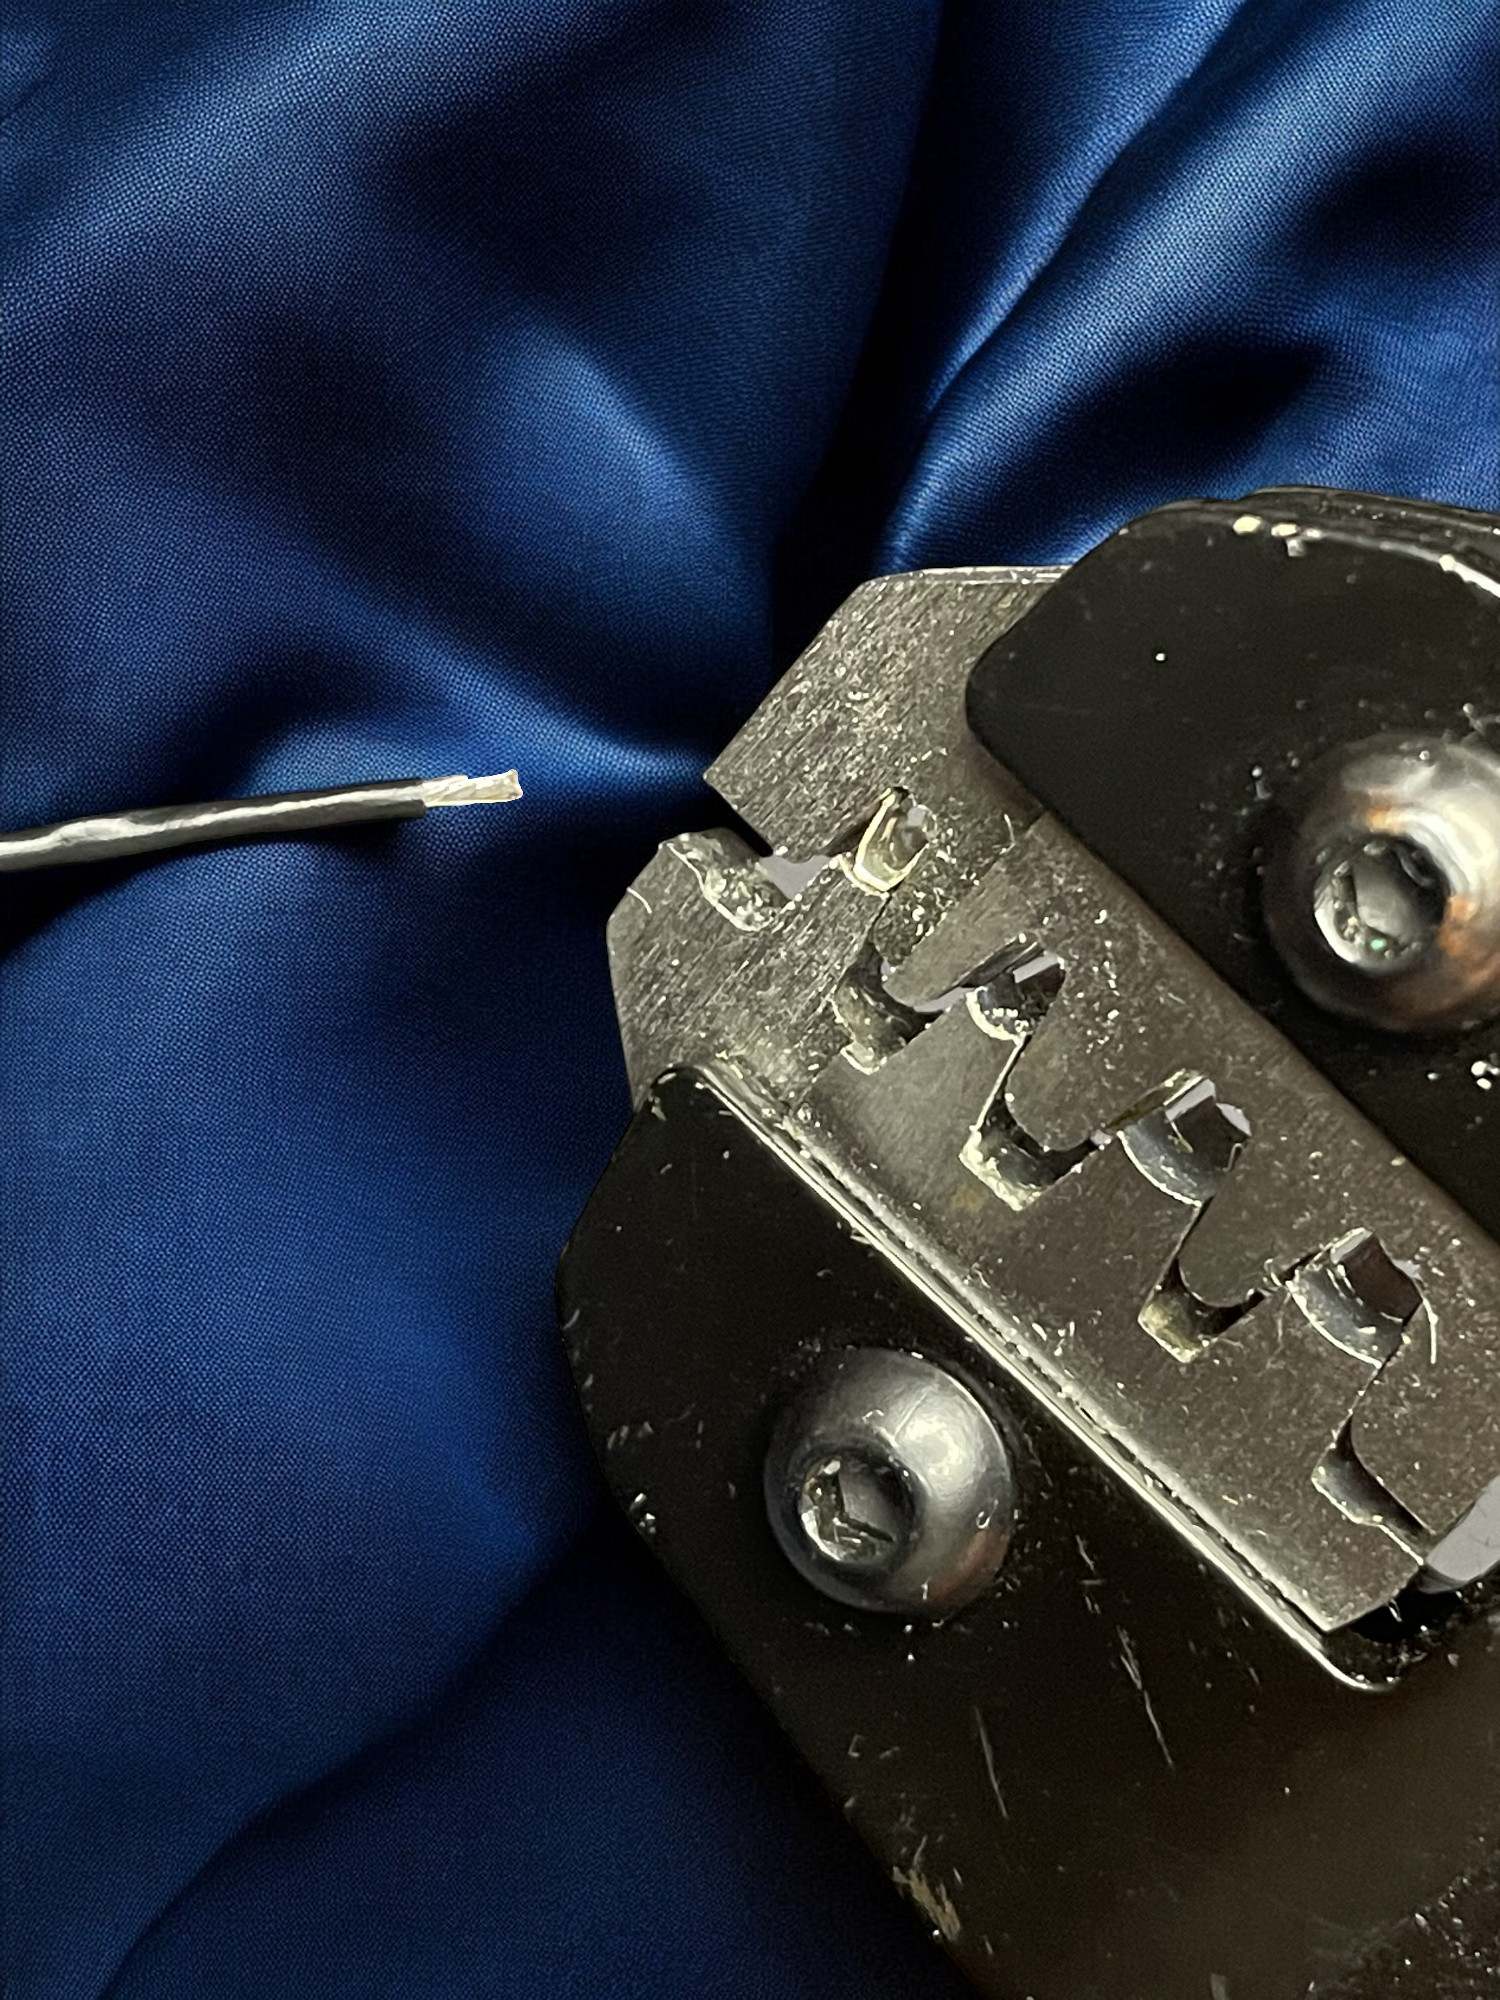 |
| The resulting crimp should look similar to the following image with the insulation being crimped by the first set of wings and the inner wires being crimped by the smaller set of wings. |  |
| Crimp remaining 5 wires. | 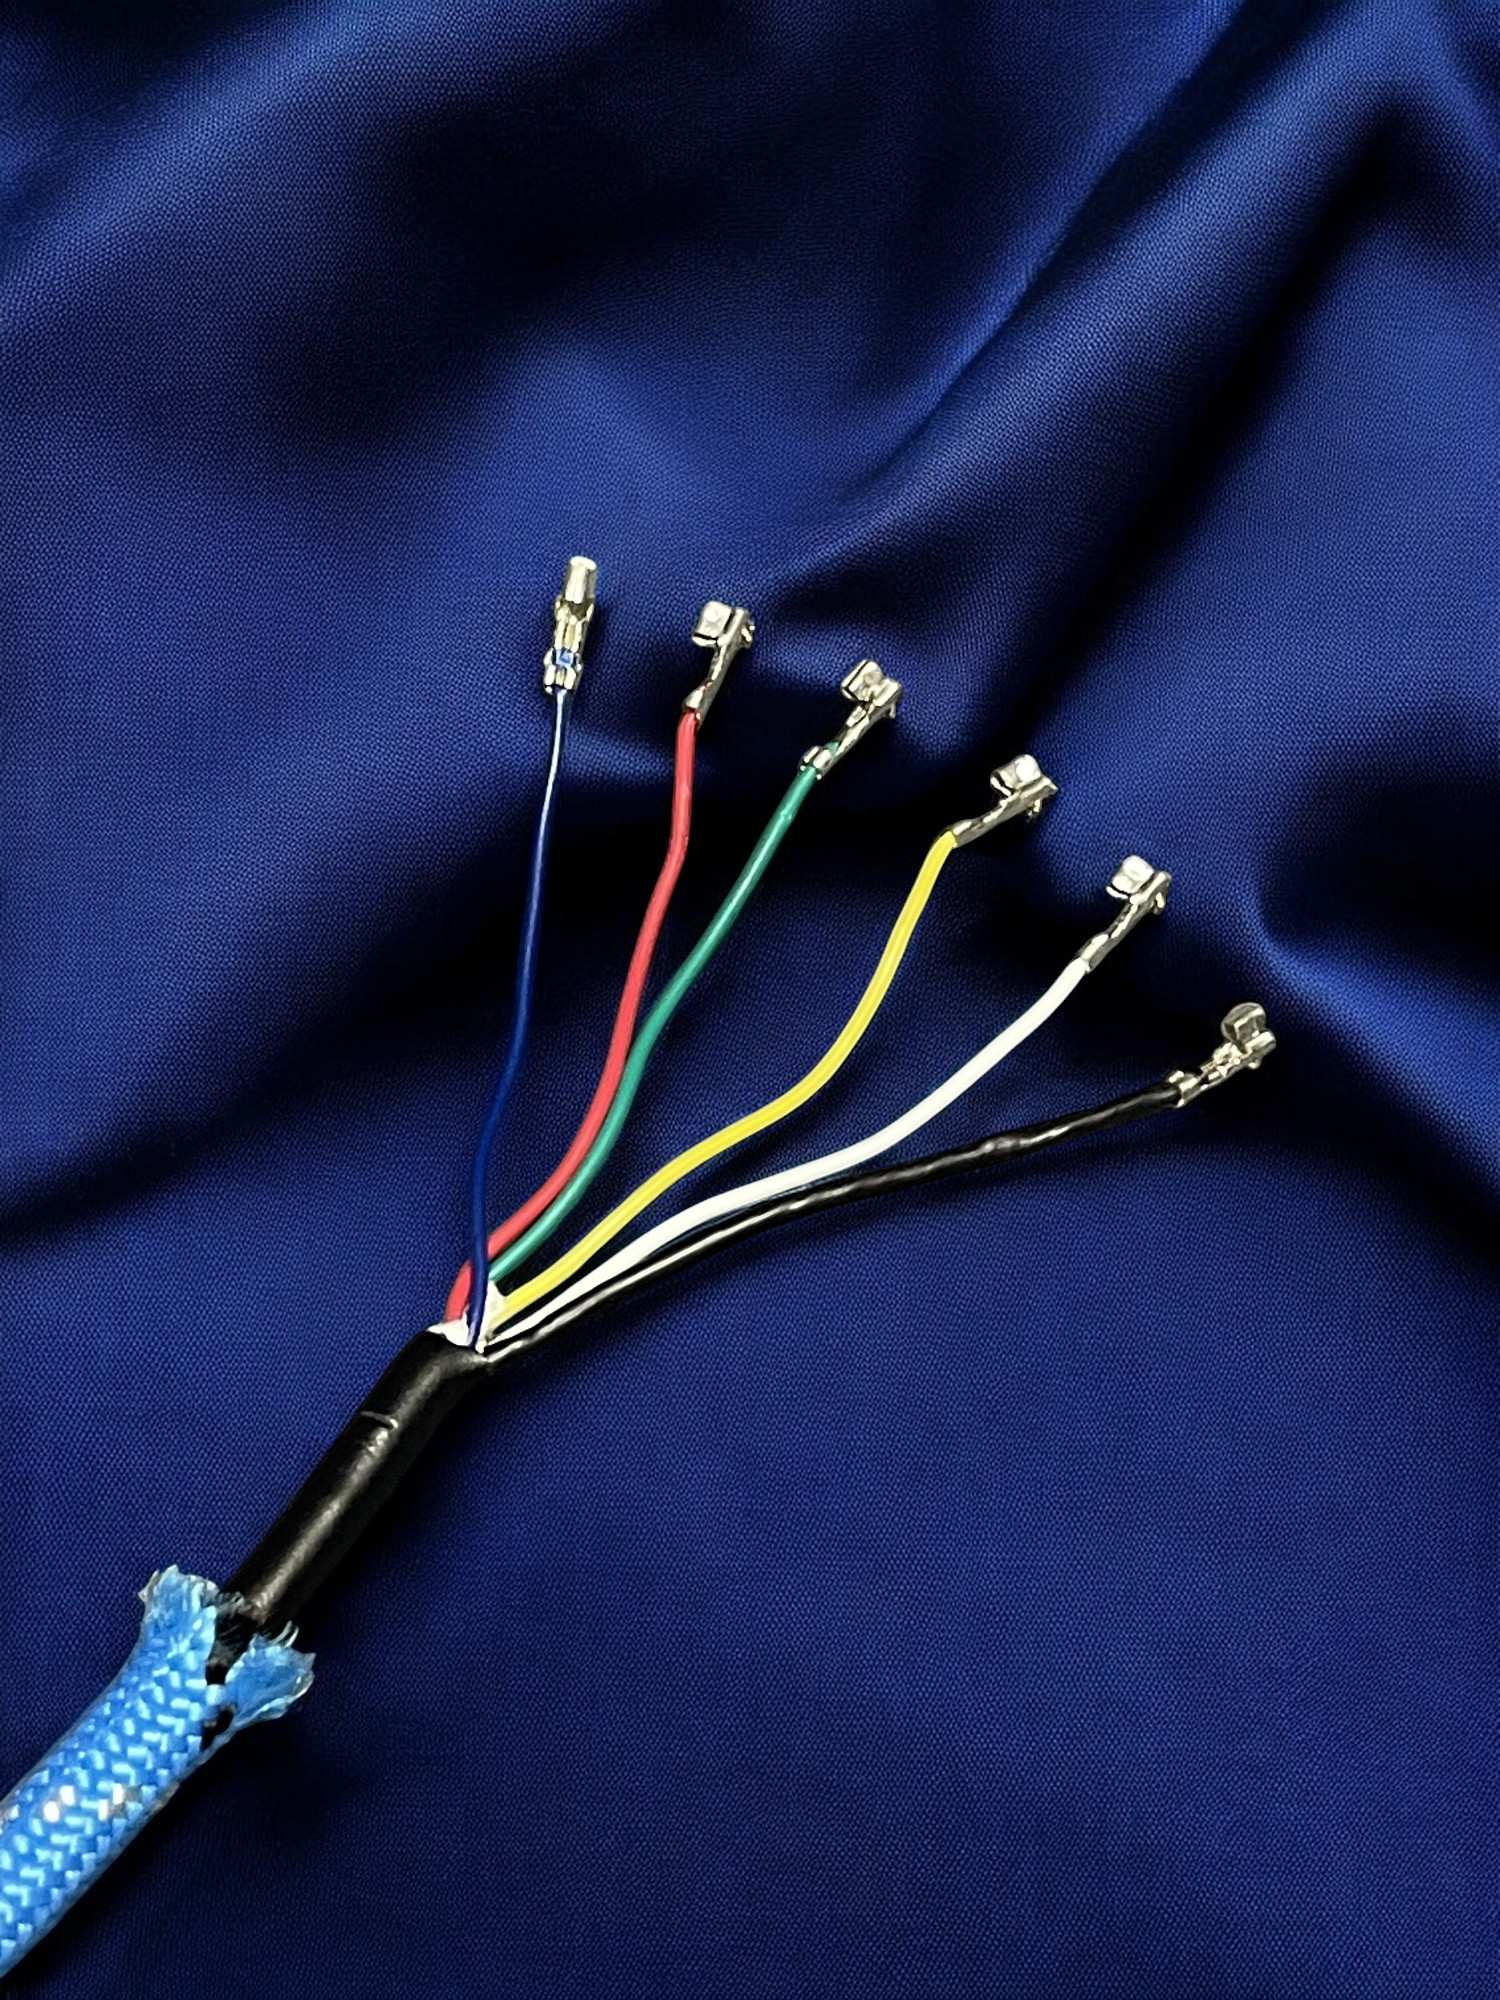 |
| Using the provided color chart, grab a JST connector and insert each of the 6 pins into it. Note Provided pinout image is only for OEM, Retro Forge, or other cables that have the same insulation colors | 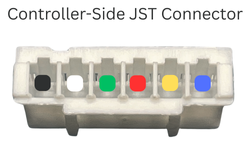 |
| All pins should be pushed up as far as possible. Please note that you should see each metal "wing" sticking up which prevents the pin from being pulled out. | 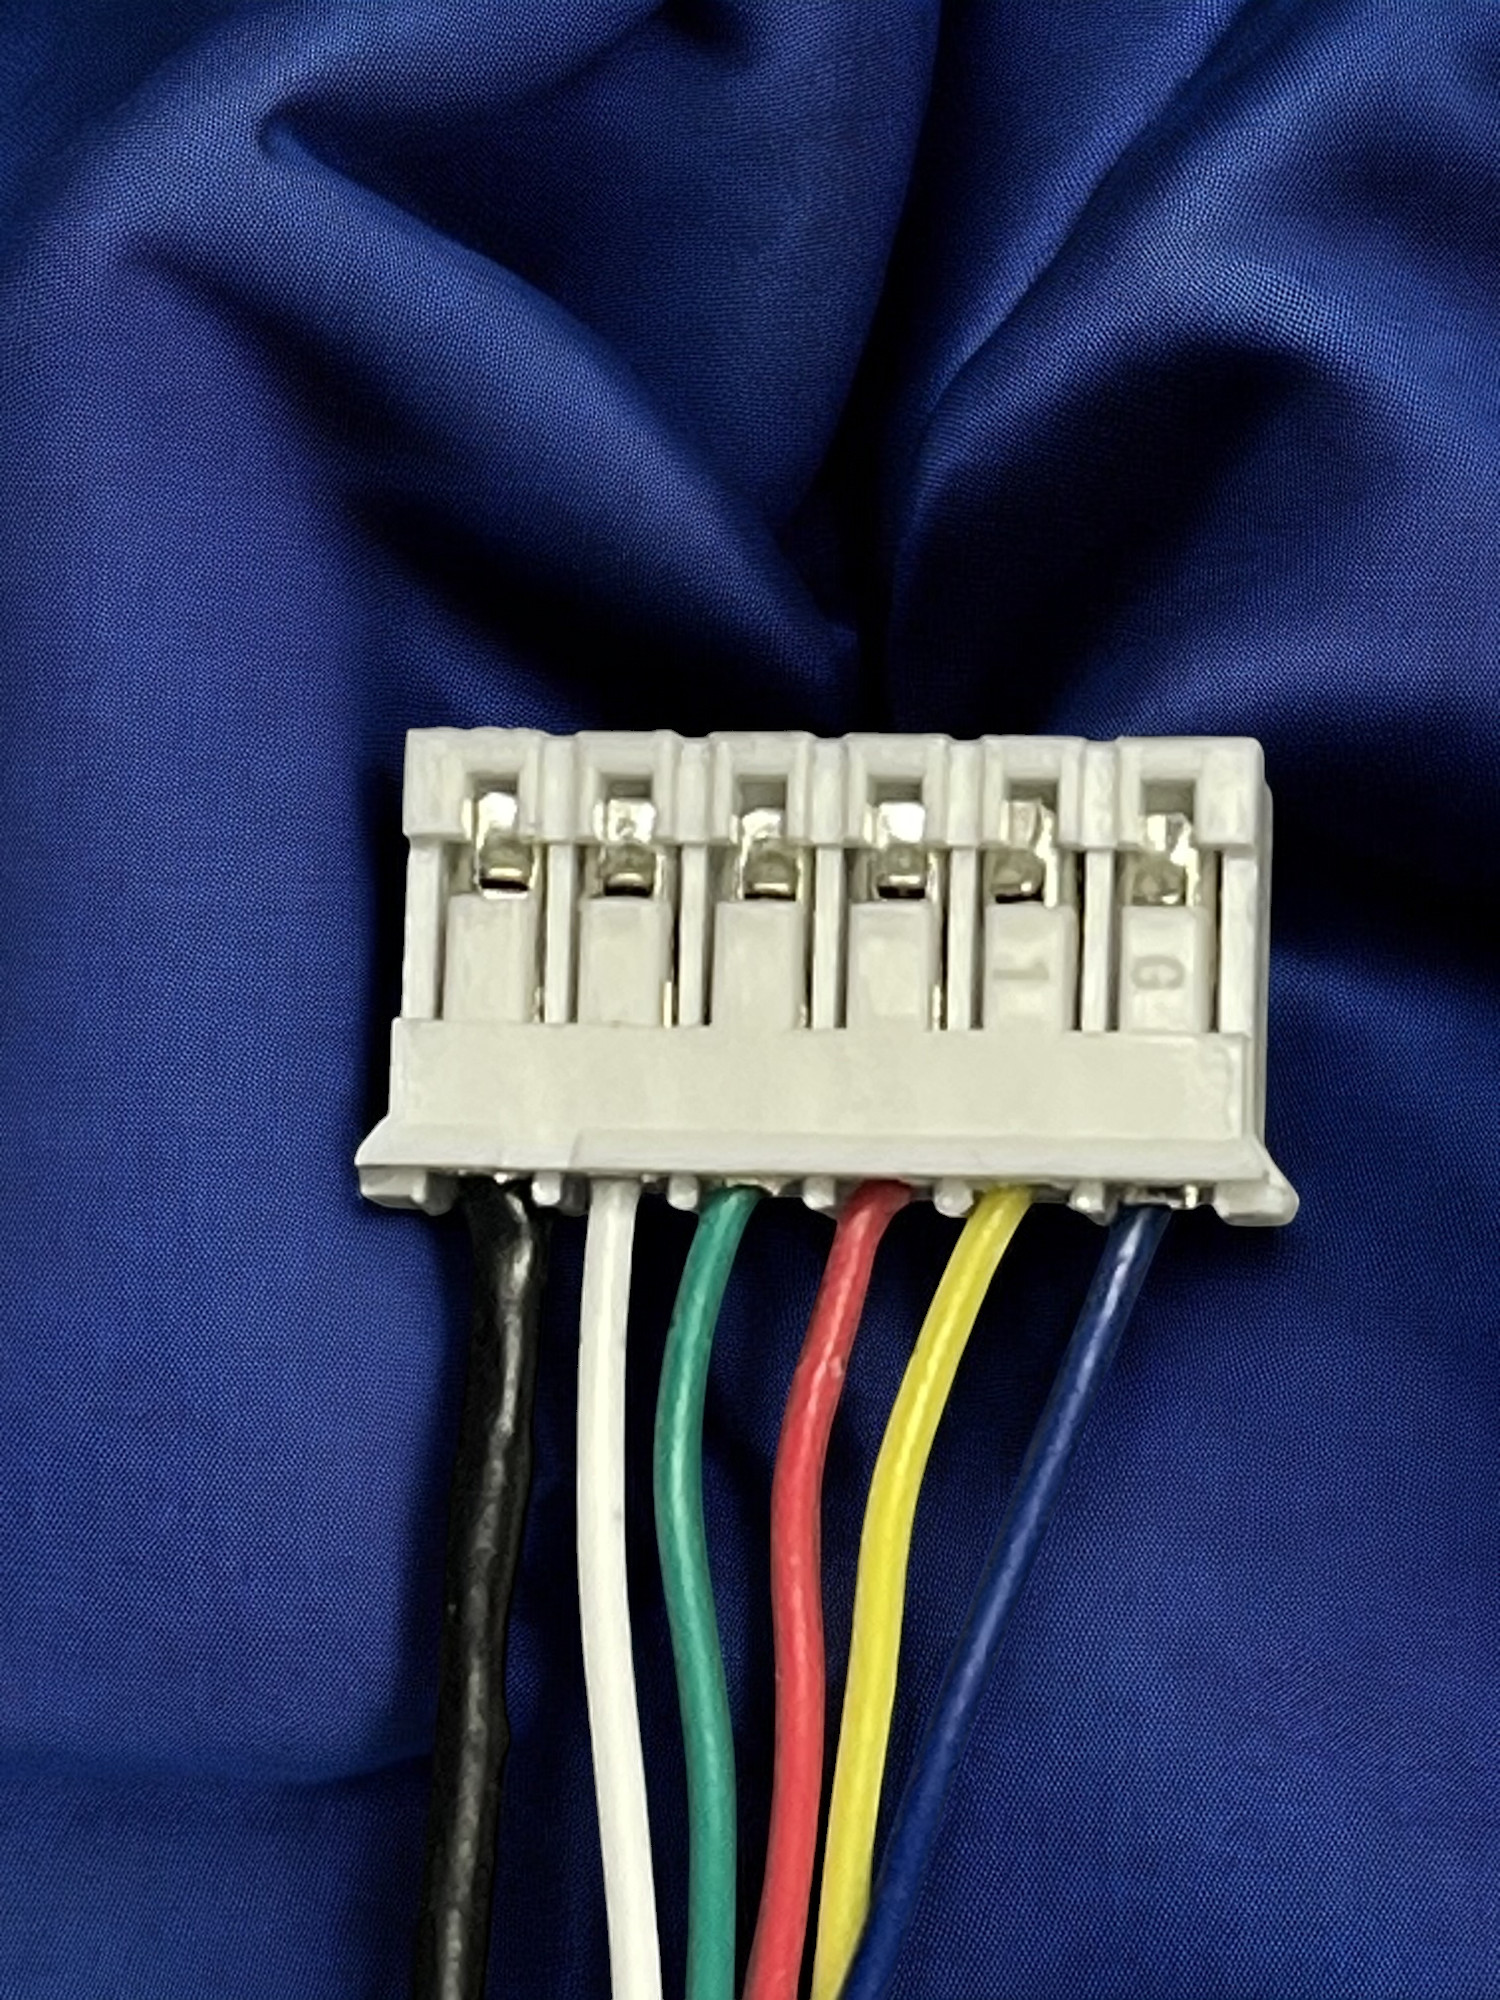 |
| Pull the paracord back up to be flush with the black sheathing of the cable. | 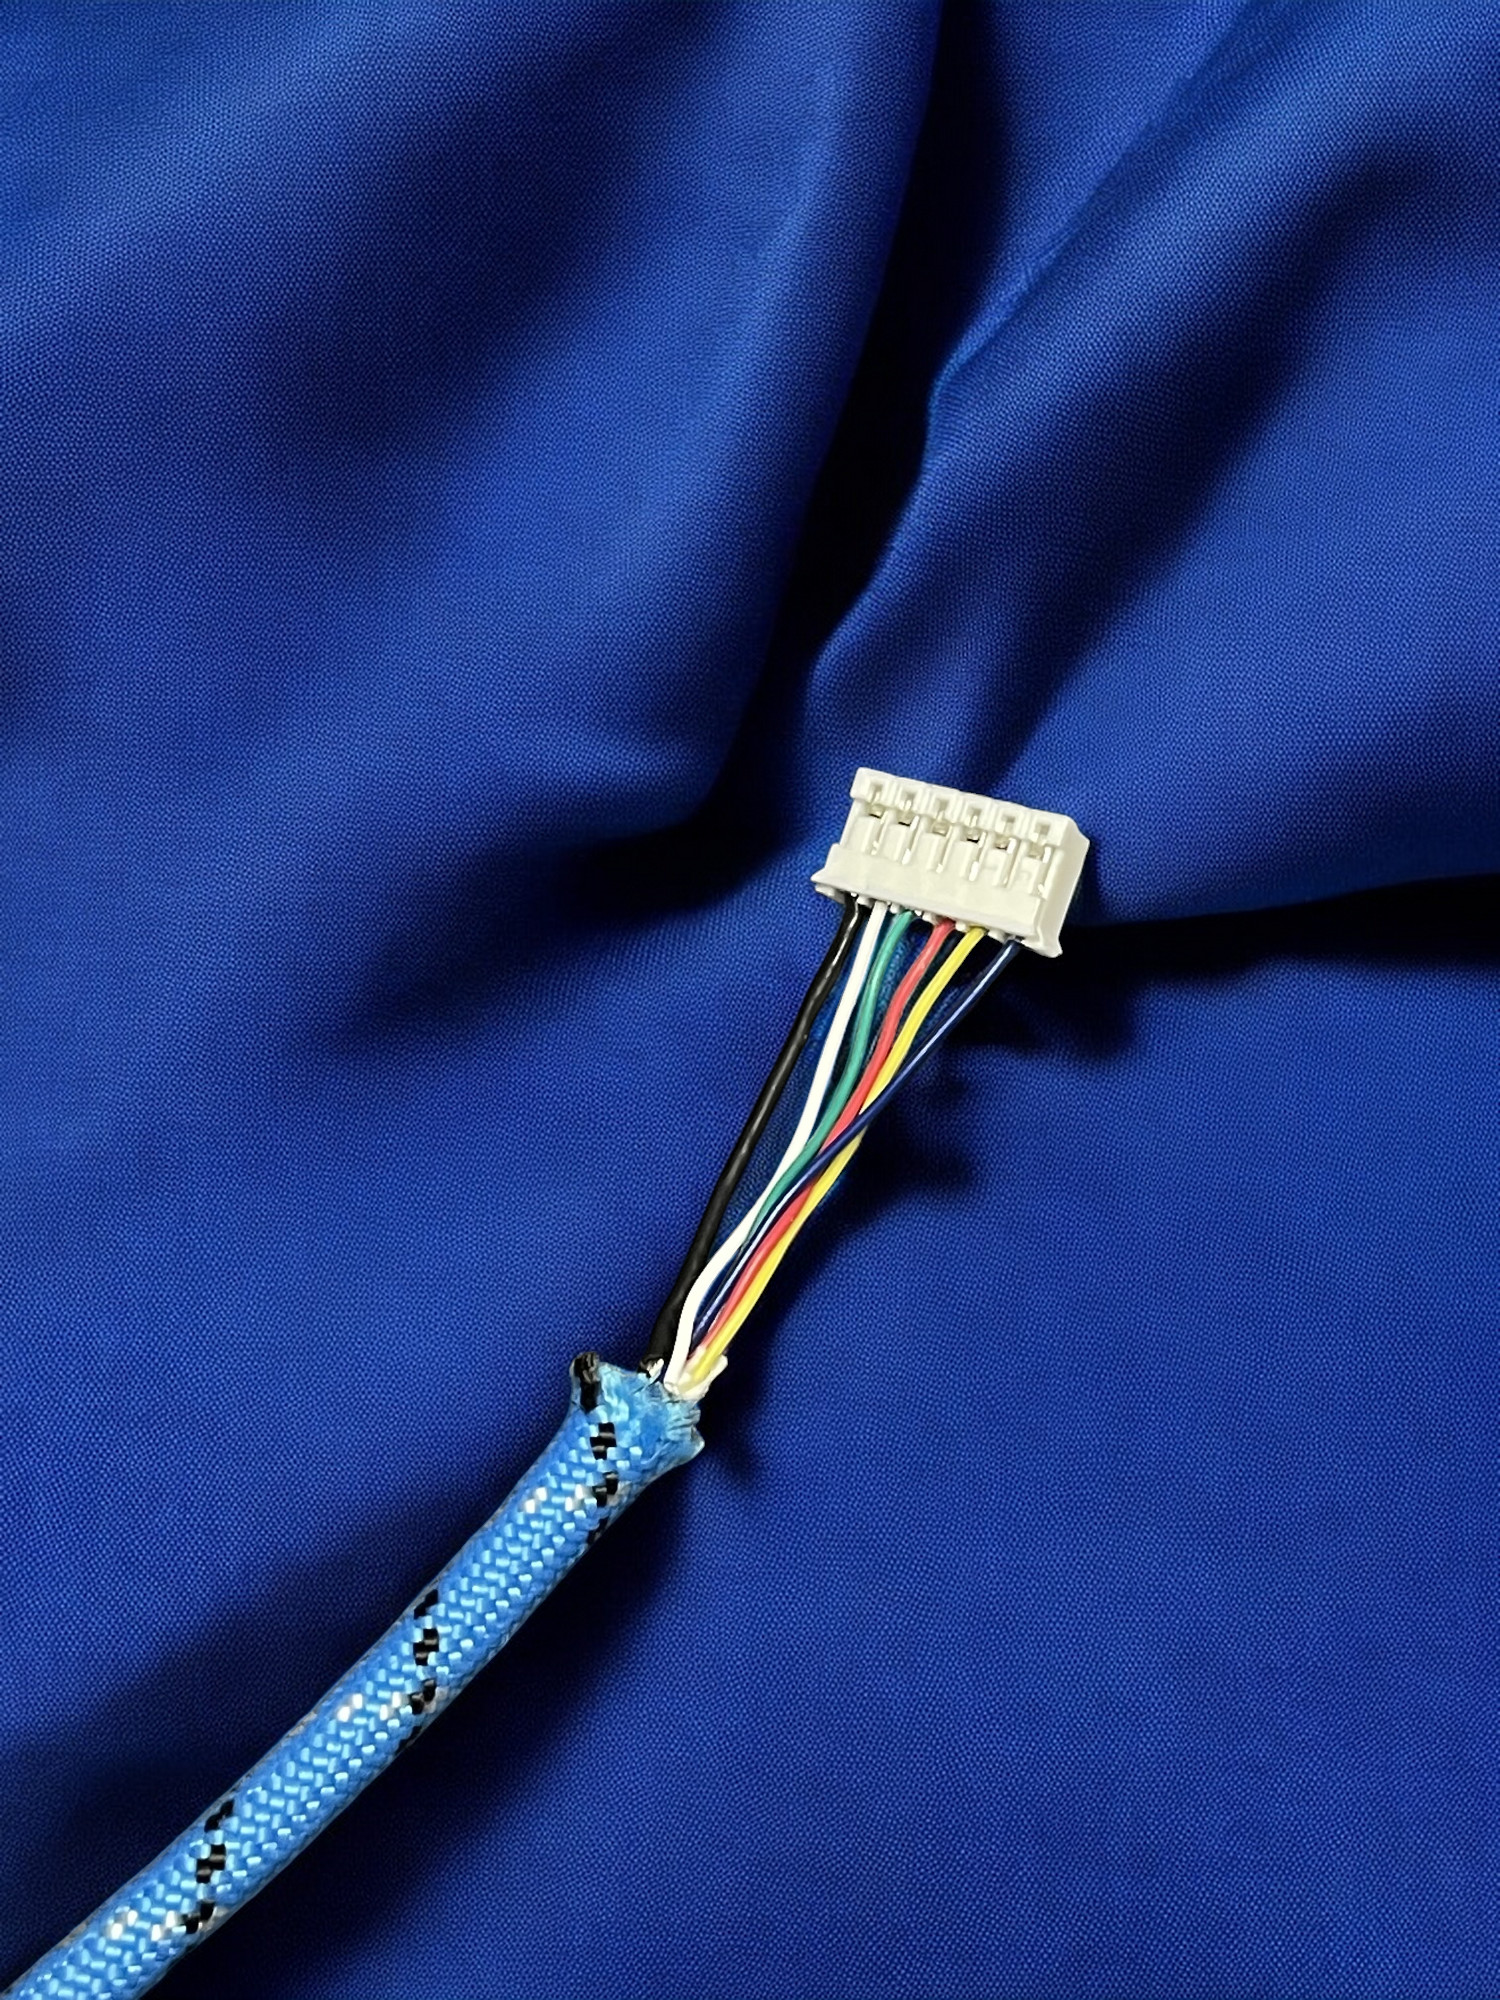 |
| Slide the piece of heat shrink you previously placed on the cable up and over the crossover section. | 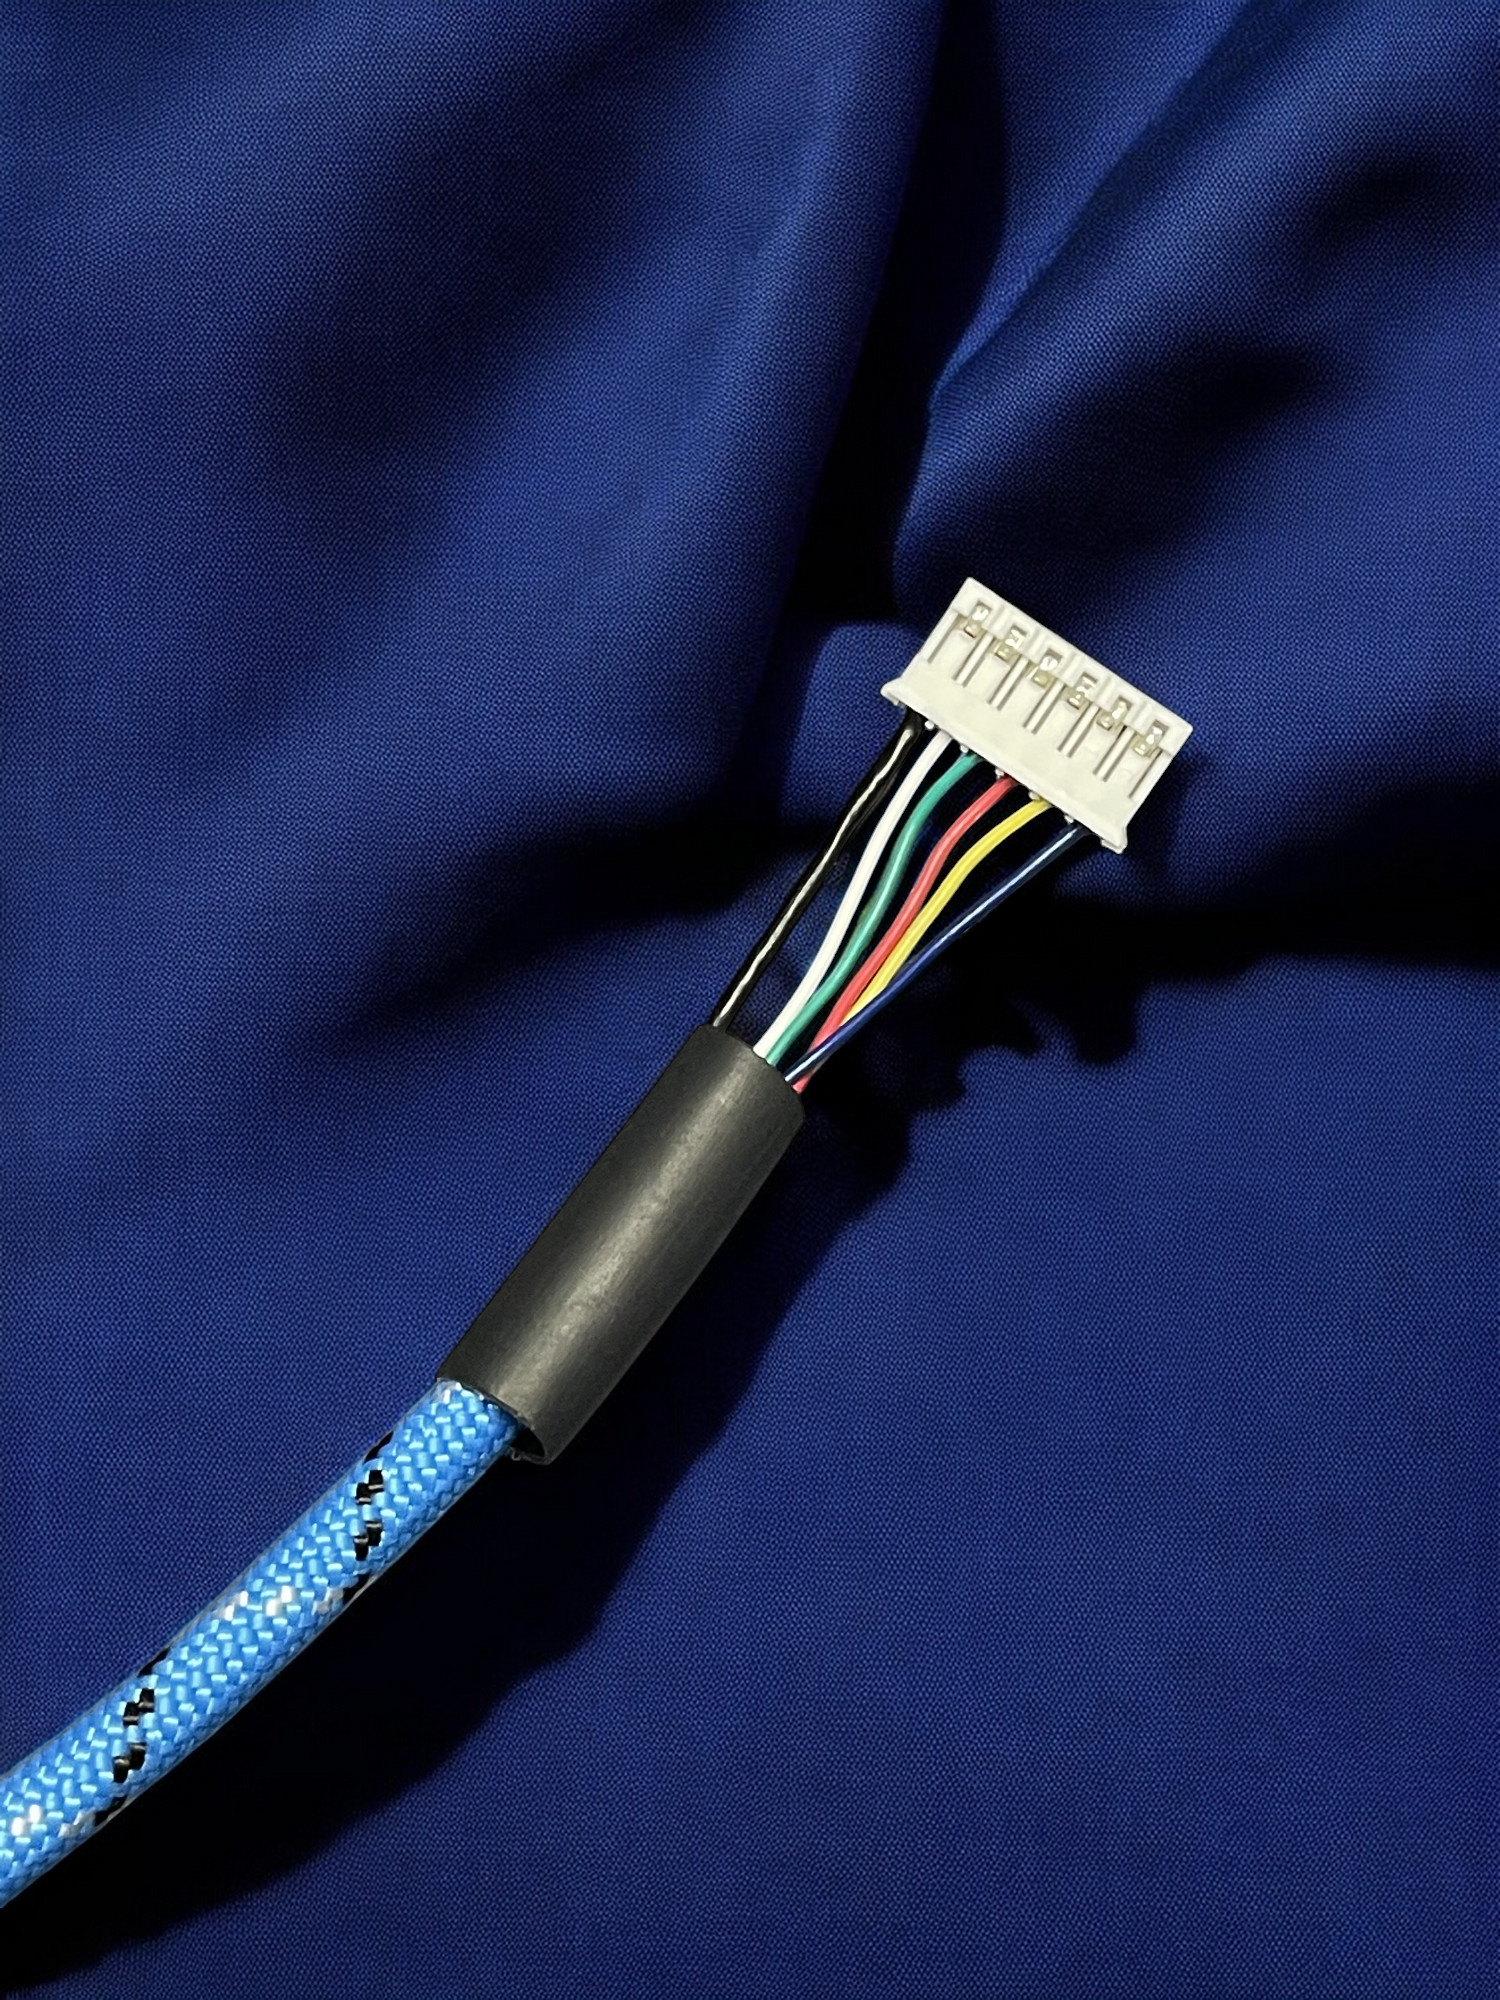 |
| Heat the tubing until evenly shrunk. | 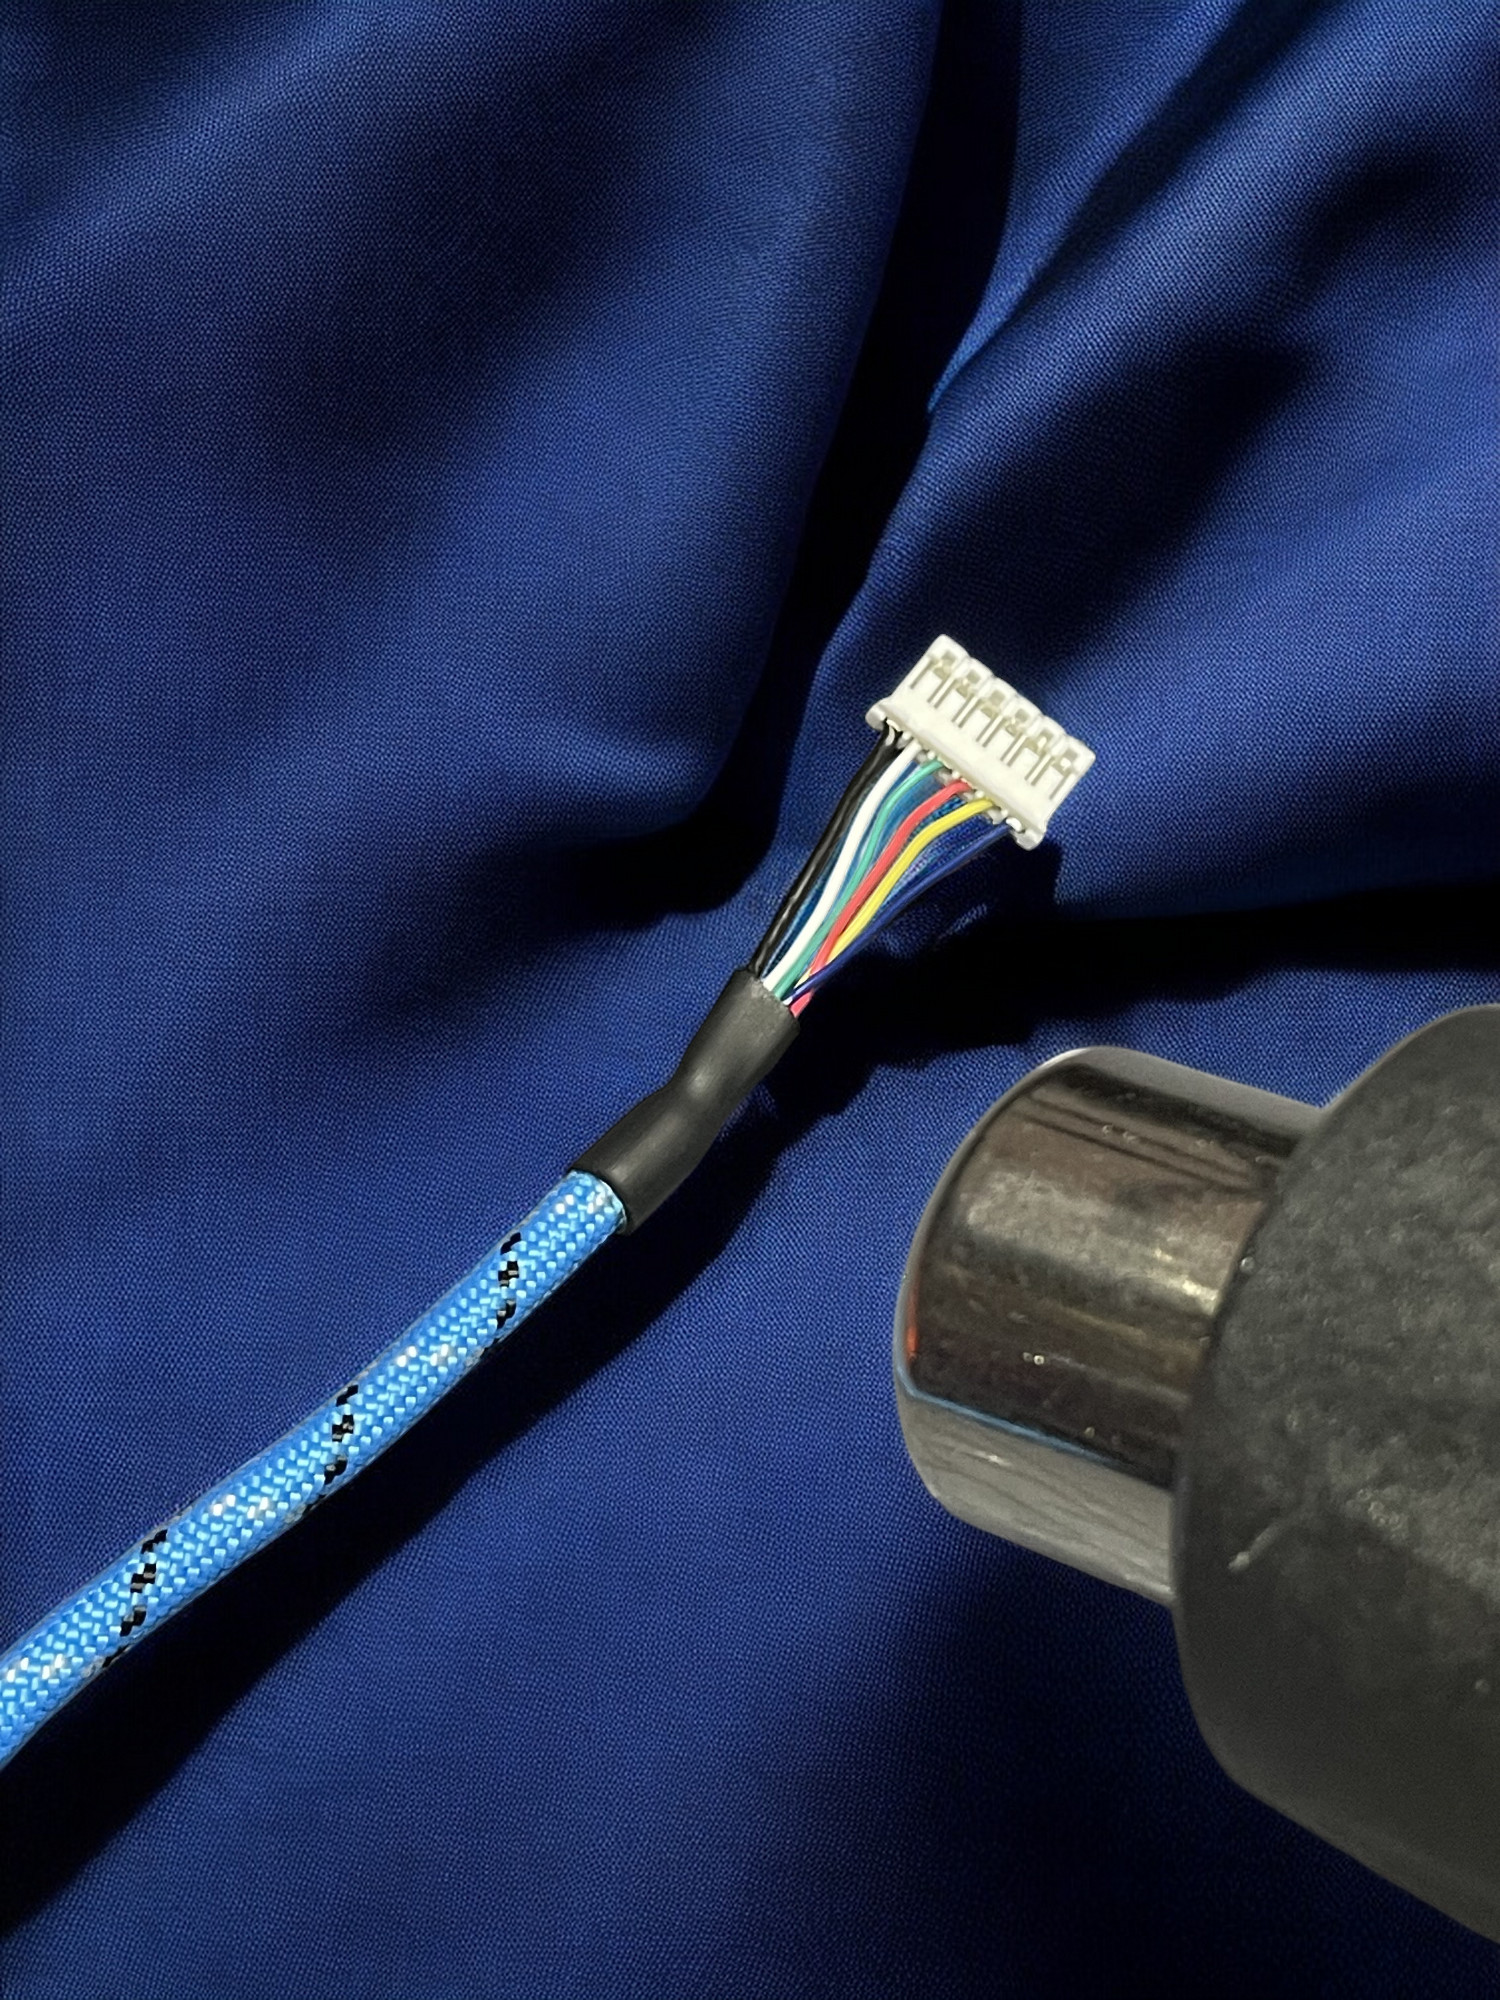 |
Finishing Touches
TODO zip tie
TODO test cable
TODO installation to controller